I’ve updated some of the Autodesk Fabrication Resources pages. You can find the links below however you should note that none of the information has changed from 2018 to 2019. Non the less, you can review the links here…
Fabrication 2019.0.0 Released
Autodesk released Fabrication CADmep, CAMduct and ESTmep 2019.0.0 this week. As they’re not primary products for Autodesk, they don’t always show up in the Autodesk Desktop App. The best place to get them is from the Product Downloads section of the Autodesk Accounts portal if you are a contract manager or software coordinator in your account.
For the most part, these are just repackaged versions of last year’s software. Autodesk’s focus is on adding Fabrication capabilities to it’s Revit product. None the less, there’s a couple new things that I’ll reveal in a future post.
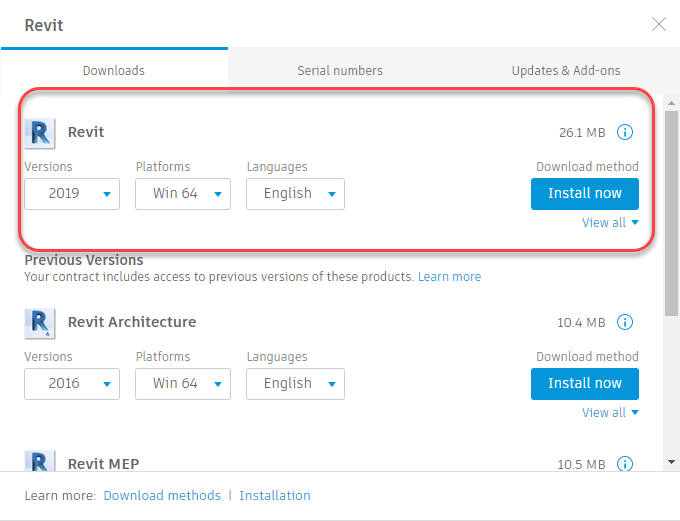
Revit 2019.0.0 Released
Autodesk released Revit 2019.0.0 today. At this time, it’s now showing up for me in the Autodesk Desktop App. You may be able to access it from the Product Downloads section of the Autodesk Accounts portal if you are a contract manager or software coordinator in your account.
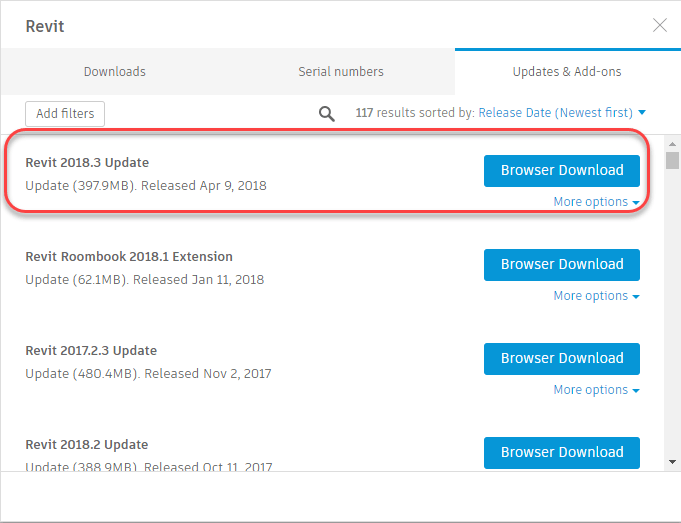
Revit 2018.3.0 Update
Autodesk released update 2018.3.0 for Revit on 2018.04(Apr).08. Click here to see a listing of the issues fixed in this and previous updates for Revit 2018,
To download and install the update, refresh your Autodesk Desktop App and updates should appear if you have an active subscription (maintenance plan or annual subscription). The Autodesk Desktop App icon is located in your Windows System Tray if it was installed.

You can also access them from the Product Downloads section of the Autodesk Accounts portal if you are a contract manager or software coordinator in your account.
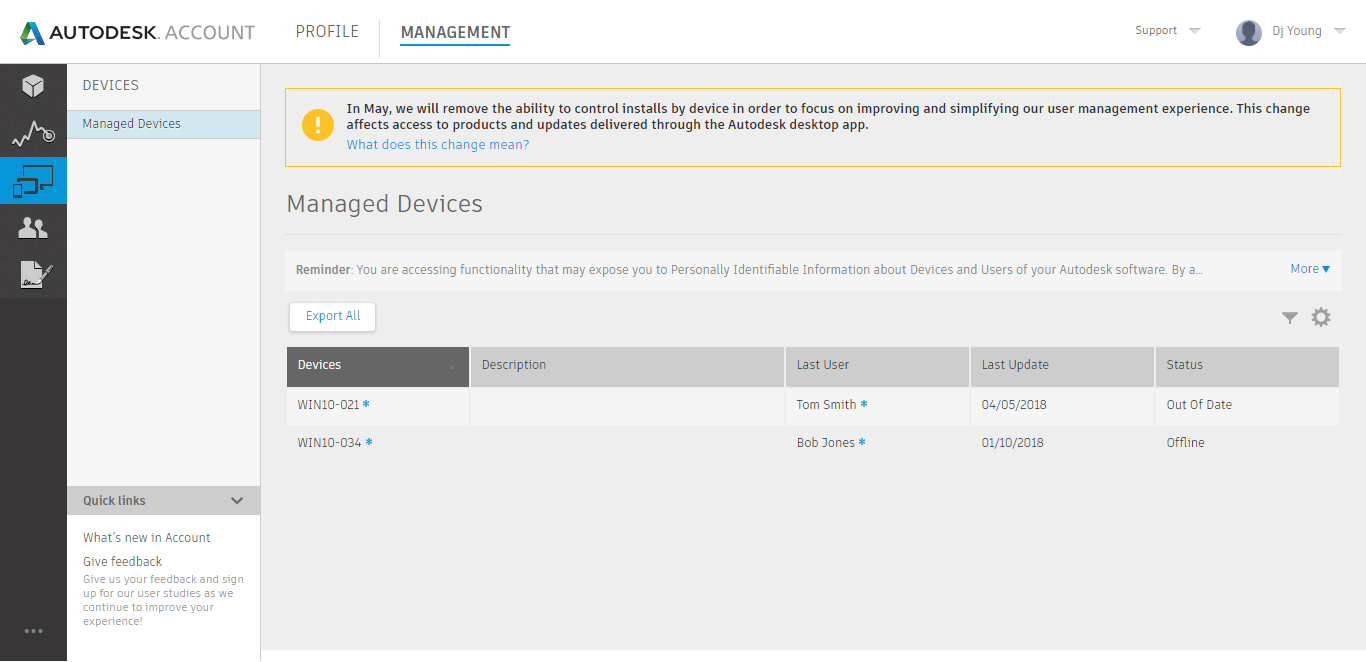
Autodesk Removing Device Management
On May 15, 2018, Autodesk will be removing the Device Management functionality from the Accounts Portal. The idea behind Device Management was a place where you could tell Autodesk’s Desktop App (formerly App Manager) if it should allow access to software and updates on a particular computer system.
In theory, it was a good idea. In practice however, it never worked well. For starters, for Autodesk to have your device listed the Desktop App needed to be installed. That seems obvious. But for this to happen, you had to allow access to all devices or the Accounts Portal wouldn’t see the device.
From an enterprise management perspective, it would be logical that all devices be blocked from application and/or service pack downloads except the systems of a CAD/BIM Manager, IT or Power User tasked with vetting the the update. They could test or choose when to roll-out new versions or updates and when ready, the devices could be allowed access. You may even want to use the Desktop App to install the updates to a certain point for a new system but for that to work, you had to enable it for everybody for it to pickup the new device. Now, all your users see all updates and software even if you didn’t want them to and some of your users may be updating past where you want them. You’d have to then disable everyone again after the new device showed up in the list and re-disable them,
Another problem was that it the Desktop App (or former App Manager) was ever uninstalled and reinstalled, your device would show up again. Uninstall and reinstall 5 or 6 times like I had done over almost 2 years of working with their support team to fix the issues and you would have your device listed 5 or 6 times with no way to remove them short of another support ticket.
Ultimately, I don’t think anyone will care. I don’t believe most companies used this feature. With the move to subscription software, everything is based on the user anyway making device management less important. None the less I do wonder, if Autodesk actually understood what companies really needed to manage their enterprise (especially large enterprises), they may have designed the functionality differently. It just may have had more adoption by customers. I highly doubt they consulted any large or small customers when designing Device Management as it was a dismal failure,
For more information on the retirement of Device Management from Autodesk’s Accounts Portal, click this link to see their support article.
Autodesk Concurrent Usage Restriction
A couple months ago I posted about a “business rule” Autodesk had which restricted a user from using more that 2 titles of their Collection on the same computer at the same time. The original post can be read here. This wasn’t a technical limitation rather a legal restriction. The “rule” essentially stated that you couldn’t run more than 2 products at the same time for the same user on the same computer. This would be like Microsoft saying you couldn’t use Email, Word and Excel all at the same time. I asked several trusted Autodesk resellers, my Autodesk insiders and other industry peers and it seems this restriction wasn’t very well known, In fact, not a single person I asked was aware of the “rule”
Back in January when I first raised the issue, I was in the middle of a contract renewal and it was Autodesk’s fiscal year end. As a result, there were several Autodesk regional reps raising the issue internally at Autodesk. I had hints back then (unofficially) that they were reassessing the policy and would likely remove the restriction. I’m now happy to report that as of March 29th, the policy restriction has been officially removed.
It was reported in the “Moving to Subscription” forum as a followup to my initial complaints and concerns. You can read the entire forum thread here.
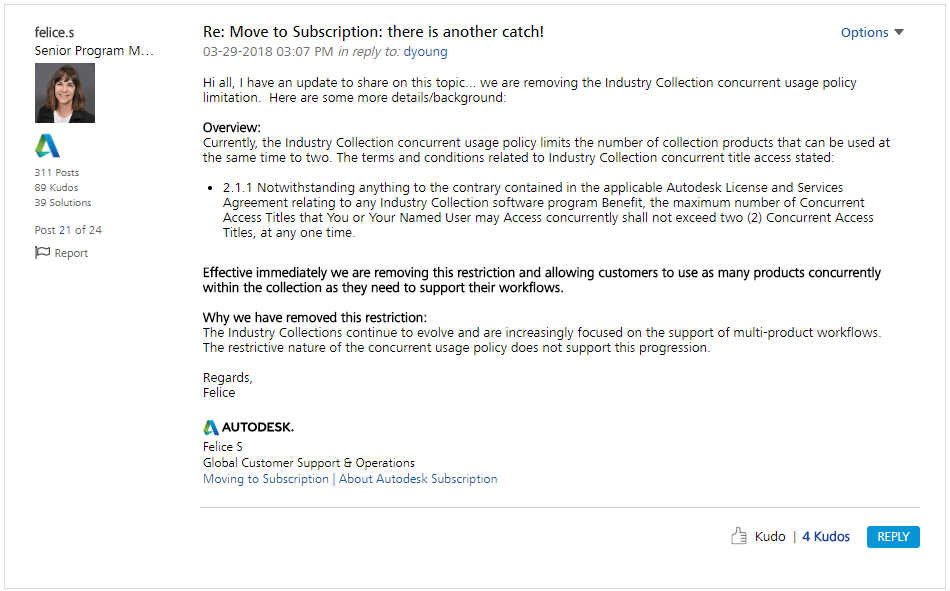
If you look at Autodesk’s Collection Licensing support article here, you can see the restriction struck through and updated.

I’m a tough critic of Autodesk’s policies and their sales practices. But I have to admit, this was fairly quick action on their part considering their legal team was likely involved. They historically haven’t made concessions based on customer pressure very often and when they have, it sometimes comes very slow. In the use case I gave them, I discussed how an MEP firm running Fabrication CADmep would need 3 licenses, One license of CADmep, one for the AutoCAD session it was running on and Navis.
The feedback I received through resellers pushing their Autodesk partner managers for answers came back quickly in mid-January exactly how many users globally fell into that scenario. I was impressed how quickly they started analyzing the scope and impact to their company and users. Hats off to Autodesk for squashing this ridiculous rule. For the first time in over 25 years of dealing with Autodesk, their sales and legal teams came together and did the right thing.
AutoCAD 2018.1.2 Update
In case you missed it, Autodesk released update 2018.1.2 for AutoCAD a couple weeks ago. Click here to see a listing of the issues fixed in this and previous updates for AutoCAD 2018,
To download and install the update, refresh your Autodesk Desktop App and updates should appear if you have an active subscription (maintenance plan or annual subscription). The Autodesk Desktop App icon is located in your Windows System Tray if it was installed.
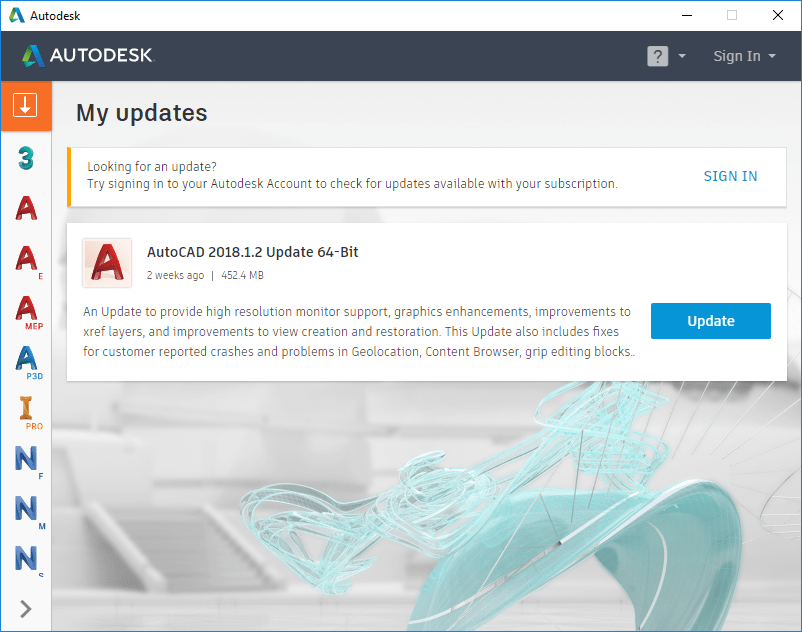
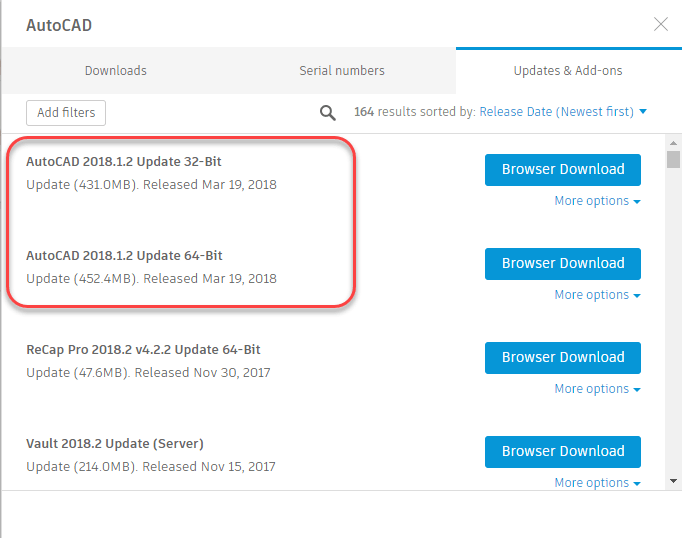
You can also access them from the Product Downloads section of the Autodesk Accounts portal if you are a contract manager or software coordinator in your account.
Autodesk 2019 Network License Update
FlexLM version 11.14.1.3
It’s that time of year where Autodesk releases new versions of their desktop products. For companies with network licenses, it’s also strongly recommended to upgrade to the latest version of FlexLM for you license server.
Current Version: 11.14.1.3
You can download the latest version from Autodesk’s web site here.
A few things to note…
- A few releases ago, Autodesk changed the default installation location for network licensing to <C:\Autodesk\Network License Manager>. If you’re license server is still running from a different location, you may want to consider re-configuring to the default location. This allows for more easily managing data (logs, license files, etc.) as it doesn’t fall under the additional security restrictions you’ll find in the Program Files folders.
- You can uninstall the old license server and reinstall the new version but this isn’t needed. The license server itself is fairly simple and doesn’t install a lot of files. Simply shut down the FlexLM service using the LMTOOLS utility, copy over the new files and restart the service. I’ll typically install locally on my desktop to get the files and then copy them to the server. There’s also a number of free utilities on-line that will allow you to extract files directly from an MSI installer. One of the more popular utilities for I’ve used before is Less MSI.
-
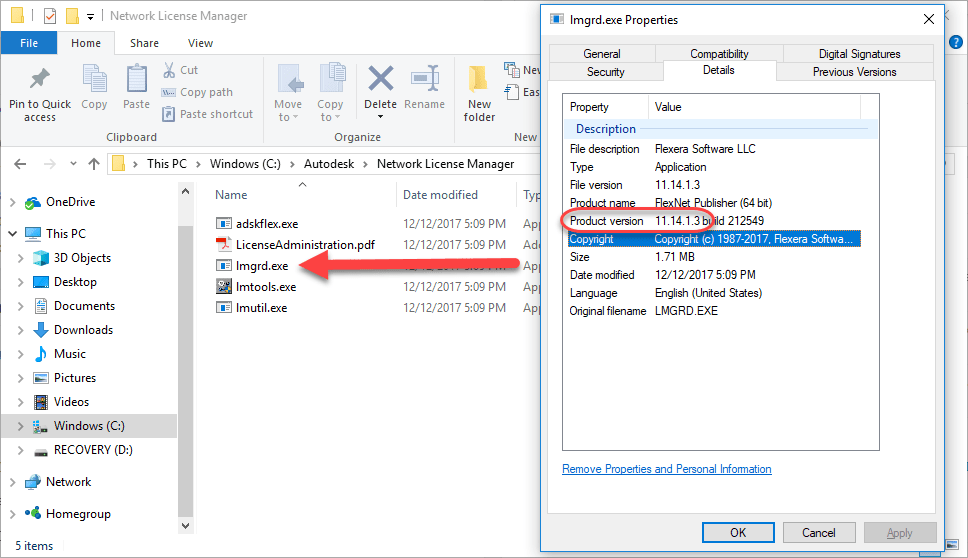
To determine which version of FlexLM you’re running, browse to the folder where your license server is running and Right-Click on LMGRD.EXE. Using the properties dialog, the Details tab will tell you the version you’re currently using.
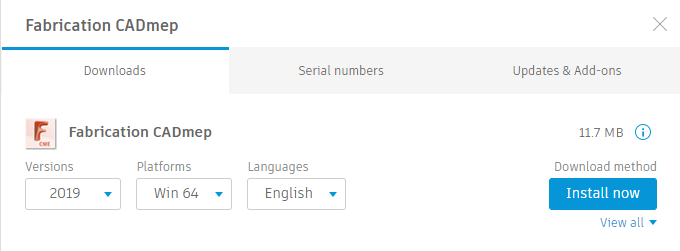
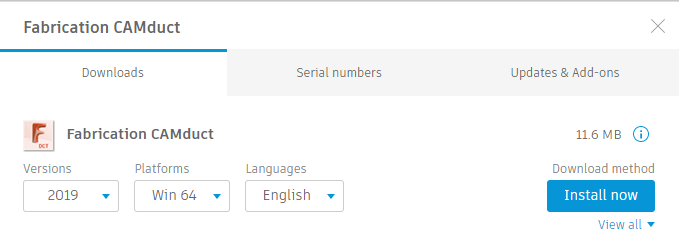
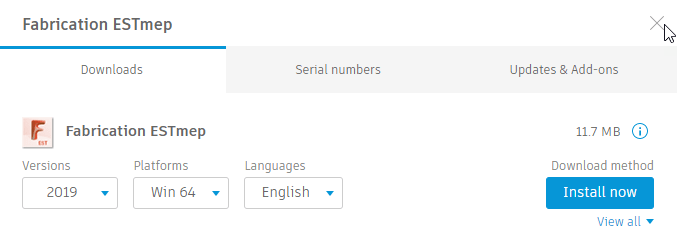
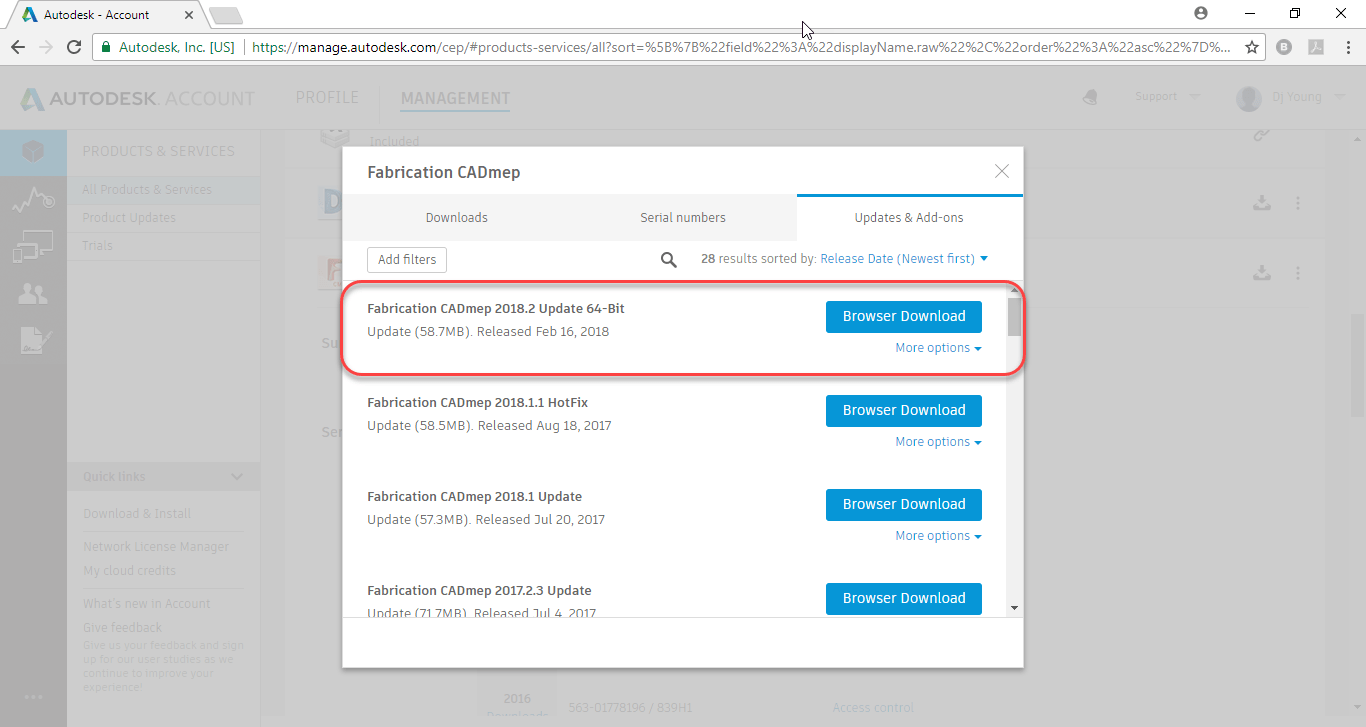
Autodesk Fabrication 2018.2 Update
Update 2018.2 for Autodesk Fabrication
Autodesk just released update 2018.2 for CADmep, CAMduct, ESTmep as well as the lesser used CAMduct Components, Tracker and Remote Entry.
There’s a hand full of fixes for CADmep, ESTmep and CAMduct. If you refresh your Autodesk Desktop App, the updates should appear if you have an active subscription (maintenance plan or annual subscription). The Desktop App says they were released a few weeks ago but they just showed up in the Desktop App today.
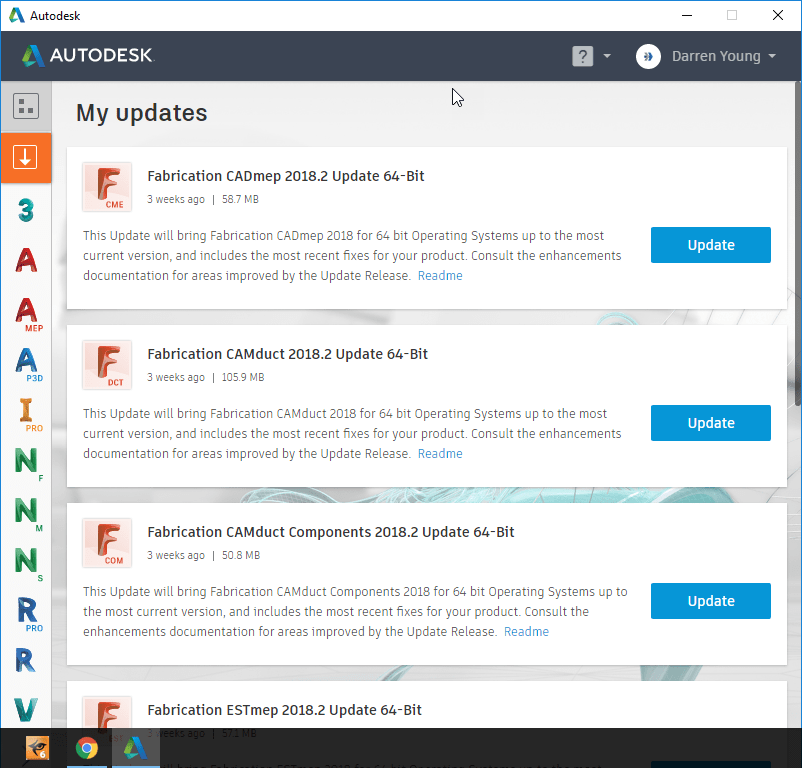
You can also access them from the Product Downloads section of the Autodesk Accounts portal.
CAMduct Components, Tracker and Remote Entry did not have any “fixes” and were only updated to keep the build numbers consistent which means there’s really no benefit to updating those.
You can find a complete list of updates and build numbers here.
Here’s the fixed issues…
CADmep
- Improved the stability of patterns 1206 & 1207 when adding holes.
- Improved minimum straight length size when filling in Design Line.
- Improved patterns 2884 & 2051 by relaxing the bad dimension checks.
- Improved connector insulation adjustments when insulation parts = Wrap inside.
CAMduct
- Improved geometry cuts in NC program for VICON Post Processor.
- Improved the stability of patterns 1206 & 1207 when adding holes.
- Improved Piercing for Custom NC.
- Improved patterns 2884 & 2051 by relaxing the bad dimension checks.
- Improved connector insulation adjustments when insulation parts = Wrap inside.
ESTmep
- Improved Item List view in Job contents table to auto-refresh when parts are deleted.
- Improved the stability of patterns 1206 & 1207 when adding holes.
- Improved the estimating information present on the Review Installation Costs, Review Installation Times, and Review Fabrication Time tabs.
- Fixed an issue causing hangers to report incorrect costs.
- Improved patterns 2884 & 2051 by relaxing the bad dimension checks.
- Improved connector insulation adjustments when insulation parts = Wrap inside.
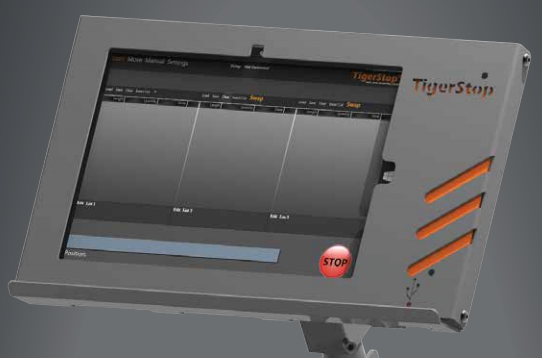
TigerStop – Tip #1
More and more mechanical contractors are installing and using TigerStops. The company has been around for a long time in a number of industries but only recently have they started to get noticed by mechanical contractors. If you’re unfamiliar with them, you can find out more from their web site www.tigerstop.com. You may also want to view their Blog post about one mechanical contractor’s experience with them here. I’ll be posting a few tips going forward as I get more familiar with them. To get you started, here’s my first Tip.
Install TigerTouch software on your computer
One of the options you can buy when getting a TigerStop, is the Tablet package that consists of a Windows Surface PC with the TigerTouch software. This package provides your TigerStop with a much friendlier interface that can be used to control your TigerStop controller.
While this software is used to control your machine, you can also install it on any computer. Simply download the Full installer from TigerStop’s web site and install. Installing on another computer has several benefits….
- Test, and learn some of the software workflow in a safe more comfortable environment. This is a great way to train your shop staff how to use the interface without taking your machine out of production and without wasting any material.
- Allow you to more easily get screen captures and produce documentation for your staff.
- Test new software builds before updating your machine.
When the TigerTouch software starts, it notifies you that it can’t find a machine connected. That’s perfectly fine, just click cancel so it doesn’t try to look again.
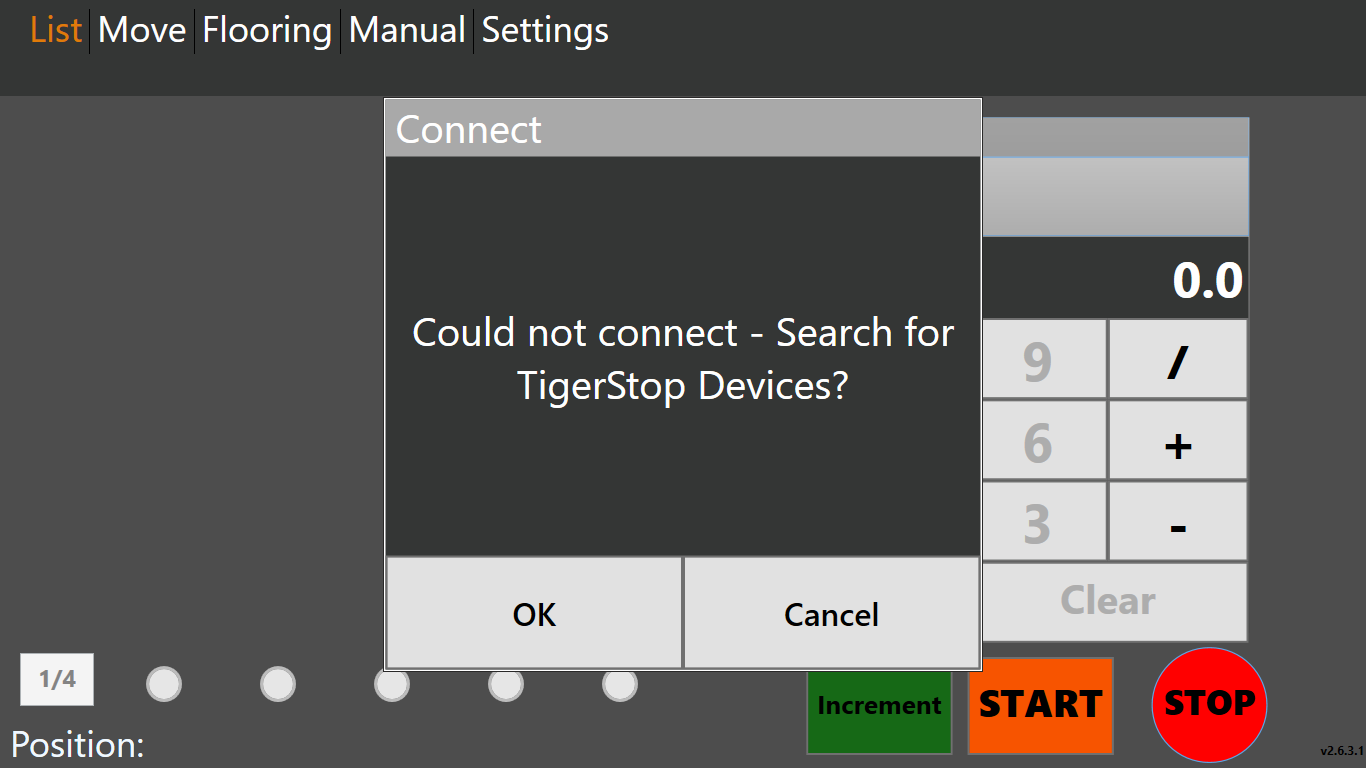
From here, you can now use many of the functions of the software. When you click START, instead of the software waiting for your saw to operate, your cut lists are just processed automatically for for each stock size you enter. Here’s a video of the software opening a Cut List and processing it on my system which is NOT connected to an actual TigerStop machine.
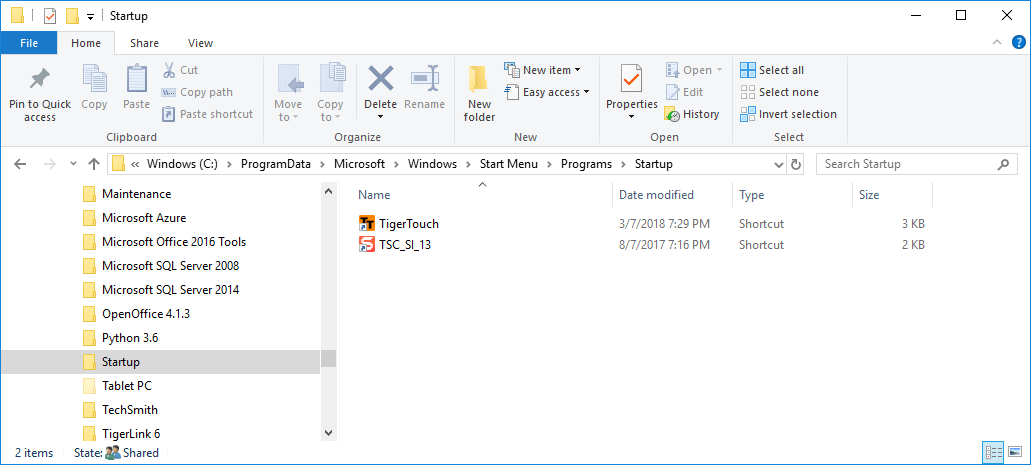
One last item…When TigerTouch installs, it assumes you’re installing a machine so it’s configured to automatically run when you log into Windows. To stop this, simply remove the TigerTouch Shortcut in the Windows Startup folder. The shortcut is located here:
C:\ProgramData\Microsoft\Windows\Start Menu\Programs\StartUp
When you’re browsing to this folder you may not see the ProgramData folder because it’s a Windows System folder which by default is configured to be hidden. Simply type in the folder name and you’ll be able to browse to that folder.