Fix – Revit Fabrication Parts Suddenly Become Invalid

If you’re using Revit 2018 or 2019 with Fabrication Parts, you may notice that upon loading or reloading your configuration some (or many) of your parts become “Invalid”.

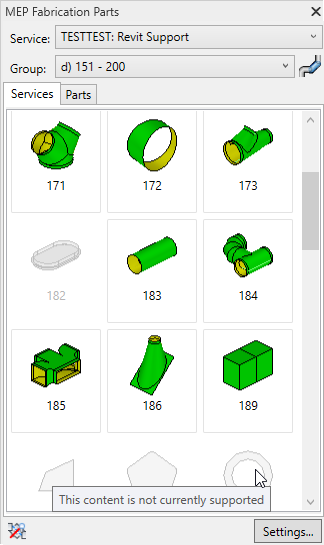
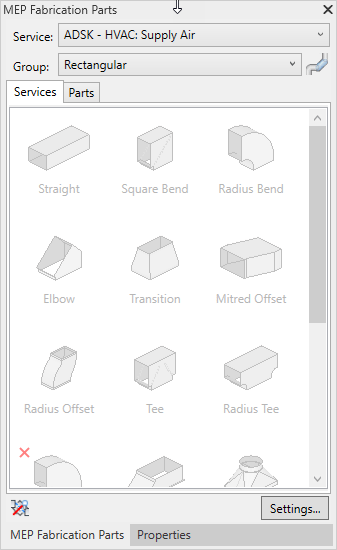
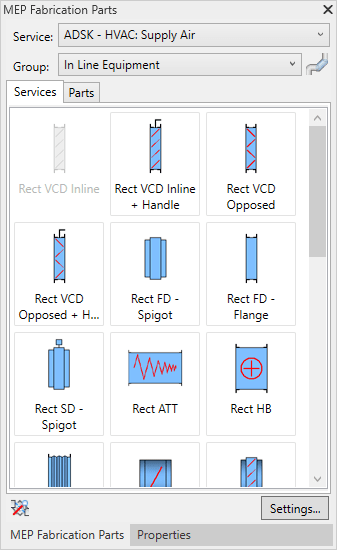
I’m not talking about Fabrication Parts whose CID/Pattern isn’t supported in Revit. I’m referring to perfectly valid Fabrication Parts. Parts that once worked. They may even be currently in your model but are no longer active in your Parts Browser. Here’s a couple examples…

You may even notice valid parts become invalid after unloading a service or that invalid parts become valid again after loading a new service.

What’s happening is that your Fabrication Configuration’s Image Cache has become corrupt. The issue is in Revit 2018 and 2019. Revit 2020 does not experience the issue. Whatever changed in Revit 2020 made it more resilient to a corrupt image cache.

The only known fix until recently was editing your service template. You would have to remove and re-add the part. Reloading the Fabrication Configuration in Revit and it would be fixed. Unfortunately, future database changes would often revert back to the invalid state.

Quick and Dirty Work-Around (Revit 2019 Only)

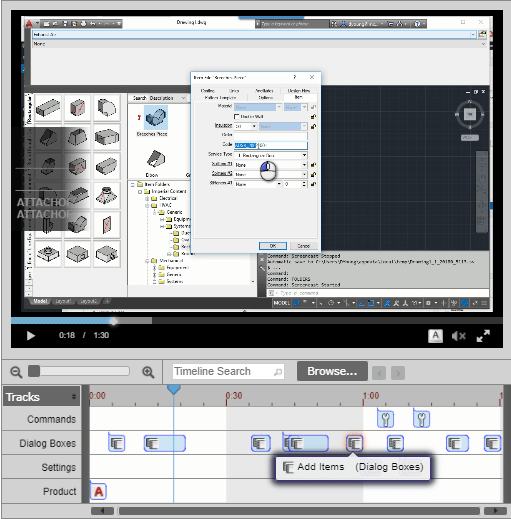
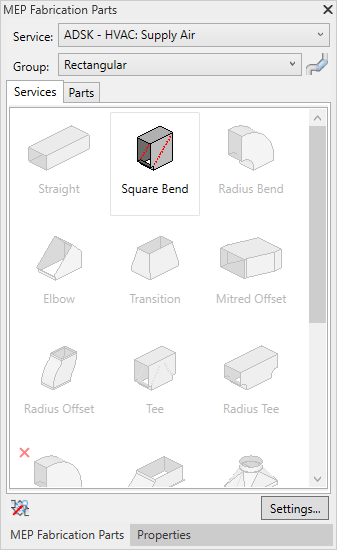
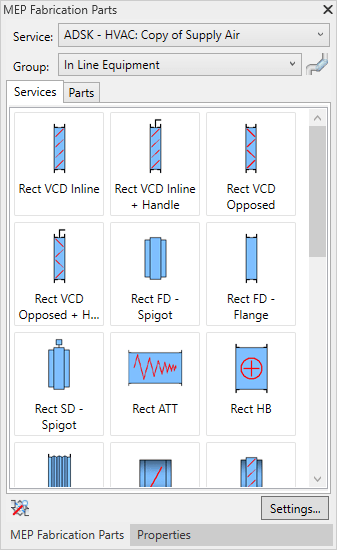
If you’re using Revit 2019, there is a quick and easy work-around. That’s assuming you only have a few parts that are invalid. To work around the issue, reload your Fabrication Configuration and individually load the invalid part in the Parts tab. The following image shows one invalid part added to the Parts tab.

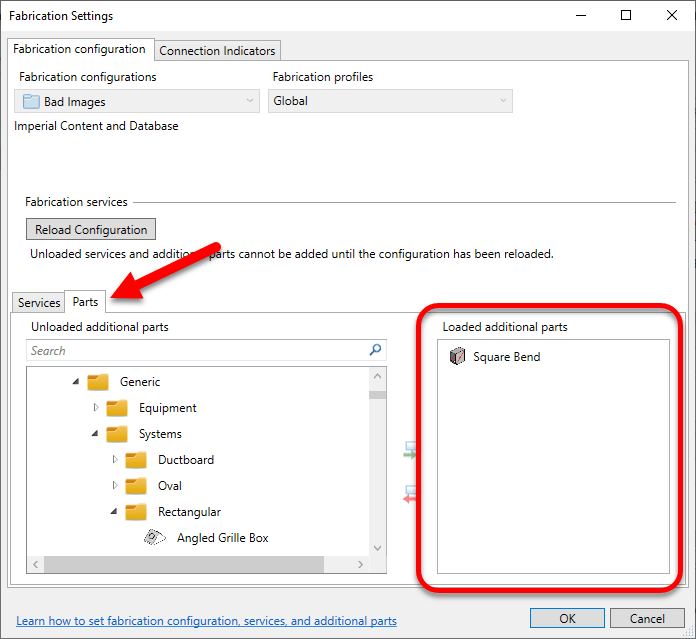
Once added, the Part then becomes valid in the Parts Browser.

A Permanent Fix (For both Revit 2018 & 2019)

The prior work-around was only available in Revit 2019. This didn’t help Revit 2018 projects which do not have the Parts tab in Fabrication Settings.

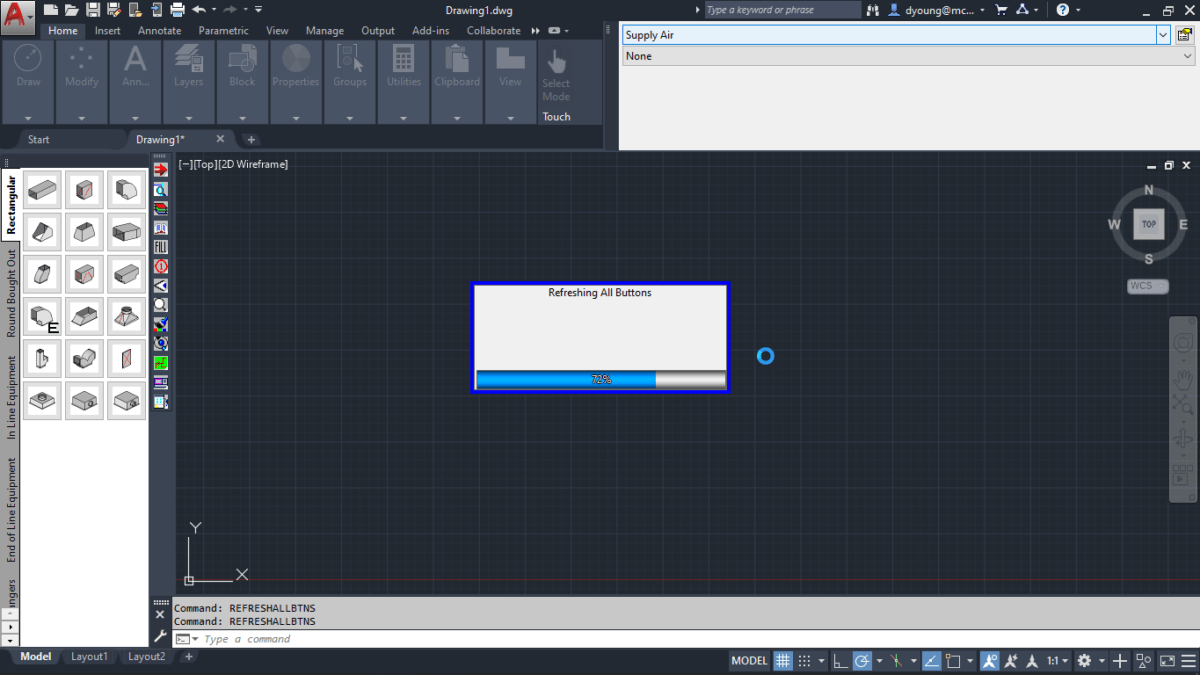
To properly fix the issue, you need CADmep. Load your Fabrication Configuration in CADmep. Once loaded, find an open area of your service and press CTRL+SHIFT+Right-Click and select Clear Cache.

Next type the REFRESHALLBTNS command. You’ll see a progress bar while CADmep refreshes your button image cache.

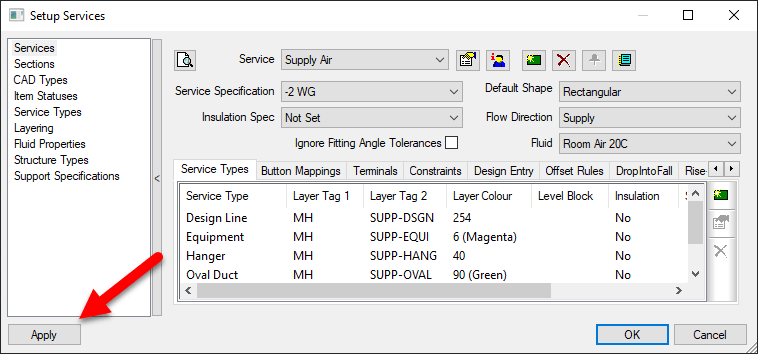
At this point, your button cache should be rebuilt. However I’ve seen instances where you have to “coerce” or otherwise persuade CADmep into saving it back to disk. To verify the changes are saved, go to the Service Editor and click the Apply button then close the dialog.

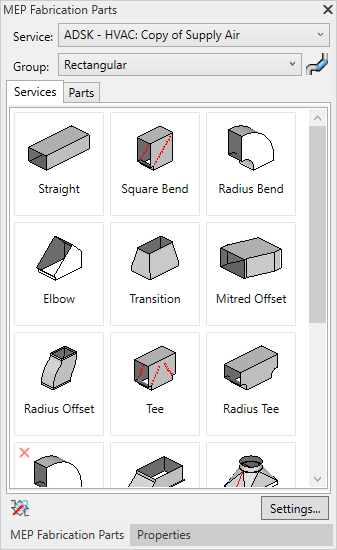
At this point, you should be all set. If you go back to the problem Revit file and reload your Fabrication Configuration, you should see the Fabrication Part become active again.

Preventing Future Corruption

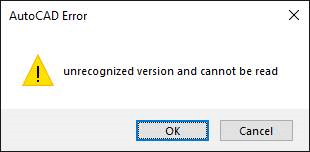
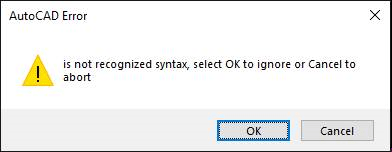
To prevent future corruption, you first need to understand how it happens. When loading CADmep, you may have noticed the “Button Validation” as shown in the following image…

Because this can be a slow process, most users simply hit the Escape key to terminate the validation. This isn’t a big deal for a user. For a database administrator, this can leave your image cache partially built and corrupt it.

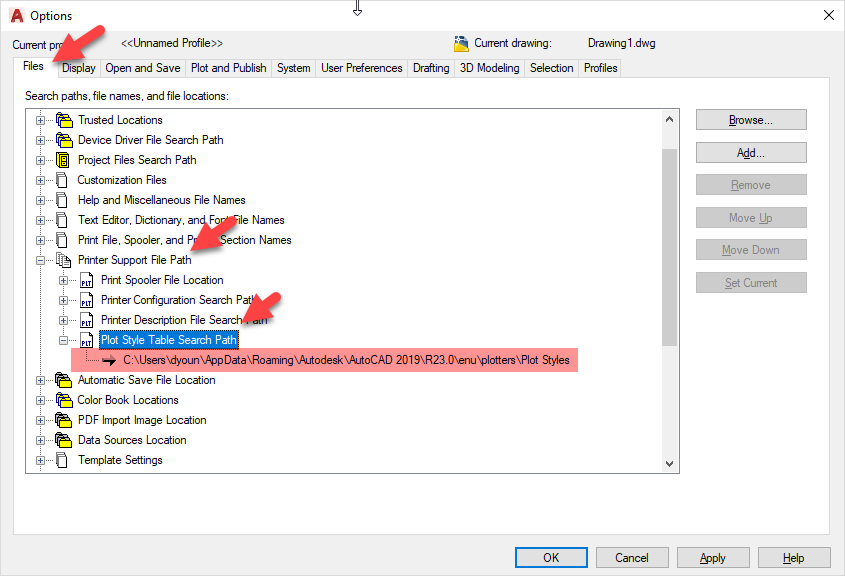
While you can simply stop canceling the process, the better option is to prevent it in the first place. By default, CADmep enables Button Validation. But you can turn it off. To do this, use the Edit Configuration utility that comes with CADmep.

Note that this utility is named the same between versions and between CADmep, ESTmep and CAMduct products. It may be tricky to pick the right one. You need to select the one that comes with CADmep.

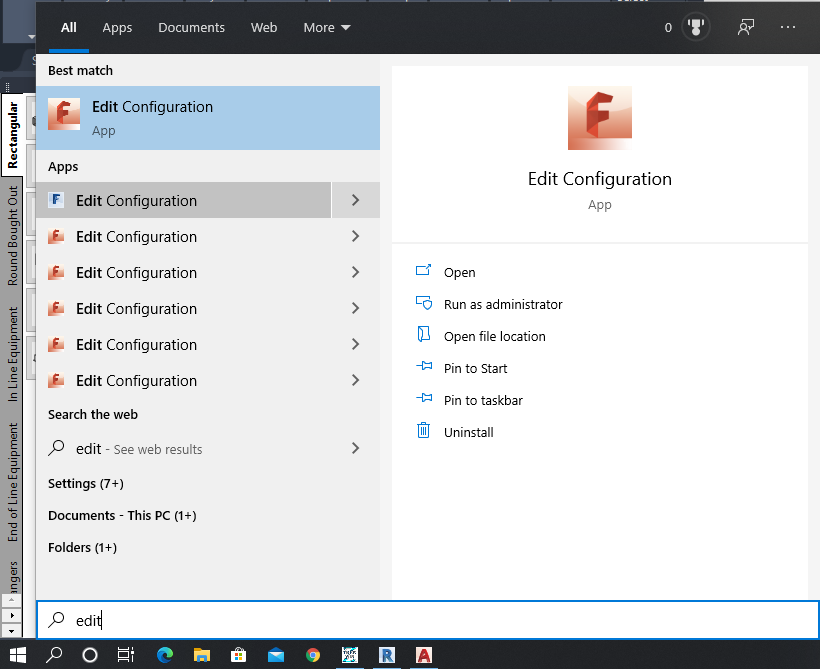
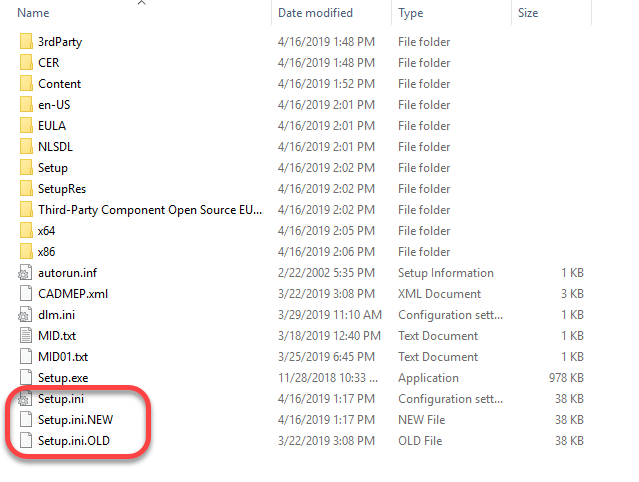
You also need to perform this for each CADmep version that’s installed. To help, you may want to choose the Open file location option. This will bring you to the folder with the shortcuts. You can then easily navigate to the proper version of Edit Configuration that you’re looking for.

When you run the utility, it’ll prompt for a configuration. You can pick any, it doesn’t matter. The setting to change is not specific to the configuration, only the product and version for the currently logged in user. The following image shows the Skip Validate Buttons at Start-Up option.

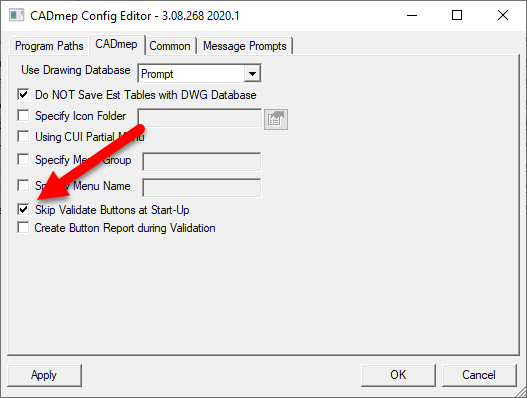
Select this option and the next time you launch CADmep, you’ll no longer see the button validation. This prevents you from canceling out of the validation as well as speeds loading of CADmep.

Credit Goes To…

Special thanks to Martin Schmid and Craig Farish of Autodesk for helping with this issue. We’d been experiencing this issue on and off for over 1/2 a year. Autodesk Support had indicated that nobody else had reported the issue and provided the 2019 work-around. They repeatedly assured me it was fixed in 2020 and not a problem with my data. They had no fix for 2018 which is used by several projects.

After experienced a large volume of invalid buttons, our database administrator spent 6 hours before users arrived rebuilding service templates. The the issue resurfaced within hours of a simple database update. With $5k-10k of lost productivity over 2 weeks with several detailers unable to model certain services, I called in a favor with Martin and Craig. They quickly had their team analyse our data and identify the fix.

I’ve since run into 4 other companies experiencing the same issue and this fix has worked flawlessly for them as well. Hopefully you’ll not need it but if you do, it’ll save you load of time, frustration and money.

Autodesk Fabrication 2020 Installer Issues

If you use network licenses or create network deployments of CADmep, CAMduct or ESTmep you may encounter errors. Autodesk incorrectly pathed the Network License Manager files in the SETUP.INI files.

Even if you are using Stand Alone or User Based Subscription licenses but build Network Deployments, if you configure the deployment to include all components in the deployment (recommended if you plan on modifying the deployment later) you can encounter errors.

To correct the errors, you can replace the SETUP.INI files that are part of the installation with the ones provided in the following ZIP file…

Before you overwrite your installation’s SETUP.INI file, it’s a good idea to backup the original. The root of my installation folder looks like this…

At some point, I would expect Autodesk will update their download data and provide the proper files. Because of this, I would highly recommend NOT replacing the SETUP.INI files unless you encounter issues.

What’s Different?

If you’re curious what’s different between the two, you can open the INI files in Notepad or other text editor and view them there.

The original file contains this at the end of one of the entries…

Third-Party Component Open Source EULAs:x64\en-US\Tools\NLM.msi

The new SETUP.INI files have updated it to this…

Third-Party Component Open Source EULAs:x86\AdskLicensing\NLM\x64\NLM.msi

Revit Fabrication Parts – Pattern Support Analysis

It no secret that not every Autodesk Fabrication pattern is supported in Revit. I’ve recently finished a more in-depth analysis of which patterns are and are not supported in Revit. Each of the 703 different pattern types were tested in each version and each update of Revit.

On the Fabrication COD Scripts page, you can find a Revit Support Report script. That script will analyse your ITM library and generate a CSV report of the status of every ITM in your Fabrication Configuration.

You can also find the complete results of my testing on the Revit Support page. Here’s a summary of the the testing…


Tested Version

Each of the below versions of Revit were tested with all the the 704 different patterns:

20162016R22061R2SP7
2017.02017.12017.2
2018.02018.12018.22018.3
2019.02019.12019.2

Testing Criteria

“Supported” for purposes of this testing is based on whether Revit allows a particular pattern to be used in the Fabrication Part Browser.


Testing Results

Testing results will have one of the following status descriptions.

  • No – No Revit support
  • Varies ({verison}) – Revit support varies between Revit version
  • Yes (Risk) – Revit does support but use NOT recommended due to issues
  • New ({version}) – New Pattern supported in later Revit versions
  • Yes – Pattern is supported in all Revit versions with no significant issues

Support Status = No

No – Parts not supported by the Parts Browser are obviously listed as having “No” support. There are a total of 84 different patterns listed in this category. They are as follows…

125126127
128129130141158202203
204205206207208209210211212213
215216218220221228230301302308
503505521530764765803804805806
833873910913928960961964966969
974980983985994996999104911021106
1114114211501152115711611162116511681169
1181119411961198218521892190219121922199
2200287331083873

Support Status = Varies

Varies (version) – In some cases, Fabrication Parts were initially allowed or supported in earlier versions and later were restricted. These parts have a status of “Varies” followed by the version where the change occurred. It’s recommended you avoid use of these patterns even in versions where they work as they will not be supported in later versions. There are 17 patterns that once worked in Revit but are no longer supported. They are as follows…

0182222381845853855864876898
903912915971110511701175

Support Status = Yes (Risk)

Yes (Risk) – Patterns that list “Yes (Risk)” are technically supported in Revit but I highly recommend avoiding their use. Patterns with this status have issues like inserting at the Revit’s Project Base Point and not the cursor location. They also have a tendency to crash Revit if you attempt to grip or edit them. As a result, I highly recommend avoiding their use. There are 29 patterns in this category. They are listed here…

119189317346347348349350351352
353368369390392397398415810828
922930962963968973115911601176

Support Status = New

New (version) – Some patterns were not around in earlier versions of Revit but later added and supported in Revit. These patterns are listed as “New” followed by the version of Revit they became available in. These patterns are generally safe to use for Revit. There are 19 patterns in this category which are listed here…

217120612071238123912401241124212431244
124512461247124812491250219721982217

Support Status = Yes

Yes – Parts allowed by the browser that work across all versions of Revit are listed with e “Yes” status. There are 555 patterns in this category. They are listed here…

12345678910
11121314151617181920
21222324252627282930
31323334353637383940
41424344454647484950
51525354555657585960
61626364656667686970
71727374757778798081
82838586878889909192
939596979899100101102103
104105106107108109110111112113
114115116117118120121122123124
132133134135136137139140142147
148149150151152153154155159160
162163165166169170171172173183
184185186231250251252253254255
309311313314315316318319320321
322323324325326327328329330336
338340341342343344345354355356
357358359360365366367376377378
379380382383384385386387388391
393394395399401410411412413417
420421430431440441450451460461
470471472480501502504506507509
514515518519522523524525526533
535555556557580751760761800801
802807808809811812813814815817
818819820821822823824825826827
830831832834835836837838839840
841842843844846847848849850851
852854856857858859860861862863
865866867868869870871872874875
877878879880881882883884885886
887888889890891892893894895896
899900901902904905906907908909
911914916917918919920921923924
925926927929931932933934935936
938939940941942943944945946947
948950951952953954955956957958
959965967970972976977978979981
9849869879889899951000110111041107
1108110911101111111211131115111611171118
1119112011211122112411251126112711281129
1130113111331134113511361137113811391140
1141114311441145114611471148114911511153
1154115511561158116311641166116711711172
1173117411771178117911801183118411851186
1187118811891190119111921193119711991200
1201120212031204120515221972204020412042
2044204720512060207120722082209721082148
2149215521602182218321842186218721882193
2194219521962326238623882522252325242751
2814282128572868286928752881288228832884
2885288628992900290129022903290429052906
2907291629382965296629672979304130513060
30713386352235234522

AutoCAD Error: “unrecognized version and cannot be read”

If AutoCAD has ever given you an error “unrecognized version and cannot be read” error, it’s likely a corrupt CTB/STB file. An image of the error can be seen below…

You can also see this followed by another error dialog, “is not recognized syntax, select OK to ignore or Cancel to abort“. This error also shown below, is likely related to the same corrupt CTB/STB file.


Where Are CTB/STB Files Located?

To find where your plot style tables are located, type “OPTIONS” in AutoCAD”s command line. In the “FILES” tab, expand the “PRINTER SUPPORT FILE PATH” node as shown below.

A few things to note and the plot style tables support path….

  • Support paths are specific to the AutoCAD profile that’s loaded. Load a different AutoCAD profile and the path may be different.
  • AutoCAD profiles are user specific, if other users log into the system, they may also be pointed to a different path.
  • Support paths for the plot style tables will follow nested folders. That is, if you have folders under the configured path, AutoCAD will look in all those sub-folders for additional CTB/STB files too.
  • Shortcuts are followed. IF you have shortcut placed in the support path, AutoCAD will also follow and look for CTB/STB files in the location the shortcut points to as well as any sub folders there too.

CADmep & IFC

For CADmep users, IFC has been a good way to get your content to other team members using Revit. While Revit now supports Fabrication Parts, exporting from CADmep to an MAJ for import into Revit hasn’t been a reliable way to share your model with Revit users. There are a couple of key reasons for this…

  • Not all Fabrication Parts in CADmep are supported
  • Import of MAJ files into Revit is very finicky and prone to failing.

For this reason, IFC Files have been a good way of ensuring all your Fabrication data gets displayed into Revit. And to be clear, this is by using the IFCE (IFC Export) command in CADmep.  Note: AutoCAD MEP has it’s own IFCEXPORT command but this doesn’t handle Fabrication CADmep data well).

While IFC is a good way to get CADmep data to Revit and Navis, over the last couple of releases it’s been getting worse. Since 2018 release of CADmep, *.IFC files no longer import into Revit or Navis, For Revit, you can use *.ifcXML or *.ifcZIP formats but these worn’t help you with Navis which only reads *.IFC. And starting with Revit 2019.0.1 Hotfix, Revit will no longer read *.ifcXML or *.ifcZip either.

  • *.IFC Export from 2017 and earlier CADmep works in any Revit/Navis version.
  • *ifcXML export from any version of CADmep work in any Revit version before 2019.0.1
  • *ifcZIP export from any version of CADmep work in any Revit version before 2019.0.1

To help give you a better picture of IFC support from CADmep, please refer to the following two compatibility charts…

CADmep IFC & Revit Compatibility
CADmep IFC & Navis Compatibility

Autodesk Screencast

I’m amazed at how many people aren’t aware of or don’t use Autodesk Screencast. It’s a free, screen recording utility from Autodesk but it;s also a lot more.

While Screencast will record any application, a number of Autodesk applications have a lot tighter integration. Here’s some of the additional things Screencast will do that most other screen recording applications miss when you capture from an Autodesk application…

  • Record and display characters typed during playback
  • Record and display mouse picks (e.g. left button, right button, etc.) and movements during playback
  • Display product(s) and versions used during playback
  • Display commands used
  • List commands used during playback
  • List system variables/Settings changed during playback
  • List dialog boxes displayed during playback
  • Unlimited cloud storage (no limit that I could find)
  • Store recordings in Private, Unlisted or Public modes
  • Public recordings can be used as search results in Autodesk’s Knowledge Network search results.
  • Embed Screencast into web pages
  • Easily download your recordings video

Not all Autodesk applications have as much details as others (AutoCAD records a lot of data, Navis less data).

While you can use Screencast for the typical uses of any screen recording software like training, where I think it really shines is in support both internal and external, If you’ve ever had your users unable to reproduce a problem while you were looking, this gives them a good way to get that information to you. Additionally, you can see exactly what they are/are not typing and picking in the even there’s a very nuanced user interface interaction they’re missing that you pickup on or that they are having a hard time communicating.

I especially like using Screencast when submitting Support tickets to Autodesk. They are easily able to see what I see and what I type and pick eliminating a lot of unnecessary Email communication about steps to reproduce. This alone makes Screencast worth it’s weight in gold because it cuts down on the non-value added time spent during the support process. The Autodesk tech immediately sees everything and can jump start their troubleshooting and/or research.

You can download and learn more about Screencast from this link.

Fix Install/Uninstall issues easily

Install and Uninstall issues are common. They can be difficult and time consuming to resolve. Often, the fix is worse then the problem. Autodesk has a number of Knowledge Base articles on the topic with a variety of tips and suggestions…

Installations
Uninstall

One of the best options that I’ve been typically going to right from the start due to it’s high rate of success is Microsoft’s “Fit-It” utility. You can access it from the following link and clicking the Download button.

Microsoft Fix-It

This downloads and saves a file named MicrosoftProgram_Install_and_Uninstall.meta.diagcab to your computer. When you double click this file, the program starts and as you work your way through the wizard, you’ll be prompted for which type of problem you want assistance with.

My experience had been that most Install issues are related to programs already installed incorrectly. As such, I find myself using the Uninstall option not only to resolve uninstall problems but also install problems by removing the problem programs and reinstalling those to.

Regardless of the option you choose, you’ll then be presented with a list of programs the utility finds. Select the one you think best and let the Fix-It utility do the rest. It’ll scan the registry for invalid or corrupt keys, fix if possible and even uninstall the offending program.