I’m occasionally asked how one would add one of every size in a product list to their job. This very easy using ESTmep or CAMduct. CADmep however does not have this capability.
Here are the steps….
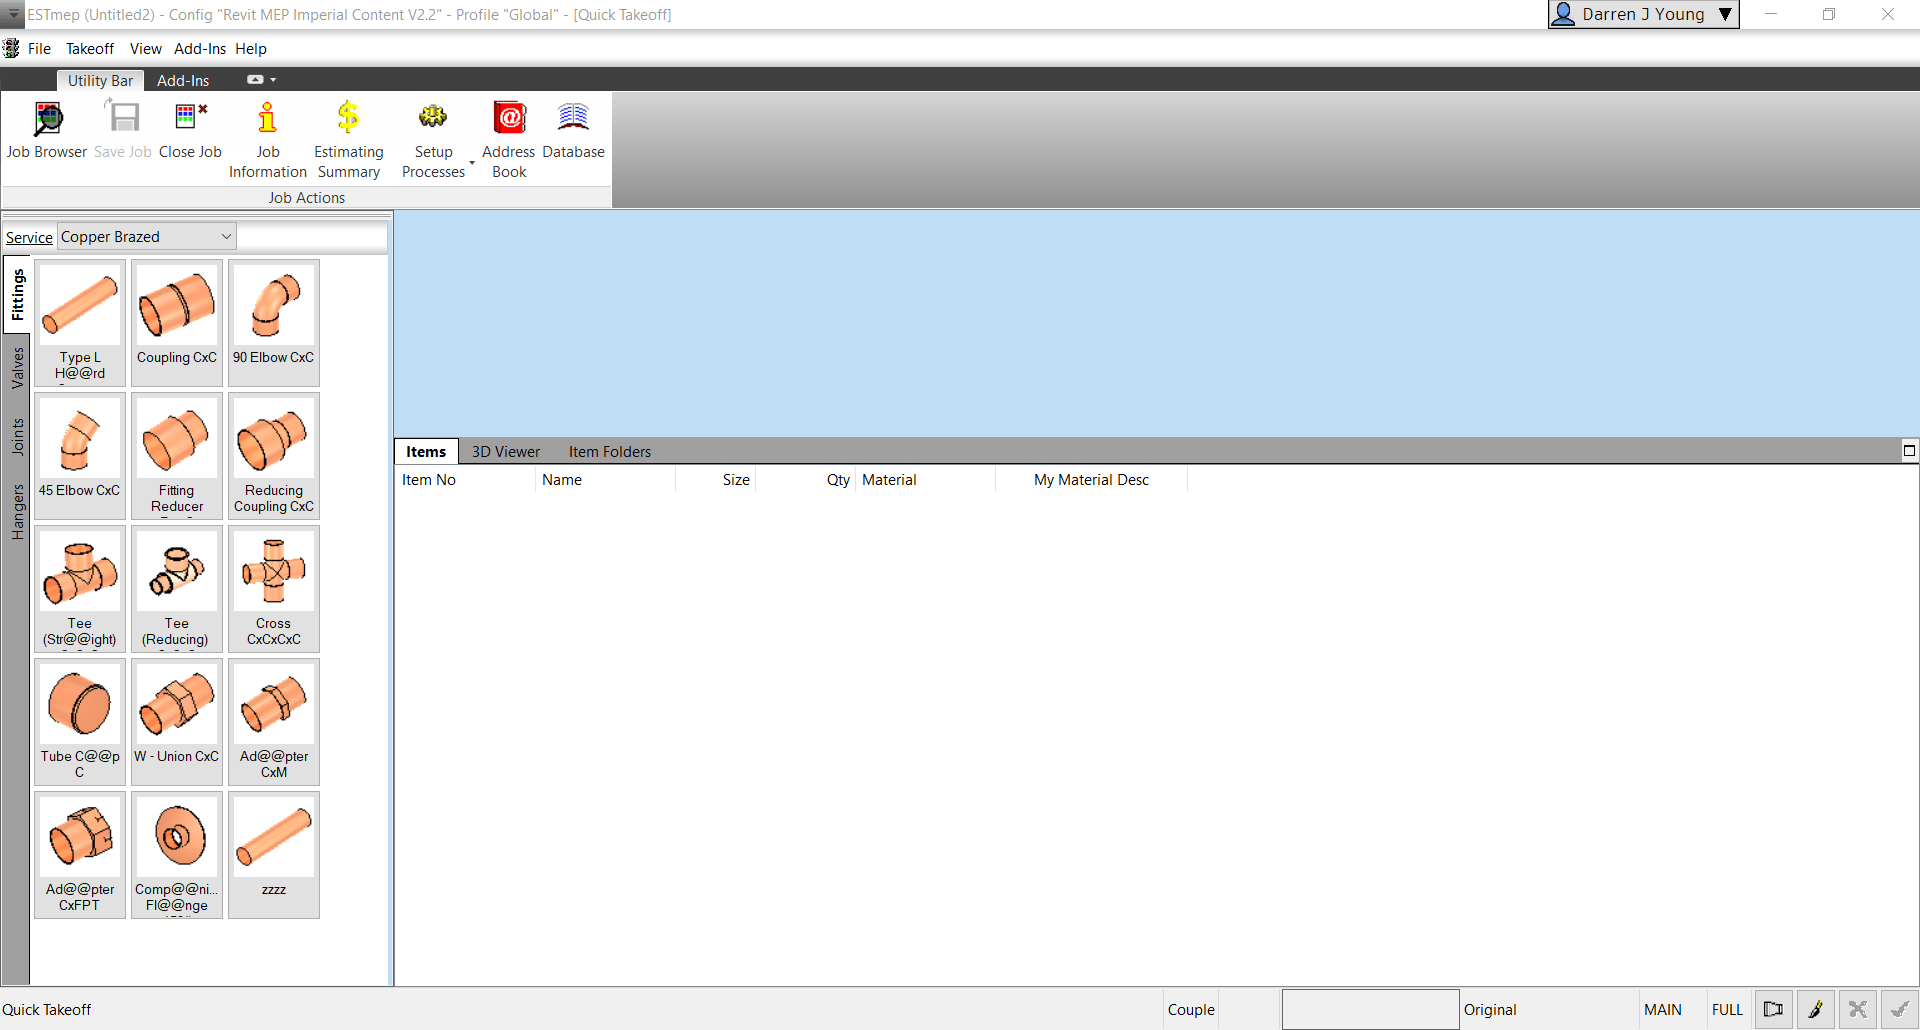
Step 1: Start ESTmep / CAMduct with a blank job.
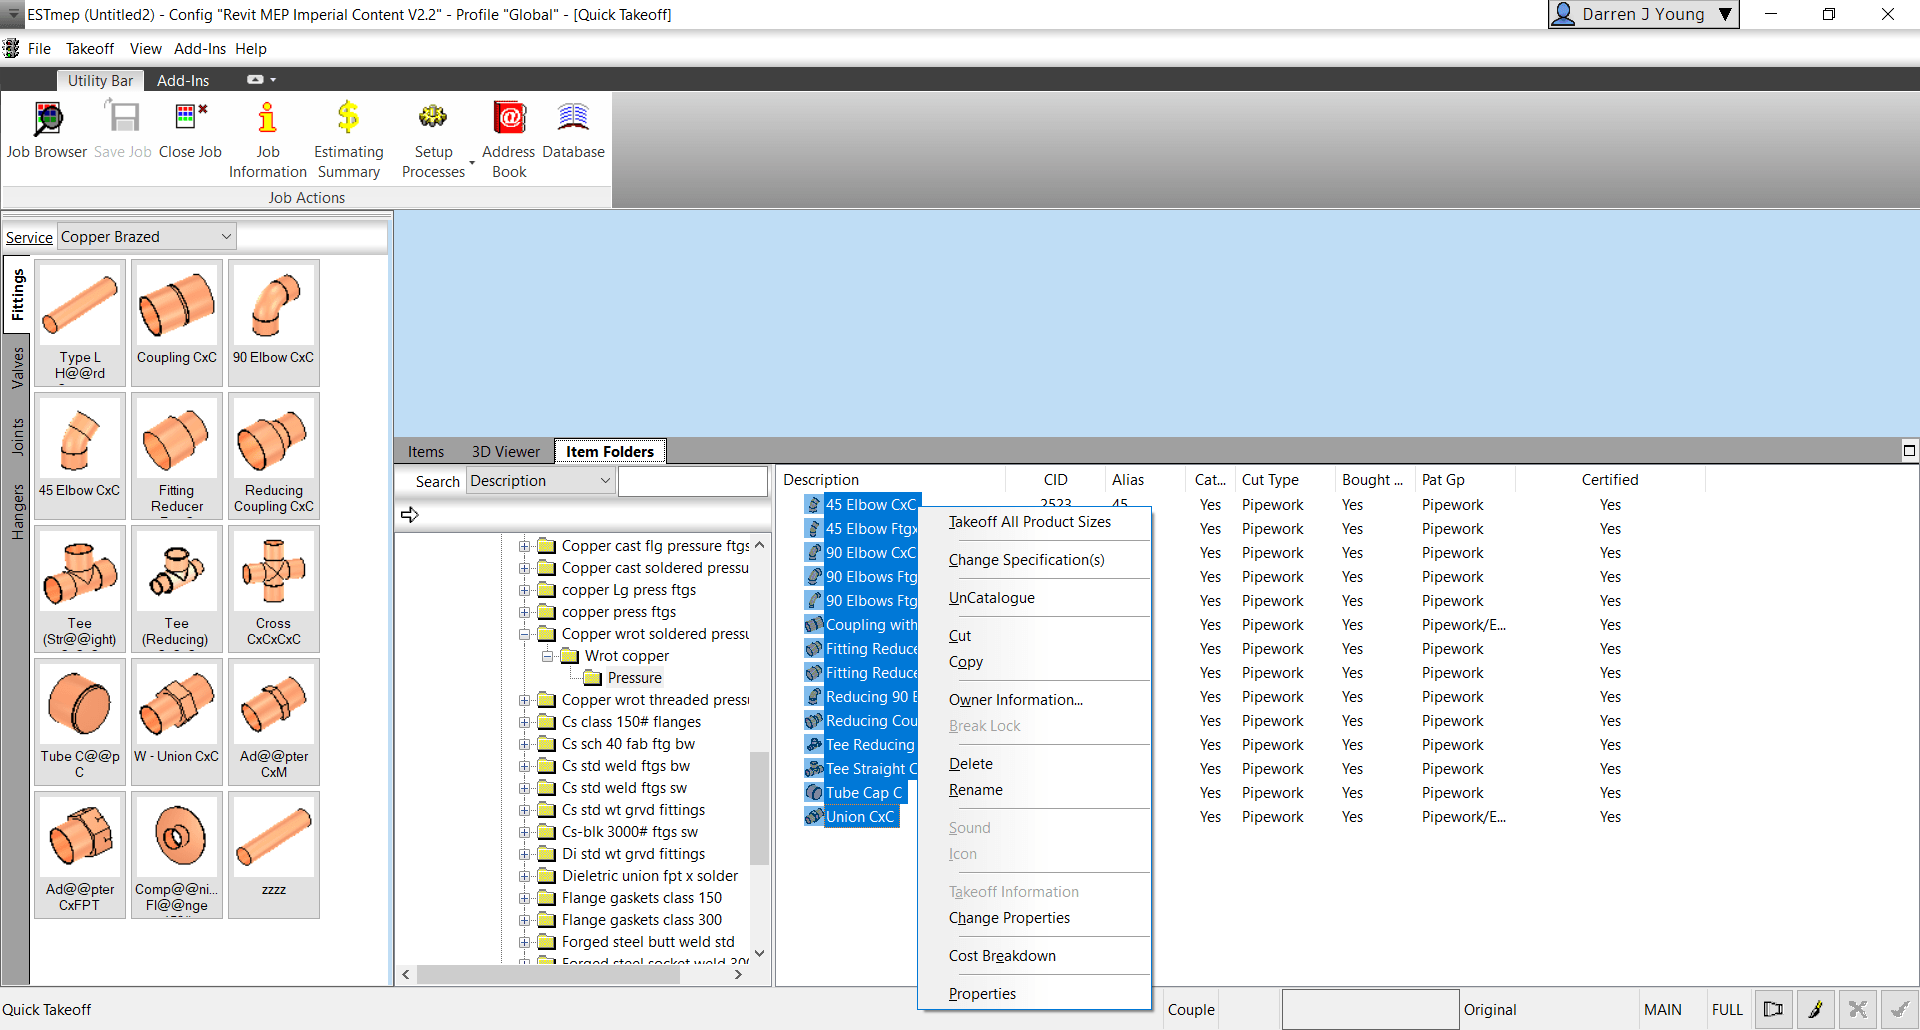
Step 2: Go to Item Folders and navigate to the folder with the ITM(s) you wish to takeoff all sizes for. Select all the ITM’s and press CTRL+SHIFT+Right-Click and select Takeoff All Product Sizes.
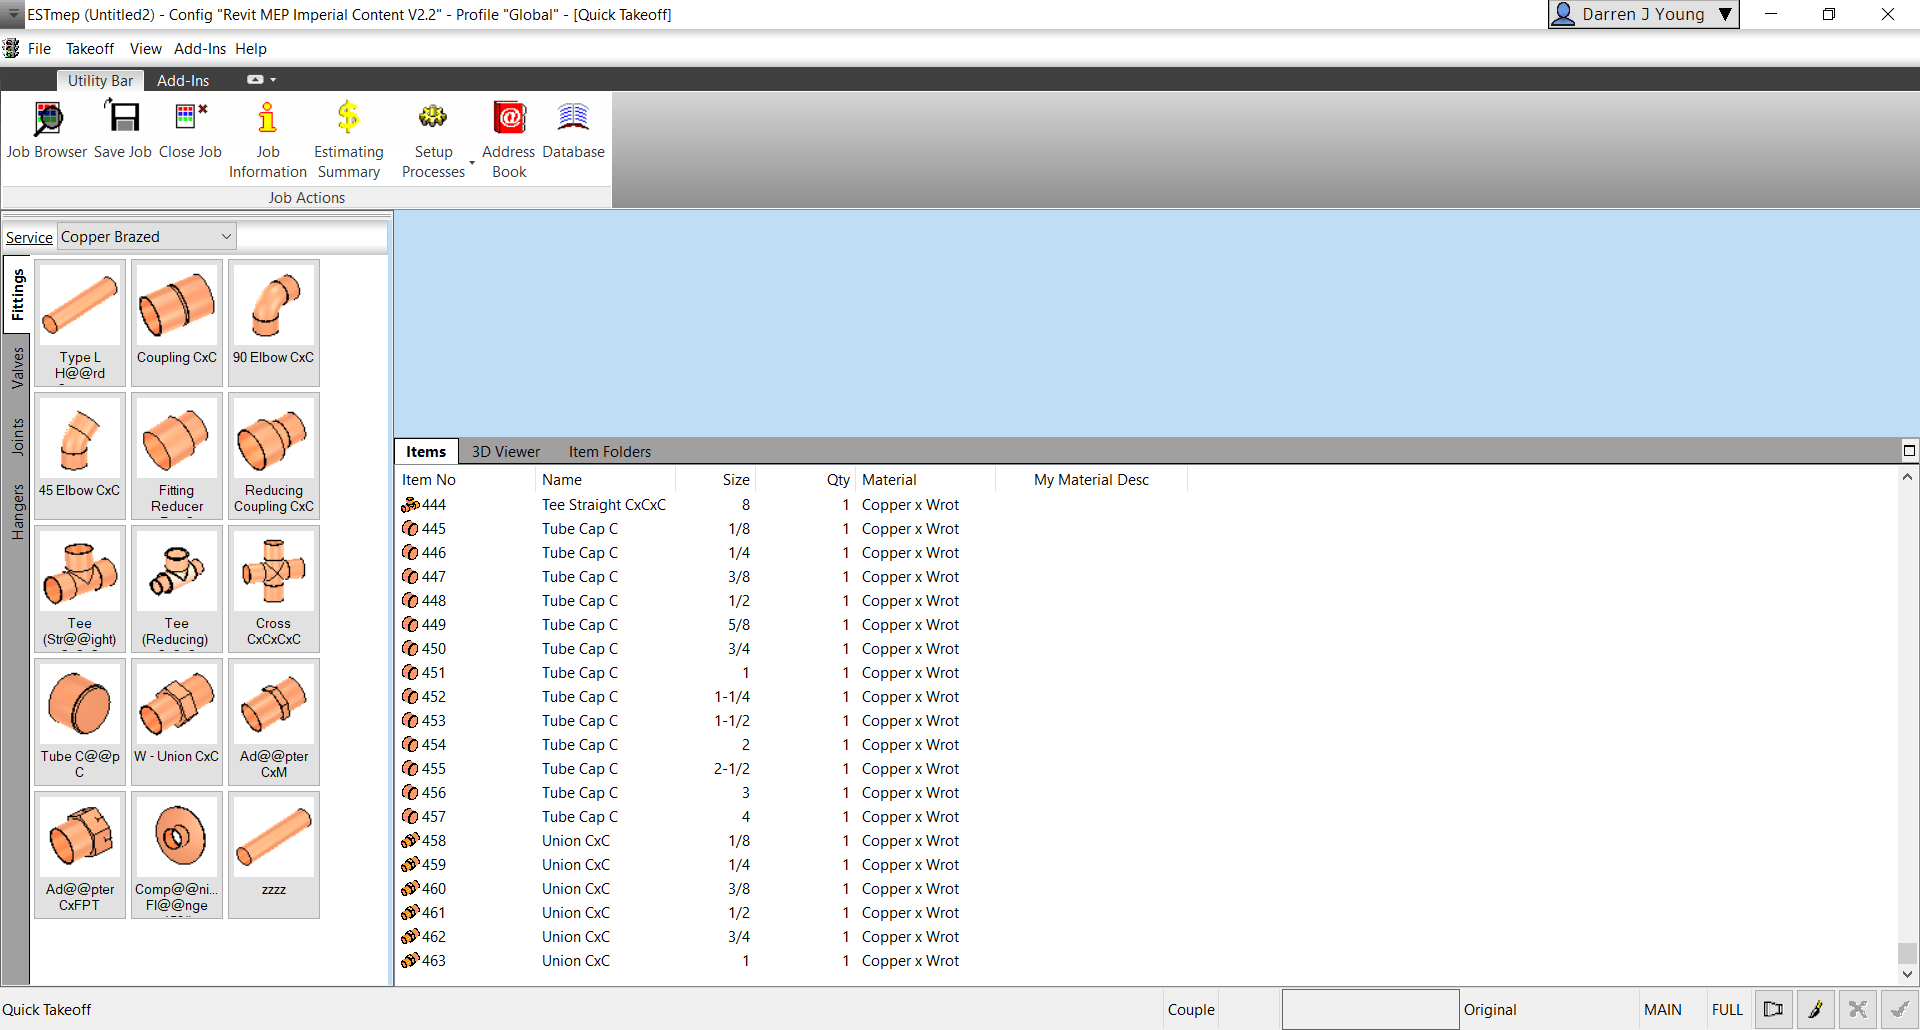
Step 3: Go back to the Items tab and review all the sizes of each item you selected.
Why Would You Do This?
There’s several reasons this may be helpful to you.
Any Size with dimensional errors is quickly found
A simple report shows you where you may have holes in your data (Price, Labor, Product Info, etc.)
Produce a quick MAJ that can be opened in CADmep (OpenJob) to measure each size to ensure dimensional accuracy.
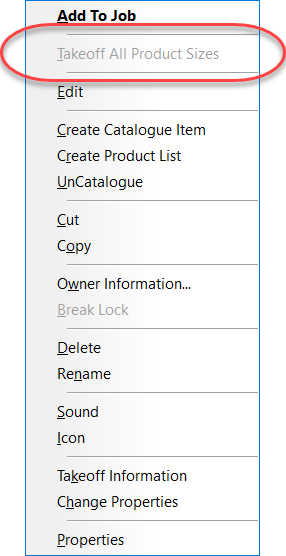
If the option is grayed out/disabled, you’re one or more of the ITM’s in your selection is NOT Product Listed. For this to work, all items you’ve selected must be Product Listed.
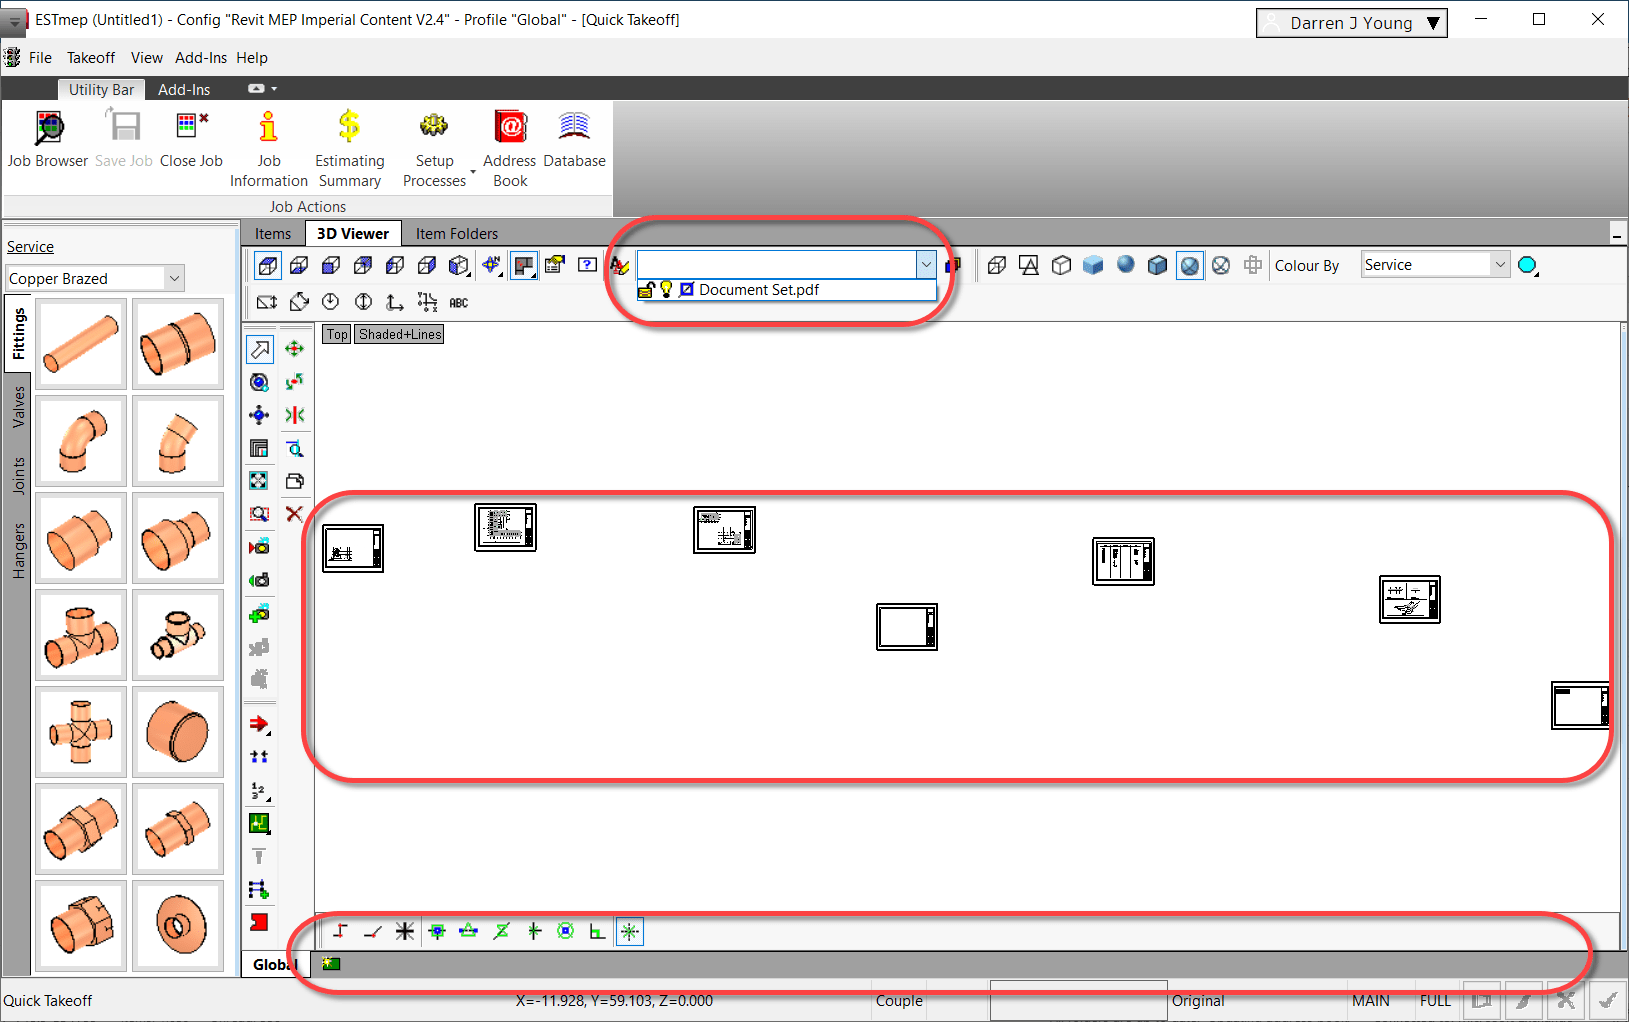
Do use use PDF Underlays in your ESTmep takeoff? Do the Pages come in all at once on separate tabs and layers? Or do you have to place them individually and make the tabs/layers yourself?
Maybe it worked one way for you and all of the sudden it seems to change to the other way for no reason. And despite looking, you can’t find a setting that changes this behavior.
What controls Auto Sheet Placement vs Individual is very easy to control, but it is hidden. Let’s take a look.
Individual vs. Automatic PDF Sheet Placement
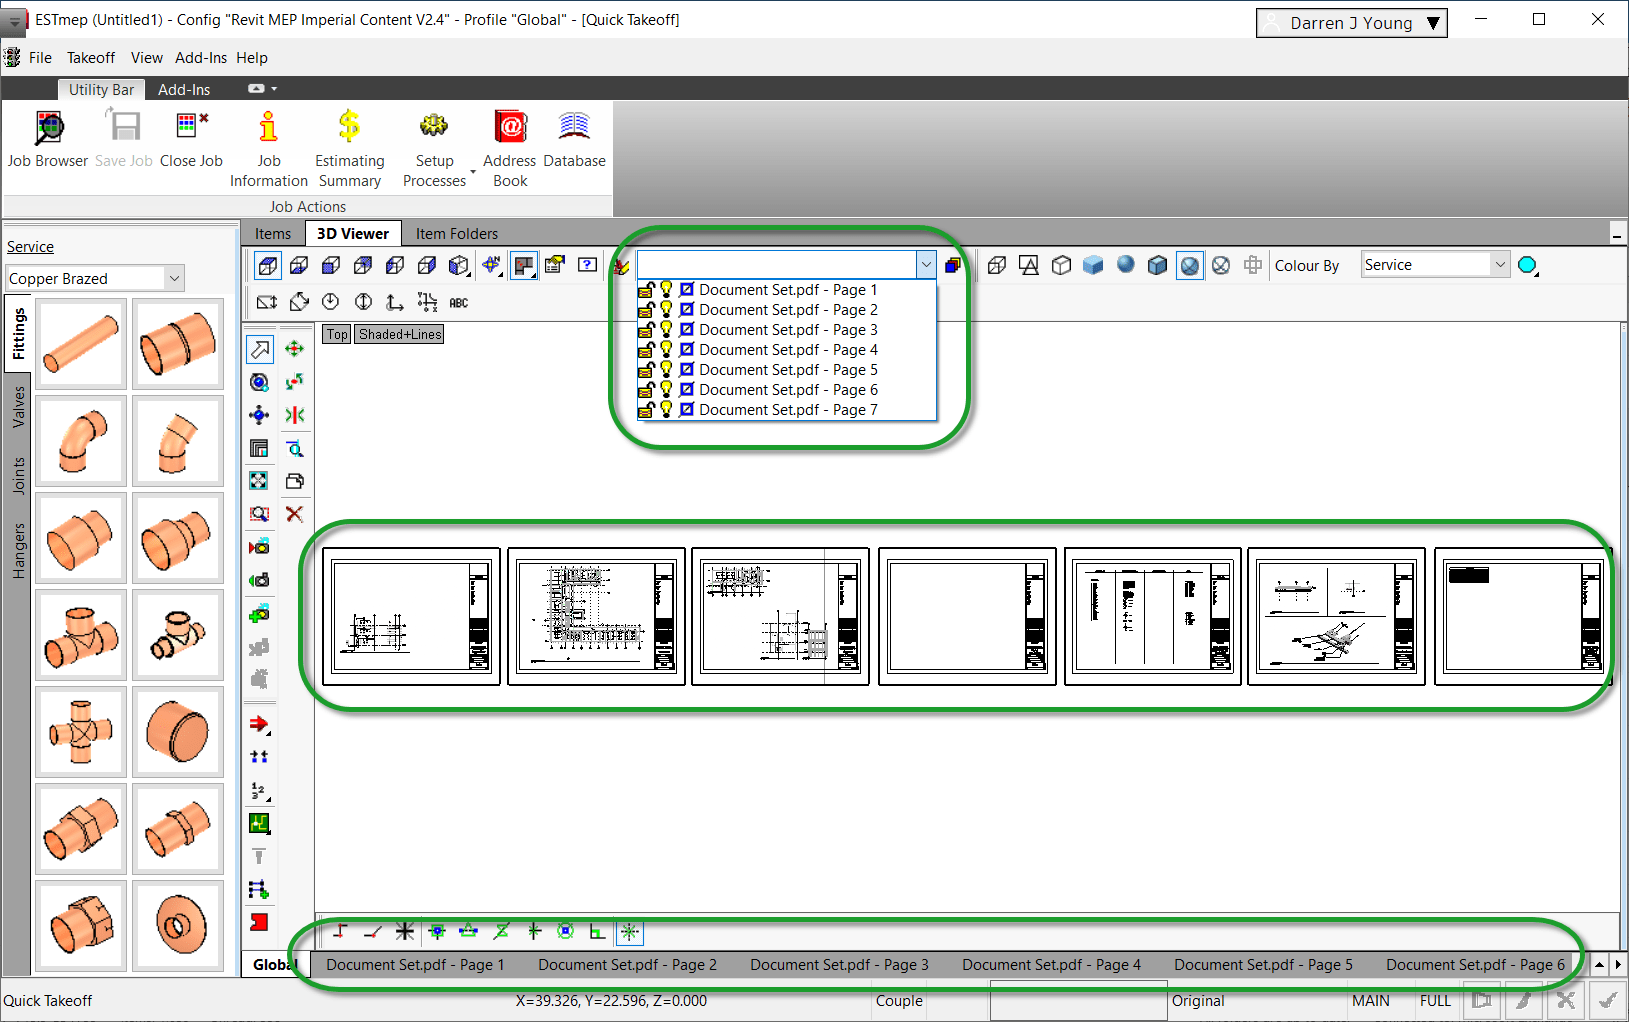
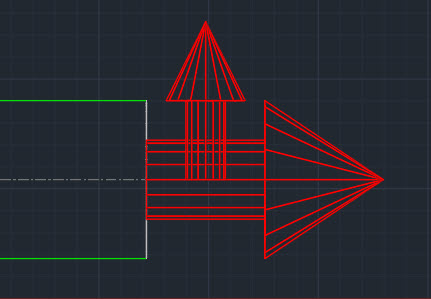
This images shows a 7 page PDF with each page imported as an Underlay separately. Notice they are not on separate tabs and they’re all on one layer.
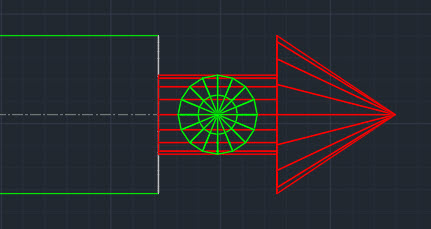
This next images shows what Automatic PDF placement looks like. Notice all sheets evenly placed in a row, each on a separate tab and layer.
So what’s the difference? What’s the magic setting? It all depends on how you select the “of type” dropdown when you select the PDF. This next image should explain it…
Let’s Look at Each Process
Place Sheets Individually One at a Time (of type = *.*)Place Sheets Automatically All at Once (of type = *.pdf)
ESTmep seems like it should be easy to calculate things like Area and Weight. A couple of the major factors in cost. But this couldn’t be further from the truth. It’s difficult to understand “Where” numbers are coming from. Here’s a few tips for troubleshooting.
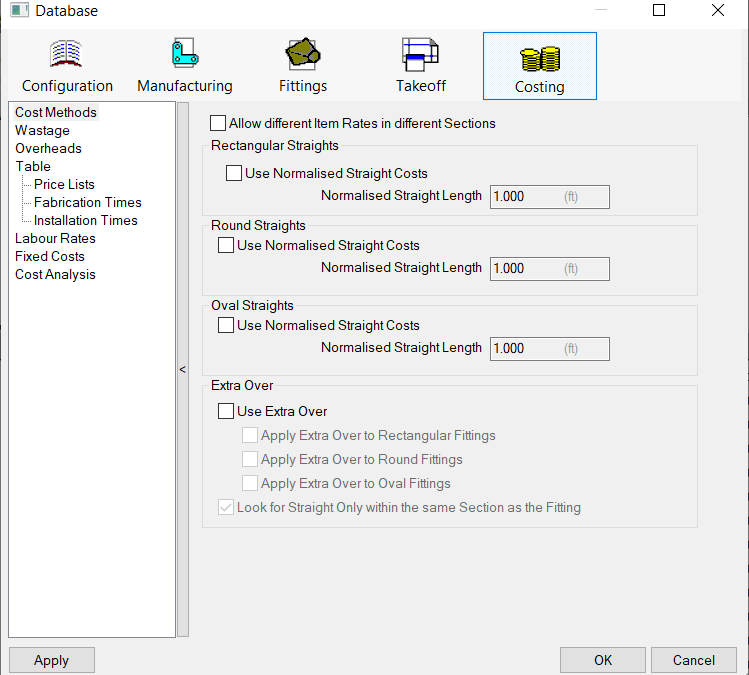
Eliminate Wastage and Costing Adjustments
Make sure Normalization is turned off for costing. You can do that here…
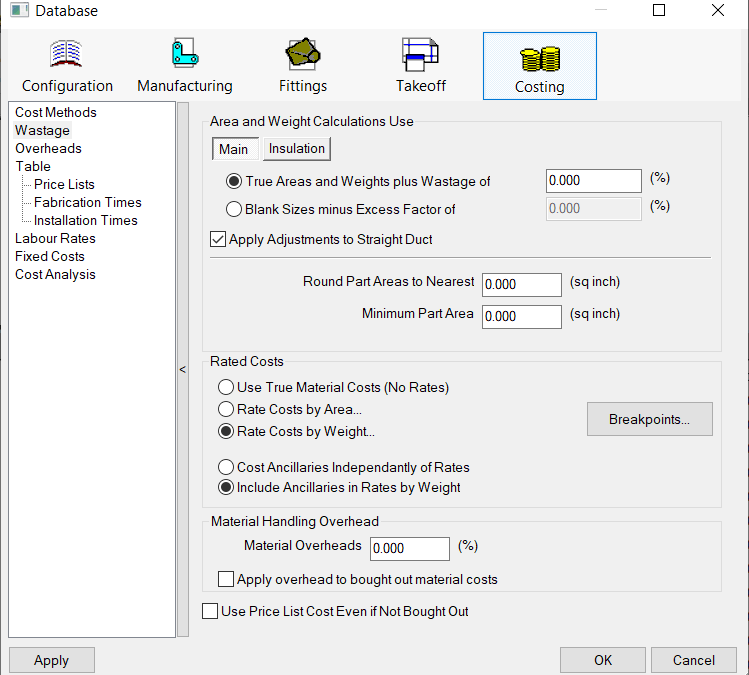
Next, eliminate any Wastage factors. Here’s what that might look like…
Create a Neutral Takeoff
There’s so many adjustments and factors that reporting properties it’s hard to tell what all makes up a number. The best way to find out what makes up a number is to make a Takeoff that eliminates as much of the factors as possible so you start with the core properties.
You can do this by adding Duct with simple numbers…12″ x 12″ x 12″. Duct with no connectors and no seams to eliminate allowances and sealant. Sizes that either don’t use stiffening or a purpose built specification that eliminates stiffening.
In my test, I created 20 pieces of Straight Rectangular Duct, You can do other fittings or Round/Oval too but start with the simplest and once you get dialed in and understood, you can expand to Round Straight or Fittings, etc.
Qty of 1
12″ Width x 12″ Depth
12″ Length
24″ Length
36″ Length
48″ Length
60″ Length
24″ Width x 24″ Depth
12″ Length
24″ Length
36″ Length
48″ Length
60″ Length
Qty of 2
12″ Width x 12″ Depth
12″ Length
24″ Length
36″ Length
48″ Length
60″ Length
24″ Width x 24″ Depth
12″ Length
24″ Length
36″ Length
48″ Length
60″ Length
Customize Takeoff
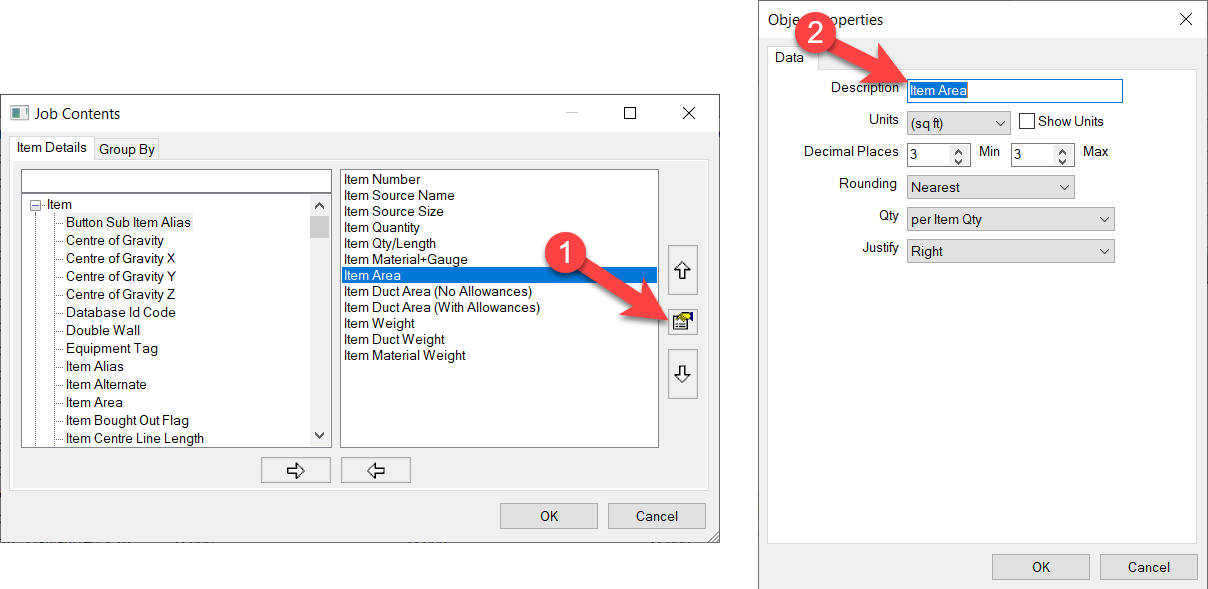
Takeoff in ESTmep can sometimes list “Many” properties for Area and Weight or Quantity. When you add them, they typically just list “Area” or “Weight” making them unclear what they are. You can customize the takeoff Description to reflect which property it maps to. This way you can add them all and see the differences.
Test Various Quantity Units
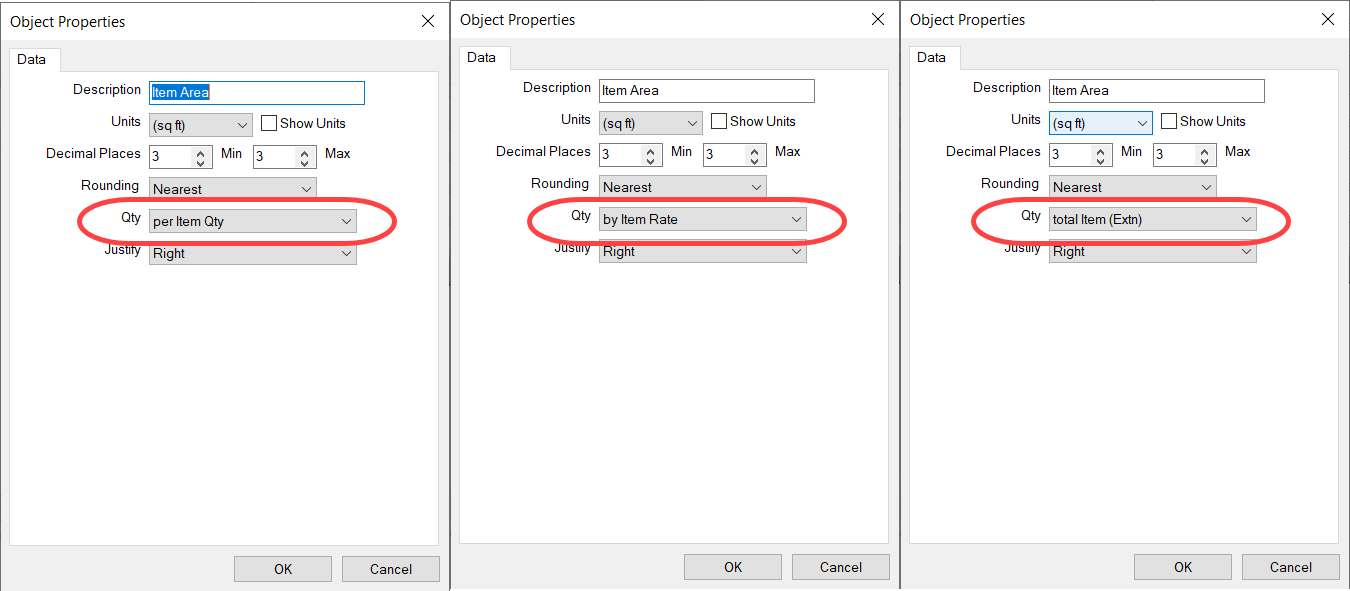
Each Property in Takeoff also has the ability to change the Qty Units. Here’s the 3 settings you have can reflect what Area and Weight is displayed. Here’s what those settings look like…
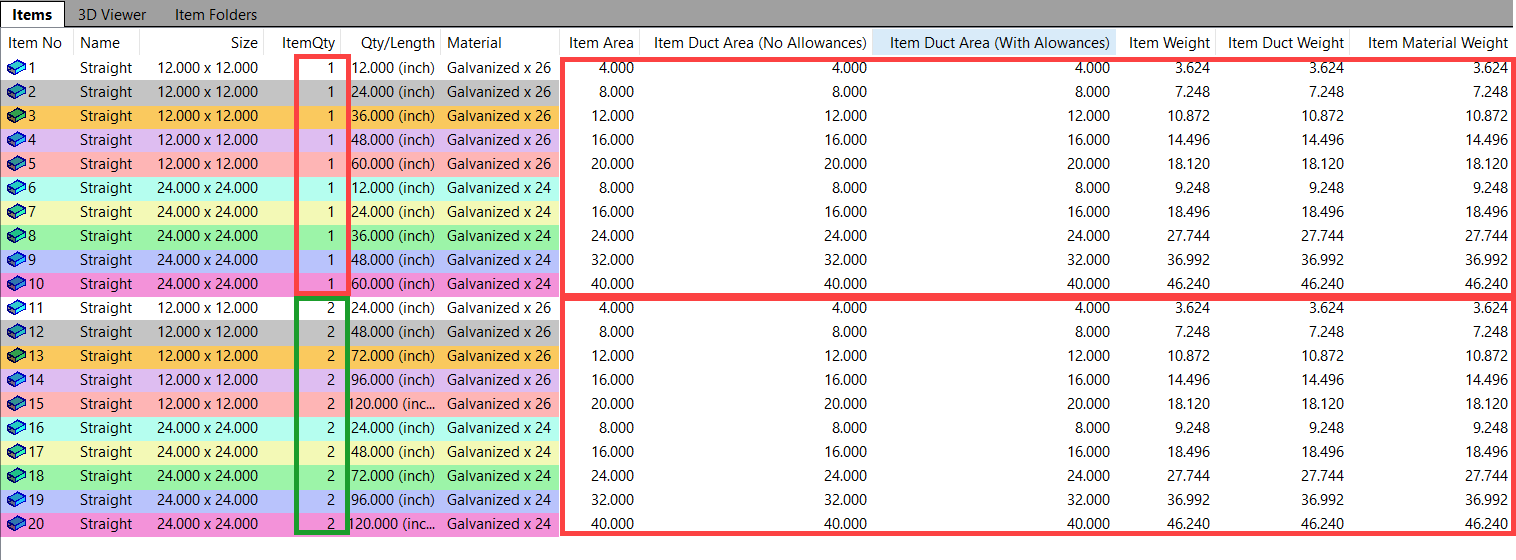
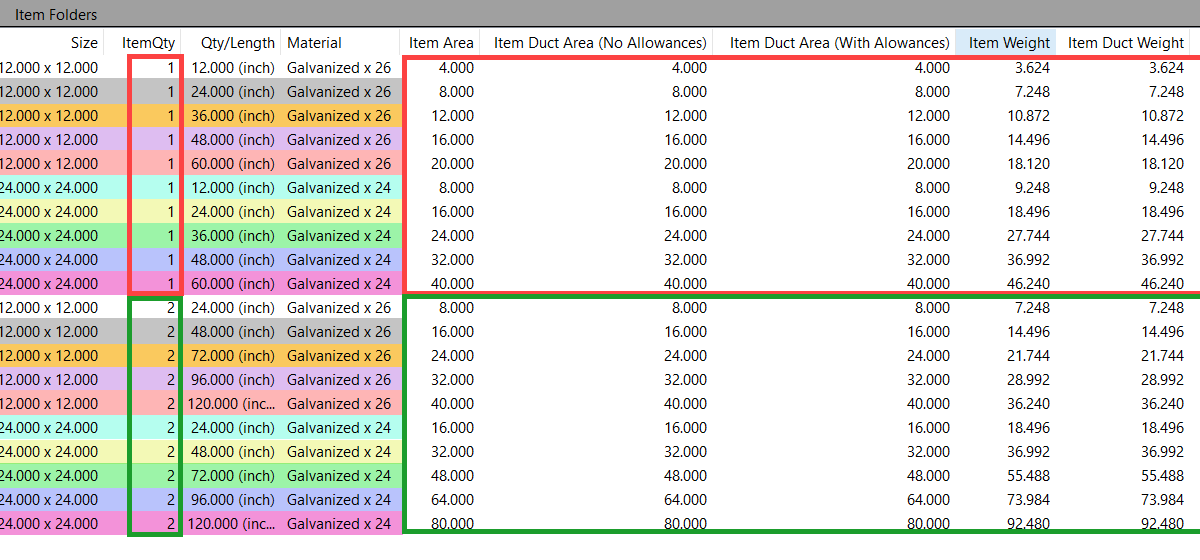
Here’s the results of those settings on my sample duct…
Per Item Quantity
Per Item Rate
Total Item (extn)
You can see “Per ITem Qty” gives you likely the closest to what you want. Exept it doesn’t take into account the Quantity of fittings. Quantity of 1 vs 2 is the same Area/Weight for the respective sizes.
“Per Item Rate” seems to be furthest from what you’d think. It’s really a ‘Per Ft’ value.
Lastly, the “Total Item (extn)” gives you most likely what you want and also taking into account the quanities of fittings.
Validate Data
Now that you have sample data and simple numbers, you can start doing the math. Look at the material and gauge and find the weight or area and see how your numbers respond.
Once you get comfortable that the numers are correct, start by adding in Seams or Connectors and see if the ancillary weights get added as you expect. Note that you’re numbers may be a little “off” based on Seam or Connector allowances and notching. Try adding only one thing at a time.
If you want to test how Wastage or Costing methods apply, you’ll want to go back to simple duct…No Seams…Connectors….Stiffeners, etc.
Keep things simple. Experiment. Check the numbers. Remove one of the factors and add another and try again. Then combine factor and verify your data is adding up properly.
Unfortunately there is no easy path or roadmap. But by starting with simple datasets and incrementally testing added features or factors, you can start to get a better picture of where your values are coming from.
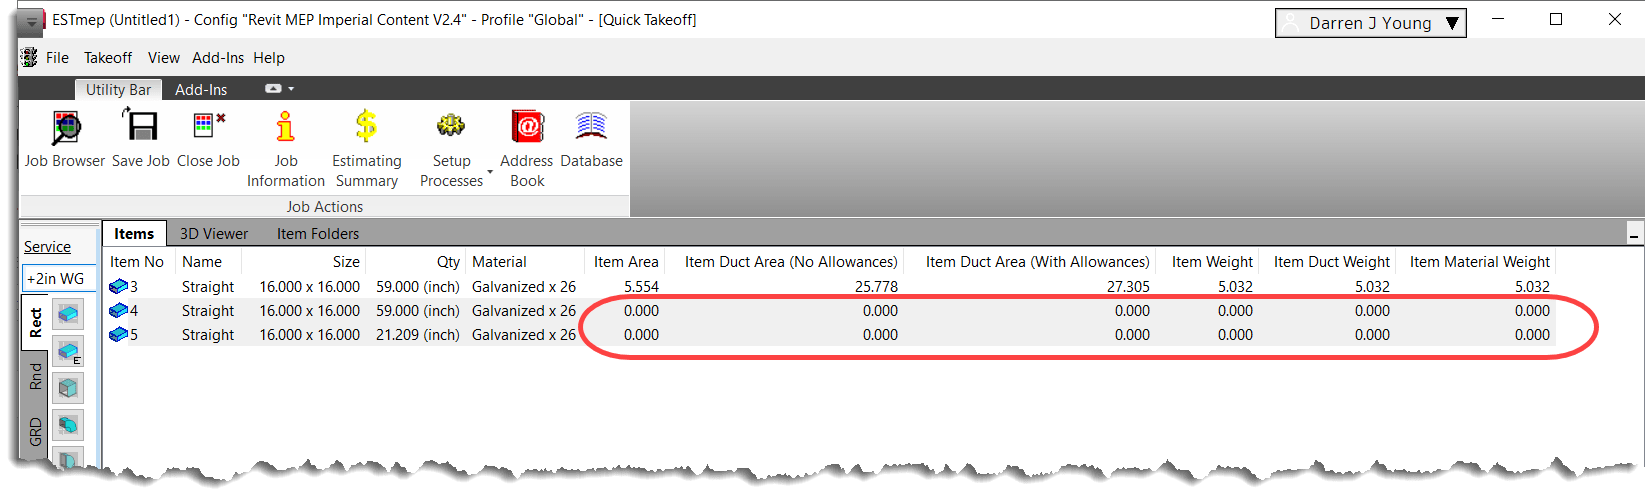
In ESTmep and CAMduct, if you use the 3d View and stretch duct to add pieces, you end up with duct that has zero Area & Weight. This also means you have zero cost for that material.
This is a confirmed issue that’s been around forever. I’ve tested from 2016 thru 2023 and can reproduce in all versions.
Here’s what that looks like…
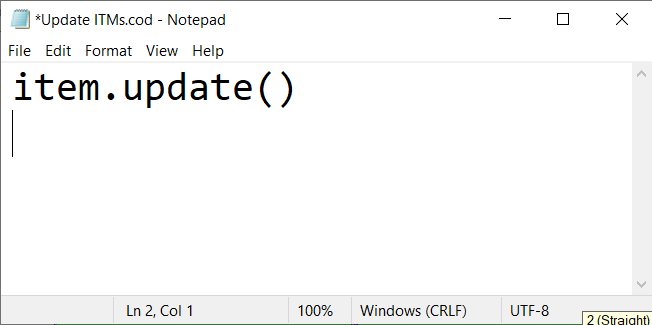
The Fix
The good news is, there’s a quick fix (workaround) you can deploy to update the weight and area. Using Notepad, you can make a quick COD script that updates the ITM’s. Below is what your script should look like…
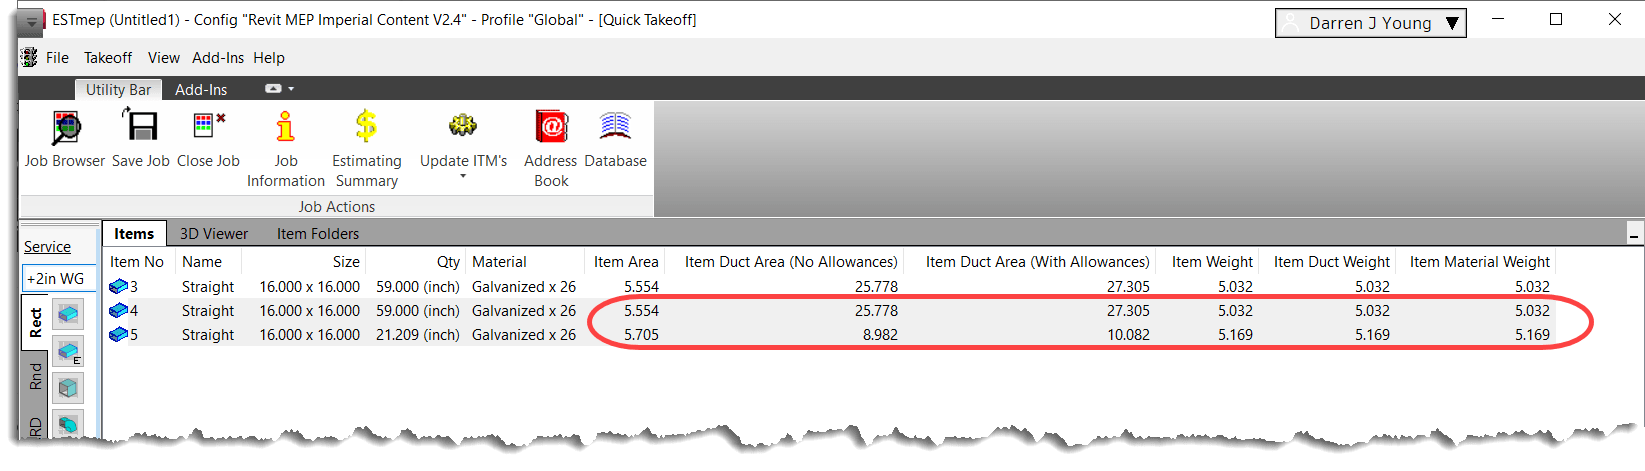
Once you create the COD script, it’s recommended you put it in the SCRIPTS folder of your Fabrication Configuration. From there, you can make a process that calls the script which will update all the ITM’s to their proper Area and Weight. The display on the Item Takeoff may not refresh. If so, just browse to another tab and back. Here’s what that looks like….
So, which this doesn’t “Fix” the issue, it does work around it fairly easily. Just run the process before running and reports or data exports.
Seems obvious once you see it but sometimes the easy things are the most ellusive.
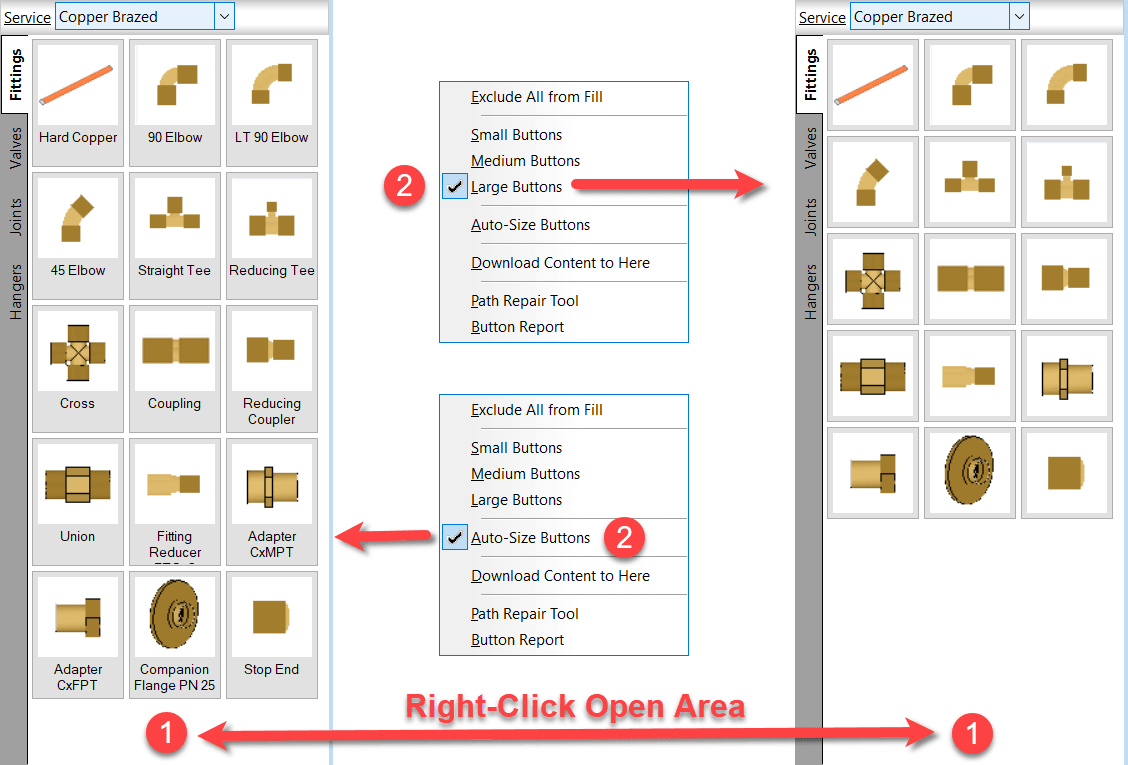
If you’re noticed descriptions on some of your computer’s fabrication palettes and not others, it’s likely the “AutoSize” option you’re looking for.
Right-Click on an open area of the service palette and select the option you prefer. This applies to CADmep, CAMduct and ESTmep. Revit…not so much. Revit likes to do it’s own thing.
CADmep, ESTmep and CAMduct all use the concept of an Attacher. This is what tells Fabrication which way to route elbows and branches.
Most people know how to place and rotate the Attacher. There are a few other tricks to working with the Attacher that you may not know about.
Up or Down, How to Get Around
Depending on your view orientation, you may notice part of the Attacher turns from Red to Blue or Green. As you rotate the Attacher it’s color will change to indicate the direction the arrow is pointing.
Green = Grass (Attacher is pointing away from you)
Blue = Sky (Attacher is pointing toward you)
Rotation Tricks
Depending oh which program you’re in (CADmep, ESTmep or CAMduct) and the keys you press, the Attacher rotates differently. Here’s a chart explaining those nuances.
Rotation
Method
CADmep
ESTmep
CAMduct
90 Degrees CCW
Click
Yes
Yes
Yes
90 Degrees CW
Shift+Click
No
Yes
Yes
180 Degrees (Flip)
Ctrl+Click
Yes
Yes
Yes
15 Degrees CCW
Alt+Click
Yes
No
No
CADmep – Click Attacher to Rotate Counter Clockwise 90 DegreesCADmep – Ctrl+Click Attacher to Rotate 180 Degrees (Flip)CADmep – Alt+Click Attacher yo Rotate Counter Clockwise 15 DegreesESTmep / CAMduct – Click Attacher to Rotate Counter Clockwise 90 DegreesESTmep / CAMduct – Shift+Click Attacher to Rotate Clockwise 90 DegreesESTmep / CAMduct – Ctrl+Click to Rotate Attacher 180 Degrees (Flip)
If you use network licenses or create network deployments of CADmep, CAMduct or ESTmep you may encounter errors. Autodesk incorrectly pathed the Network License Manager files in the SETUP.INI files.
Even if you are using Stand Alone or User Based Subscription licenses but build Network Deployments, if you configure the deployment to include all components in the deployment (recommended if you plan on modifying the deployment later) you can encounter errors.
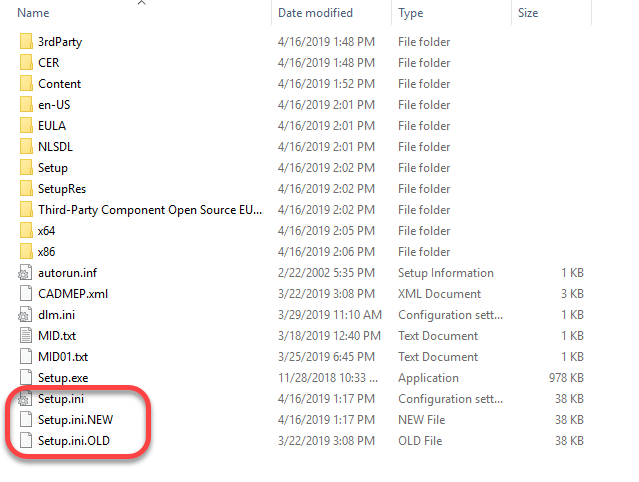
To correct the errors, you can replace the SETUP.INI files that are part of the installation with the ones provided in the following ZIP file…
Before you overwrite your installation’s SETUP.INI file, it’s a good idea to backup the original. The root of my installation folder looks like this…
At some point, I would expect Autodesk will update their download data and provide the proper files. Because of this, I would highly recommend NOT replacing the SETUP.INI files unless you encounter issues.
What’s Different?
If you’re curious what’s different between the two, you can open the INI files in Notepad or other text editor and view them there.
The original file contains this at the end of one of the entries…
Third-Party Component Open Source EULAs:x64\en-US\Tools\NLM.msi
The new SETUP.INI files have updated it to this…
Third-Party Component Open Source EULAs:x86\AdskLicensing\NLM\x64\NLM.msi
Here’s another simple Attacher tip for Fabrication products. If you hold down the Shift key while clicking on the Attacher arrow in CADmep, ESTmep or CAMduct,. the arrow rotates the opposite direction.
Clickingthe Attacher – Notice it Rotates in the “Clockwise” Direction Clickingthe Attacher – Notice it Rotates in the “Counter-Clockwise” Direction
Sometimes the best tips are the simplest. They can often be forgotten about or never learned because of that. Here’s a reminder for those that may not know or have forgotten…
In CADmep, or the 3d viewer of ESTmep or CAMduct, you can hold the Control key while clicking the attacher arrow to rotate the arrow 180 degrees. The below screen recordings are both done from CAMduct but ESTmep or CADmep work just the same.
Clickingthe Attacher – Notice it Rotates in 90-Degree IncrementsCtrl-Clicking the Attacher – Notice it Rotates in 180-Degree Increments
Over the years, I’ve written a number of scripts helpful for managing an Autodesk Fabrication configuration. I’ve given them away in my Autodesk University session I’ve taught so they’ve circulated around a bit.
I’ve rewritten most, streamlined them, made enhancements, added others, etc, etc. Because I’m always updating and changing them, I thought I’d host them here too. I can then just post when I update them.
There’s are 2 sets of scripts covering the following topics…
Debugging Properties Scripts
Job Item Scripts
Library Item Scripts
One set is for use in 2019.0 and earlier versions (but work in any version), the others are designed for 2019.1 and later when Autodesk added support for the Pattern Number property.
You can get to the scripts from the menu or click here. The scripts are free to use for all except employees of ENGworks or anyone working on the behalf of ENGworks. (contractors, consultants, etc.) who are prohibited from use.