When you build content, it’s often desirable to have certain dimensions or options locked. This even applies to connectors, seams and dampers but to a lesser degree.
If you have a lot of Dimensions and/or Options to Lock or Unlock, you don’t have to individually pick each one. You can lock or unlock many very quickly provided they’re in a row.
The trick is simple….pick the button to lock/unlock the first field you want to change, and then while still holding the pick button drag your mouse up or down. This is a fast an efficient way to lock large groups of properties without picking each one.
The following recording shows this process. We’re using Pattern Number (CID) 910 as our example.
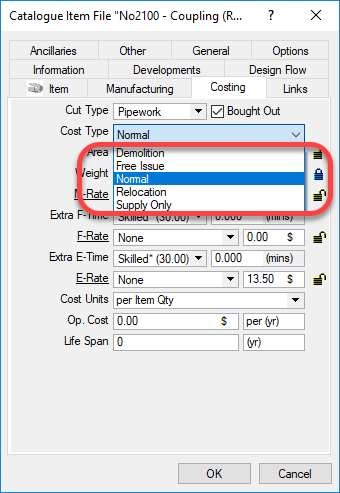
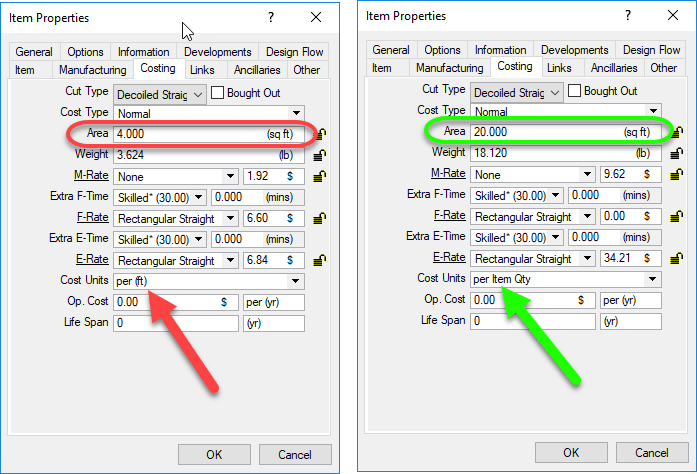
When you build Autodesk Fabrication content, you may have noticed one of the properties “Cost Type“. You can see this setting is shown in the following image.
If you do some searching online, you may run across an explanation for some but not all. As Autodesk explains in it’s online help….
Normal – Reads the Material, Fabrication, and Installation tables to generate costs of all materials, fabrication labor and installation labor.
Supply Only – Reads the Material and Fabrication tables to generate the same costs of material and fabrication but NOT installation. (You’d typically use this if you are fabricating for others outside your company.)
Free Issue – Reads only the Install table when calculating costs.
This leaves two remaining values that can be set. These are not documented by Autodesk. These two serve the same purpose…
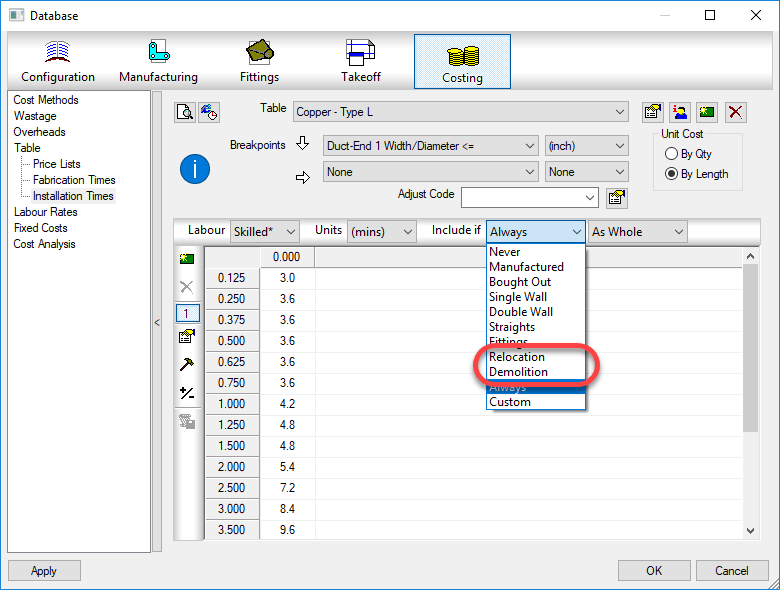
Demolition – Used as a filter for Labor table value sets
Relocation – Used as a filter for Labor table value sets
Using these values would allow you to build a labor table for relocation that would include uninstall and reinstall time. You could also use the demolition value to build a labor table for removal only of an item.
While you would think these only would apply to an install table, these filter values are also available for the fabrication table. At the very least, this opens up the possibility of using it in creative ways to serve whatever purpose you like.
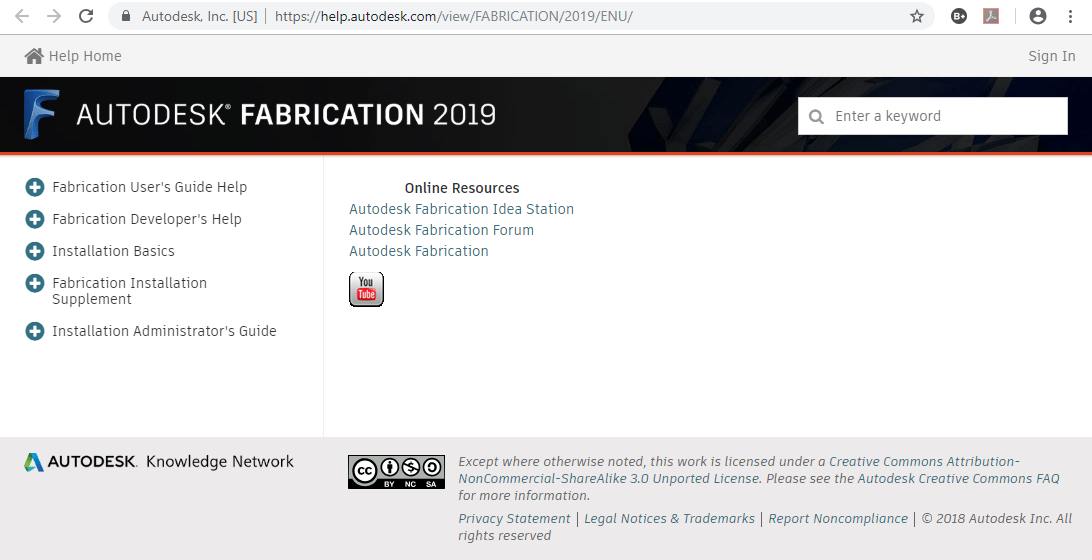
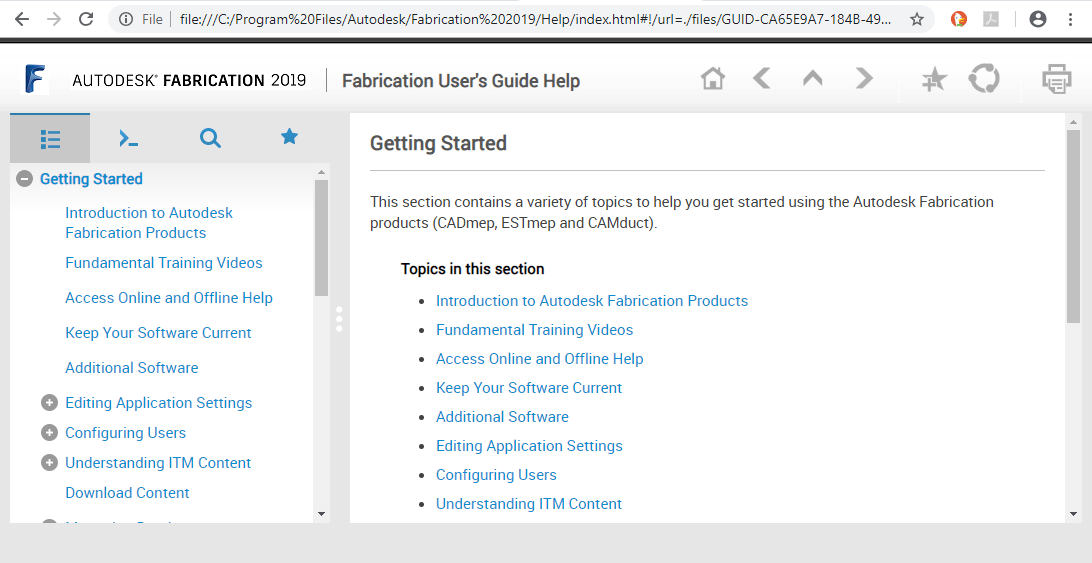
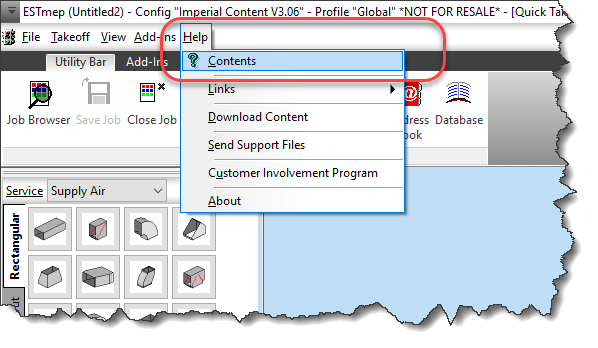
It’s sometimes easy to miss new things. This is why I want to point out something that was added in 2015. CADmep now has an APPHELP command. You can type APPHELP at the command prompt to bring up CADmep’s help system.
If you’re online, the help is pulled from Autodesk’s web site from the following URLs…
But what if you’re using CAMduct or ESTmep? No worries. The other products work the same way. Instead of typing APPHELP, type F1 on your keyboard or use the Help pull down menu.
Only One Concurrent Database Administrator at a Time.
If you use a shared database (such as on a network location), you’ll want to lock down who can edit the database and restrict that to a single concurrent user. Many areas of the Autodesk Fabrication database are large tables. If two or more users have the ability to edit those tables at the same time, you’re asking for problems. That is, the last user to edit the database wins and the other looses their changes.
Here’s how that happens….
User A logs in with full administrative permissions. User B then logs in with full administrative permissions.
At this point, both users are on the same page because they both loaded the database into the computer’s memory.
Now lets say, User A creates some new materials and connectors for some content they are building. At the same time, User B creates a new service and exits.
User B now has their new service written to the database on the server. That’s good. But User A doesn’t have those changes, they opened the database before those changes were made. When User A exits the database, what’s in memory on their computer gets written back. This is their new connectors and materials, but also the original list of Services without User B’s changes.
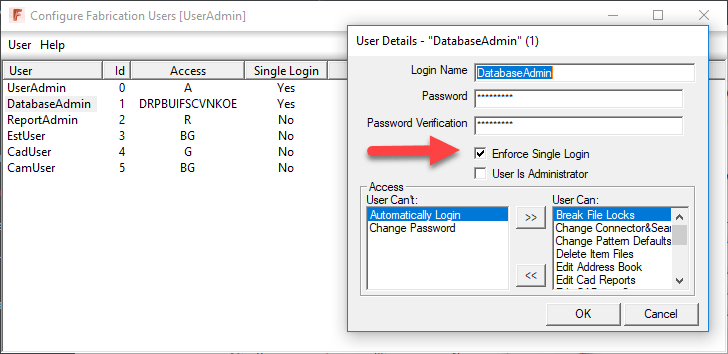
For this reason, it’s a good idea to create a separate user account used only for Database Administration work and limit it to a single concurrent user. To do this, use the “Configure Users” program that comes with all of the Fabrication products. The following image shows the setting that allows a single concurrent user and all the settings this account could (should) have.
Now if you look closely, you may notice I typically have a couple other Admin accounts in there. Once users are setup, you typically don’t need to mess with them again so I create a separate account only for this purpose but you wouldn’t have to, it could be combined with the “DatabaseAdmin” account.. This is the “UserAdmin” account shown in the image. I also restrict this to a single concurrent user and guard it’s password to only a few select people who really understand how the Fabrication Database works.
For every rule, there’s an exception and you’ll also see a “ReportAdmin” account. This account is NOT restricted to a single concurrent users and here’s why…
When you edit most database settings, you’re editing a large database table with lots of entries. When you edit a report, you’re editing a single file for that report only. The chances that two or more people will edit the same report at the same time is very small. This means multiple users can create multiple reports at the same time and each will save to their own file.
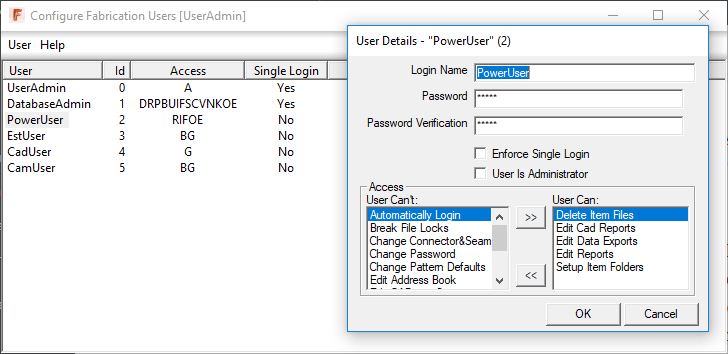
Much like Reports, content (ITM files) are separate file based and will most likely not have more than one person editing the same ITM at the same time. This means you could also create a separate “ContentAdmin” account that lets you setup and delete folders only (no other permissions). Alternatively, you could combine both of the Report and Content accounts into a single “PowerUser” account that does both like in the following image…
Using a less restricted account like this allows more people to create Reports or Content without creating a bottleneck in your workflow. Those creating ITM’s won’t be able to create new connectors or materials or other settings, but they can make new ITM’s that point to existing database entries. This will help you scale your content building activities when you get a last minute request for a large library of pipe fittings. Your primary database admin will use the restricted “DatabaseAdmin” account to create the needed materials and connectors, and you can then have a large number of users making ITM’s using the “PowerUser” account in a safe manner,
Based on a lot of years experience, I’ve been told many times by people that they are careful to not have two or more people go in at the same time and don’t need to restrict their accounts. But I can also tell you, the more I make sure it can’t happen with these restrictions instead of letting them assure me it doesn’t happen because they’re “careful”, the less “unexplained” problems and corruption I see.
This warrants a little explanation. Many companies have multiple locations and need to sync Fabrication configurations between those sites. Other companies have their Fabrication configuration copied locally to the users system from a central network location.
To keep from having to manually keep different sites or local computers up to date, it’s natural to look so some of the many technology solutions like Microsoft’s One Drive, Box.net, Dropbox, Google Drive, DFS Replication etc.
Here’s the problem….most of these solutions sync files in their own order and time frame. You often can’t control when they sync. When using CADmep, ESTmep or CAMduct, just using the software can cause the program to read back from the database files. Many of the database files reference each other using indexes. Take for example, the Specifications and Materials….both of those database areas refer to each other.
When changes are made, what happens is the files get updated where you make the changes, but the two files that get changed, may sync somewhere else at different times. As you’re using the software, if it happens to reread some of the database files when some are sync’d and others aren’t, this can cause unspecified problems.
One of the more common issues is when a system you’ve drawn changes to a completely different system. Have you ever had a Cast Iron No-Hub waste line all of the sudden day it’s Supply Air 2″ Positing Water Gauge? This is our of sync syncing issues is often the result.
How do you work around this? Try to find sync solutions that allow more control, like after hours sync. I personally like an old batch file running RoboCopy as it allows a lot of control and I can have it fire up when the user logs on. They can also manually run it during the day if I push our a critical update otherwise the get the update tomorrow when they log in. When syncing servers from different sites, I schedule it to run after hours.
This issue is most common w/CADmep, ESTmep and CAMduct. Because Revit loads and stores your services, it doesn’t read back to the database unless you explicitly tell it to reload the services so it’s risk is greatly reduced to the point where I wouldn’t worry about it.
Now, there are people that are doing local Sync’s in real time. My prior firm, we had some…let say…”creative folks” who would take liberties with the database if they knew it was local. As such, I used Windows OffLine Files to sync a local copy but make it look like it’s still on line. This is a Sync’d local copy and goes against what I recommend above. However, we forced it to rescan frequently so when there were changes, they were small, just a few files and they’d sync quickly about the same time. Larger changes involving a lot of files can open up your risk window to having issues.
If you’re going to use life syncing utilities, proceed carefully and watch for unexplained issues. Making large changes after hours and smaller changing during working hours can help.
And if you’re considering using Window’s Offline Files, prepare for a long learning curve and experiment with yourself first. Offline Files have little control from the User Interface and is best managed with Group Policy.
After a very brief appearance toward the end of October, the Fabrication updates for 2018.3 and 2019.1 are back on line as of today.
Unlike previously speculated, they were not removed due to issues. They were intended to be released later but were inadvertently released early. If you happened to have them from their initial release, you don’t need to download the update again, the build numbers did not change. However, the PDF documentation of fixed issues on some of them did get more information listed in what was fixed. You can review all the issues addressed here…
On October 23 2018, Autodesk released Update 2019.1 and 2018.3 for all the Autodesk Fabrication products. Within a week, the updates have disappeared. This most often happens when a critical issue arises with the update. No word on what it may effect but when this has happened in the past, the issues were often significant.
I have not taken the time to uninstall and reinstall my Fabrication products as I don’t do production work. I would advise anyone that does production work to seriously consider this if they’ve already applied the updates.
So far with the limited Fabrication database administration I’ve done I haven’t noticed anything. I have tested nearly 1-1/2 dozen support issues I’ve logged over the last year and a half and only 1 was addressed. Many of my issues affected incorrect sheet metal pattern developments and require manual fixes each time.
If you’re interested in the issues that were suppose to be addressed, please refer to my Fabrication update page. Links are below. If past history holds true, the new updates will come out a month from now and be new versions which may not list the issues that were corrected.
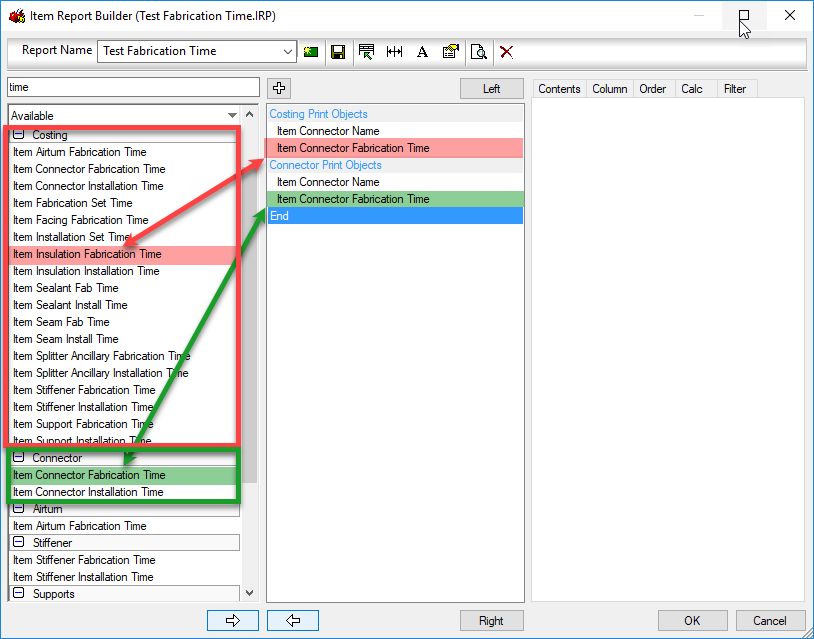
Autodesk Fabrication reports can be tricky. It’s not always clear what’s happening with the data you’re trying to report or where it’s coming from. To make matters worse, some print objects are listed more than once.
These duplicate print objects are not just in multiple categories for you’re convenience when building reports. In fact, they don’t even report the same information.
In this example, we’ll look at Item Connector Fabrication Time as it applies to a Tee duct fitting, Each Tee fitting has 3 connectors which we’ve set to a Ductmate connection. We’re using this connector because it has labor attached to it in the default Imperial configuration that Autodesk ships with Fabrication CADmep, ESTmep and CAMduct.
The following image shows our report editor for an Item report. The Red and Green shows the same name for the print objects. One is located in the Costing group and the other in the Connector group.
Red and Green Print Objects are the Same Name but from Different Groups
The “Costing: Item Connector Fabrication Time” print object returns the time for ALL the connectors on the fitting. The “Connector: Item Connector Fabrication Time” print object on the other hand return the fabrication time for each connector individually.
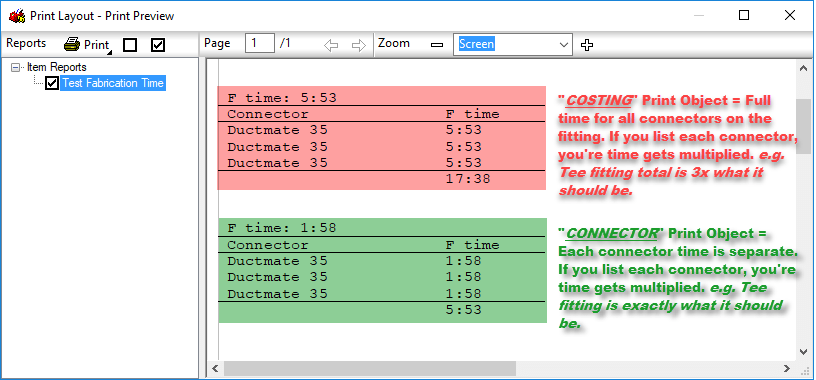
The next image shows the preview of our Item report. Costing Print object is in the top table (red) and the Connector print object is in the bottom table (green).
Top (red) Table is Showing 3x the Fabrication Time as the Bottom Table.
Now, there’s nothing really wrong with the top (red) table that uses the Costing print object except one thing. The Connector Name print object is located in the Connector print objects group which is based in “each” connector”. Using the Connector Name will list the connector 3 times, but it;’s mixed with the print object from the Costing group. This means that the table, shows 3 rows, one for each connector (Name) but the Fabrication Time for each connector listed, is the total for the entire fitting. When totaled, this results in a Fabrication Time 3x more than what it should be for the Tee fitting we used as an example.
You can download a Zipped copy of the IRP used for this test here. Just unzip the *.IRP file and copy it to the folder for your reports in your Fabrication configuration.
To recap, be very cautious about grabbing the first print object you see in a report when you scroll through them. There may be duplicates and they could yield different results. Once added to your report, it’s very difficult to know where that print object was from without intimately knowing the differences between them.
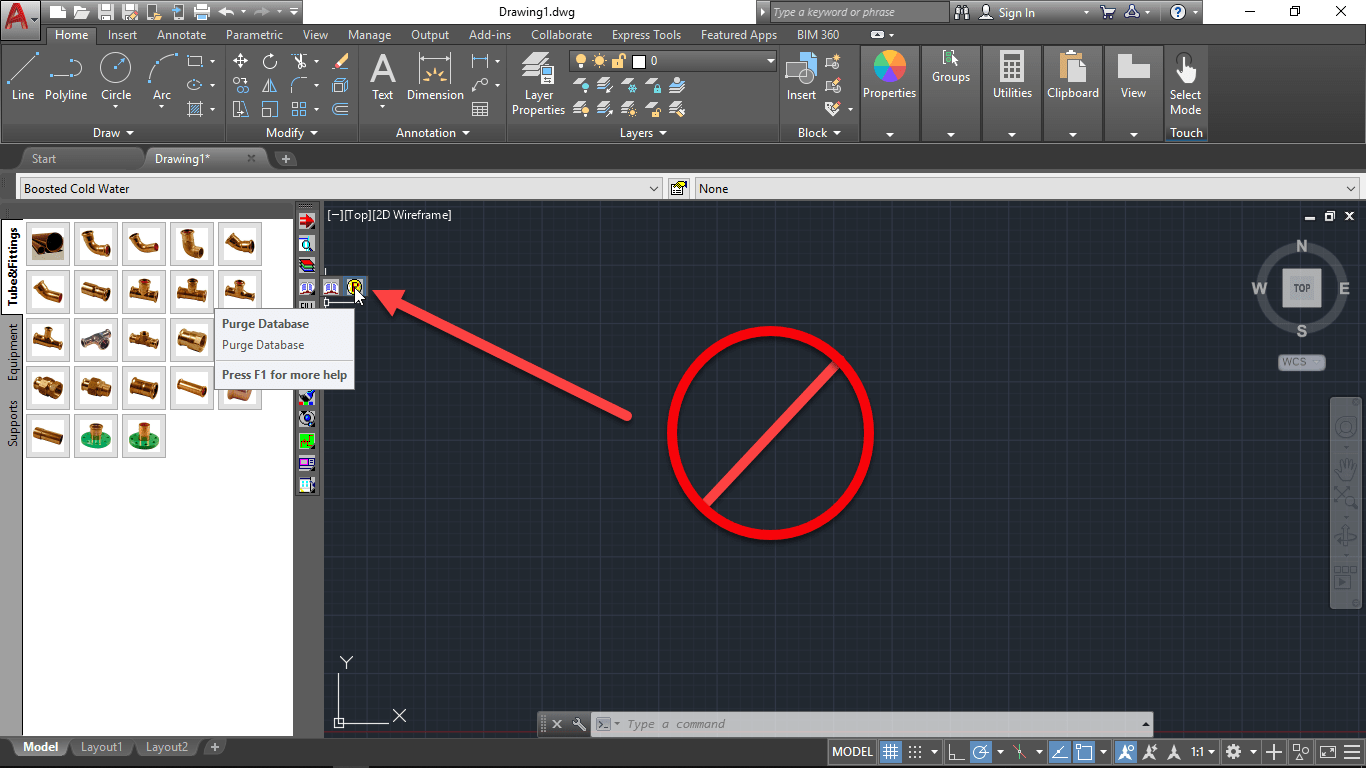
If you’re running 2019.0.0 versions of Autodesk Fabrication, you should be aware of this critical issue.
When using purging the fabrication database, the command will delete all of the content on your service templates leaving them with no buttons or content.
There are several ways to access this command. In CADmep, PURGEDB is accessed from the toolbar…
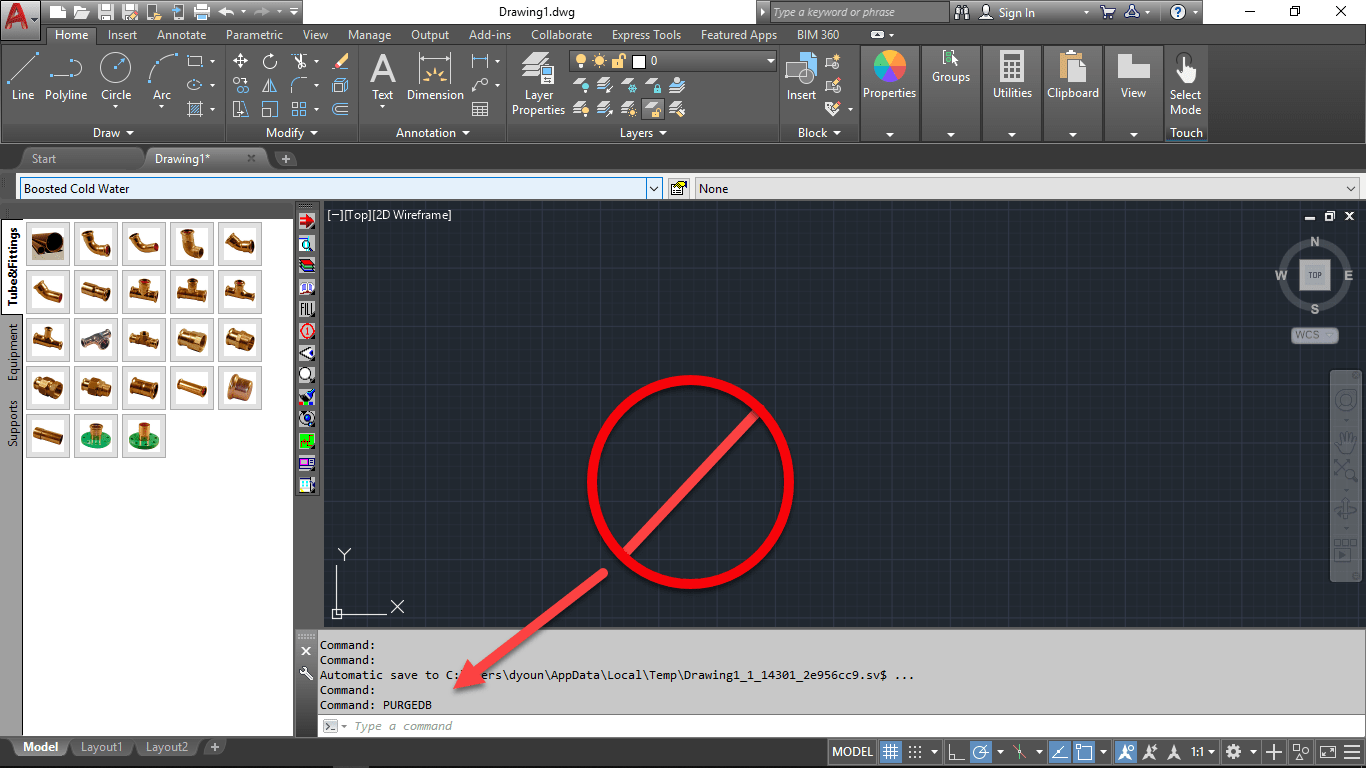
You can also type PURGEDB from AutoCAD’s command line.
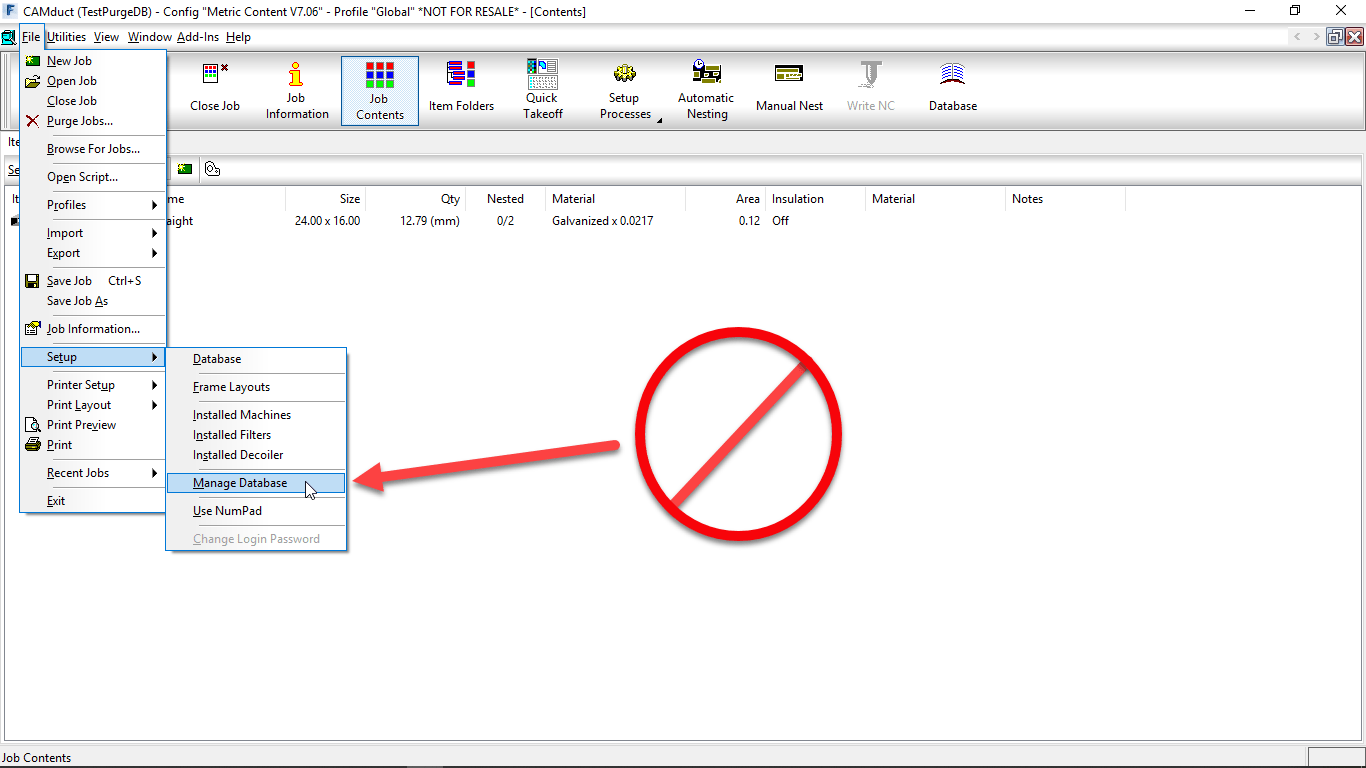
From ESTmep or CAMduct, the functionality is accessed from the FILE -> Setup -> Manage Database menu.
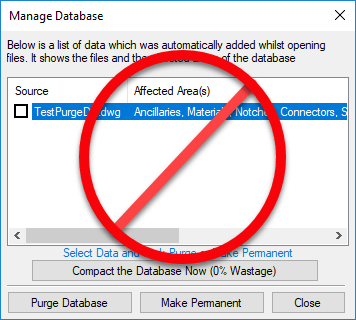
The Purge Database command itself displays the following dialog…
Again, in version 2019.0.0 versions of fabrication products, this will remove all content from all of your service templates. Do NOT run the command. Want to see for yourself what happens? Watch this Screen Capture…
This will only be a risk if you are logged into your database with Administrative privileges. In the event you have had this already happen, the only way to restore your services is to restore them from a backup of your database or to rebuild them all manually.