ESTmep seems like it should be easy to calculate things like Area and Weight. A couple of the major factors in cost. But this couldn’t be further from the truth. It’s difficult to understand “Where” numbers are coming from. Here’s a few tips for troubleshooting.
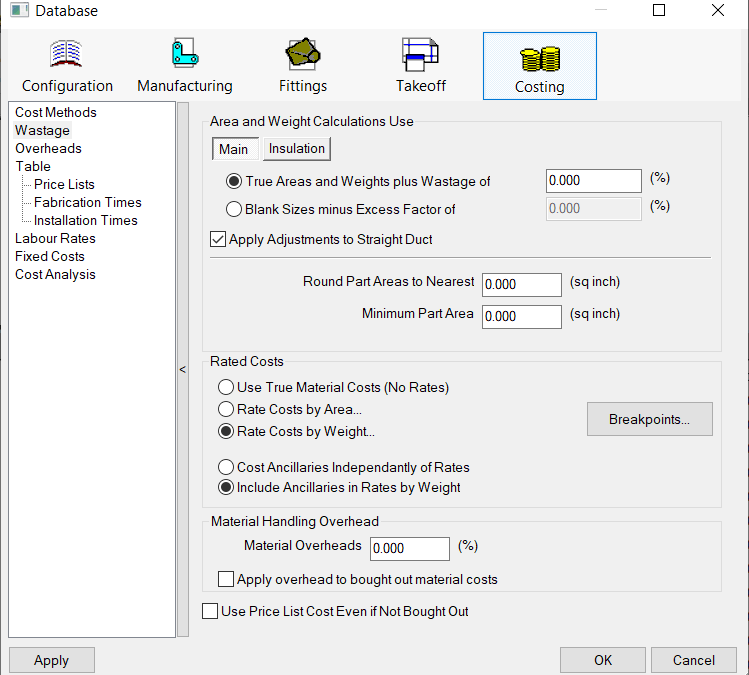
Eliminate Wastage and Costing Adjustments
Make sure Normalization is turned off for costing. You can do that here…
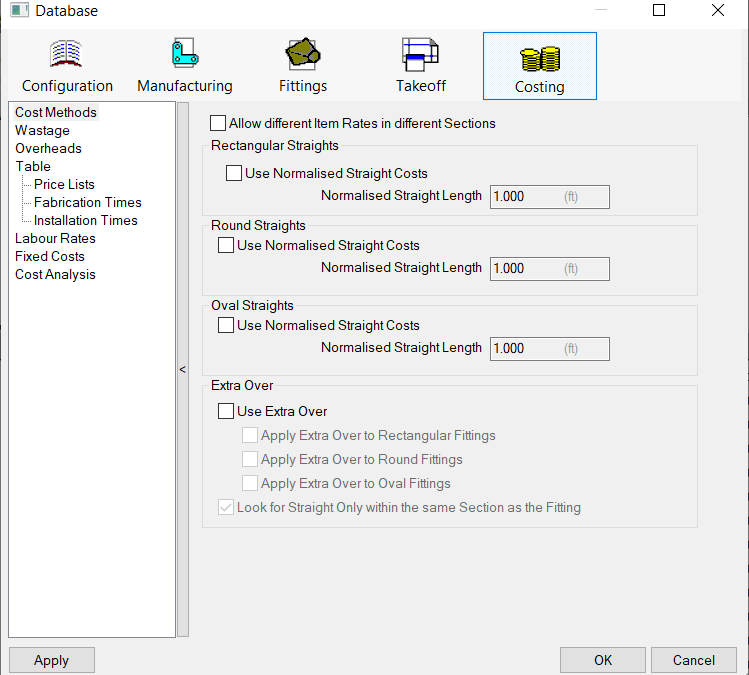
Next, eliminate any Wastage factors. Here’s what that might look like…
Create a Neutral Takeoff
There’s so many adjustments and factors that reporting properties it’s hard to tell what all makes up a number. The best way to find out what makes up a number is to make a Takeoff that eliminates as much of the factors as possible so you start with the core properties.
You can do this by adding Duct with simple numbers…12″ x 12″ x 12″. Duct with no connectors and no seams to eliminate allowances and sealant. Sizes that either don’t use stiffening or a purpose built specification that eliminates stiffening.
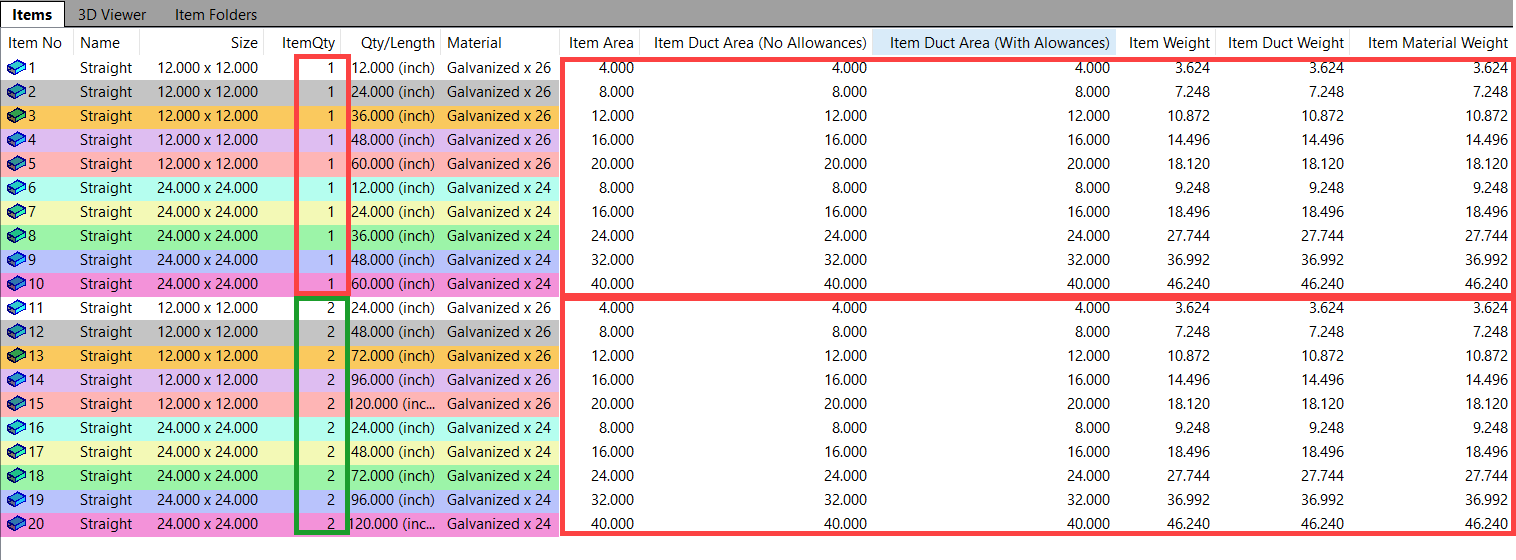
In my test, I created 20 pieces of Straight Rectangular Duct, You can do other fittings or Round/Oval too but start with the simplest and once you get dialed in and understood, you can expand to Round Straight or Fittings, etc.
- Qty of 1
- 12″ Width x 12″ Depth
- 12″ Length
- 24″ Length
- 36″ Length
- 48″ Length
- 60″ Length
- 24″ Width x 24″ Depth
- 12″ Length
- 24″ Length
- 36″ Length
- 48″ Length
- 60″ Length
- 12″ Width x 12″ Depth
- Qty of 2
- 12″ Width x 12″ Depth
- 12″ Length
- 24″ Length
- 36″ Length
- 48″ Length
- 60″ Length
- 24″ Width x 24″ Depth
- 12″ Length
- 24″ Length
- 36″ Length
- 48″ Length
- 60″ Length
- 12″ Width x 12″ Depth
Customize Takeoff
Takeoff in ESTmep can sometimes list “Many” properties for Area and Weight or Quantity. When you add them, they typically just list “Area” or “Weight” making them unclear what they are. You can customize the takeoff Description to reflect which property it maps to. This way you can add them all and see the differences.
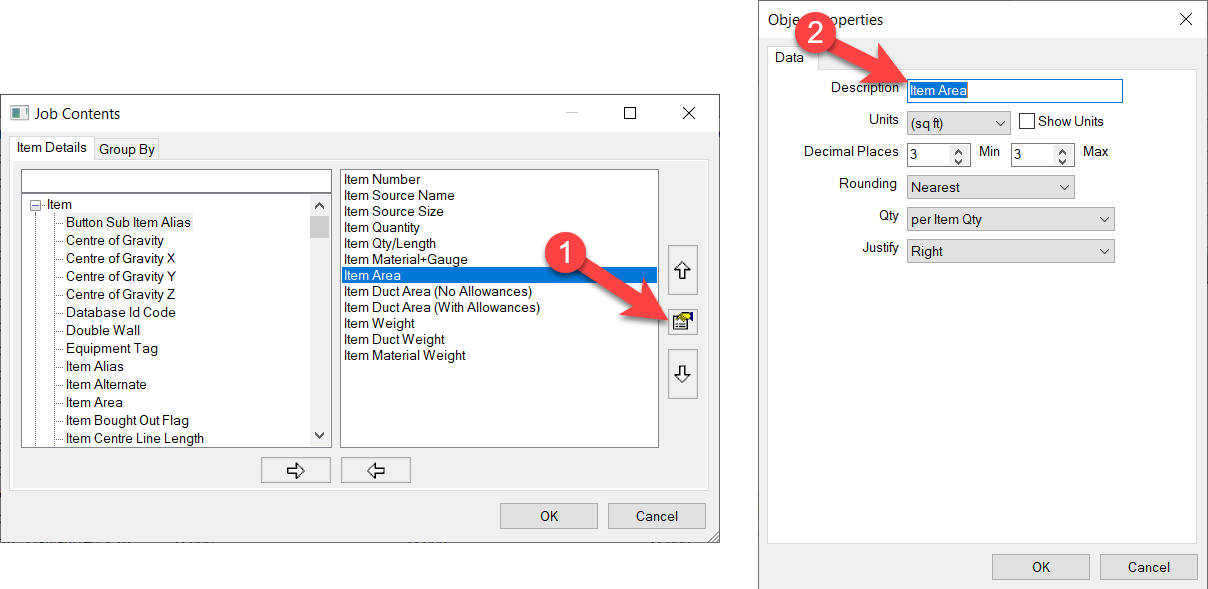
Test Various Quantity Units
Each Property in Takeoff also has the ability to change the Qty Units. Here’s the 3 settings you have can reflect what Area and Weight is displayed. Here’s what those settings look like…
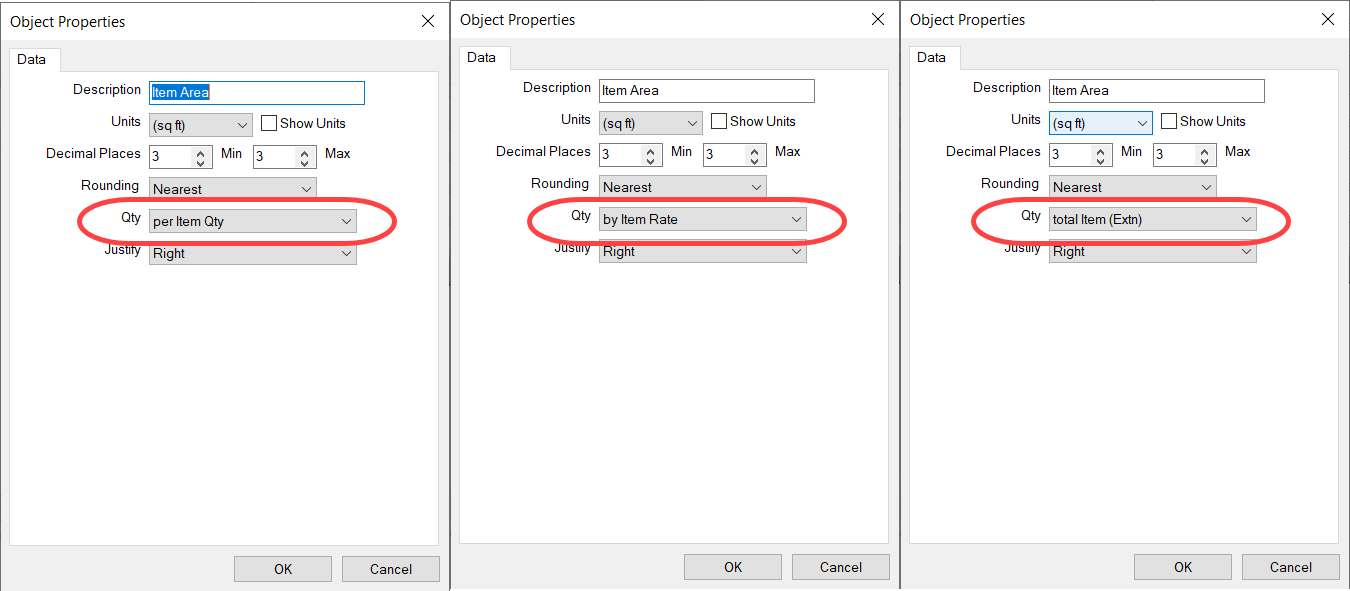
Here’s the results of those settings on my sample duct…

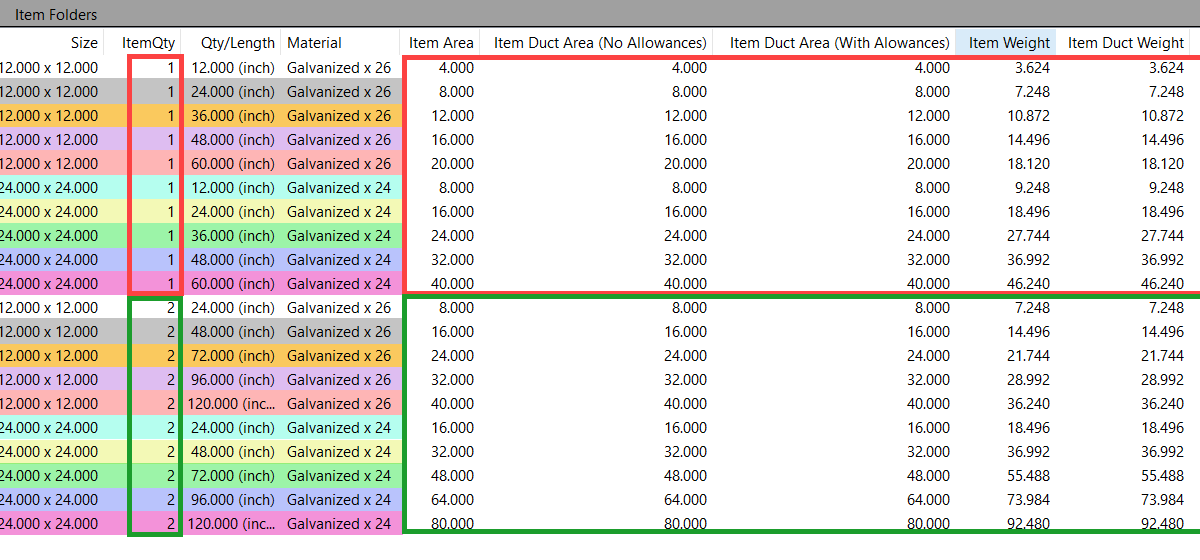
You can see “Per ITem Qty” gives you likely the closest to what you want. Exept it doesn’t take into account the Quantity of fittings. Quantity of 1 vs 2 is the same Area/Weight for the respective sizes.
“Per Item Rate” seems to be furthest from what you’d think. It’s really a ‘Per Ft’ value.
Lastly, the “Total Item (extn)” gives you most likely what you want and also taking into account the quanities of fittings.
Validate Data
Now that you have sample data and simple numbers, you can start doing the math. Look at the material and gauge and find the weight or area and see how your numbers respond.
Once you get comfortable that the numers are correct, start by adding in Seams or Connectors and see if the ancillary weights get added as you expect. Note that you’re numbers may be a little “off” based on Seam or Connector allowances and notching. Try adding only one thing at a time.
If you want to test how Wastage or Costing methods apply, you’ll want to go back to simple duct…No Seams…Connectors….Stiffeners, etc.
Keep things simple. Experiment. Check the numbers. Remove one of the factors and add another and try again. Then combine factor and verify your data is adding up properly.
Unfortunately there is no easy path or roadmap. But by starting with simple datasets and incrementally testing added features or factors, you can start to get a better picture of where your values are coming from.