Your services should not have broken links to ITM’s. Not only is it sloppy database management, it can slow performance of your database.
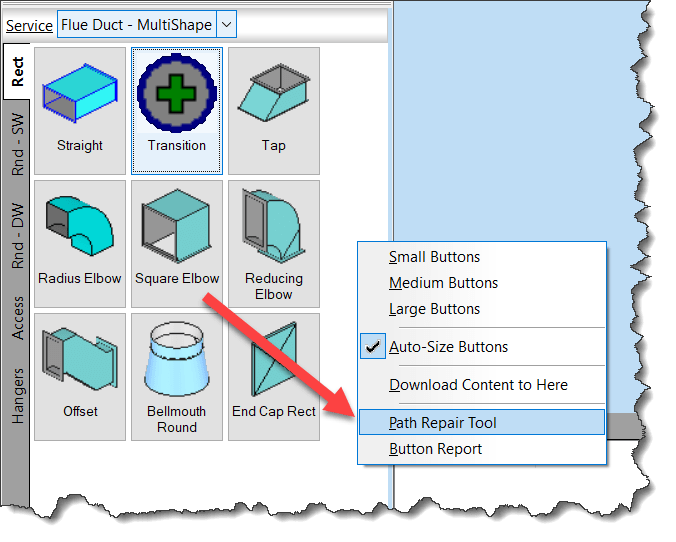
Use the Path Repair Tool to find (and fix) broken links in your services.
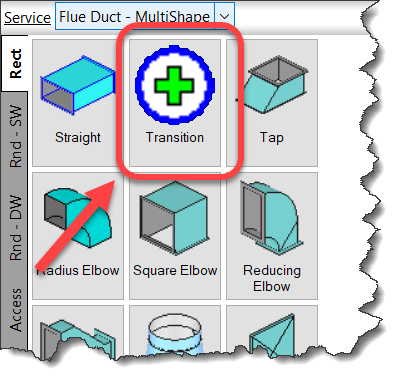
Right-Click and empty area of your Service Palette and select Path Repair Tool.
When you run the Path Repair Tool you’ll be asked to select a mapping file. You can click cancel and the tool will continue on. When it’s done, you’ll have a list of broken paths copied to the Windows Clipboard that you can paste into a file.
From this file, you can then create a mapping file. The mapping file is merely a text file in the format….
OLD PATH/NAME,NEW PATH/NAME
So the data you paste from the clipboard is good starting point, it lists all the broken paths. There may be duplicate paths listed if the path is used in multiple service templates. It’s ok to remove the duplicates.
Simply ass a comma after the broken path name and enter the new, corrected path. Once done, you can save the file and use it when you run Path Repair Tool again. It’ll then go and fix all those broken paths.
NOTE: This repair technique does NOT work if you have commas in your folder or file names. (See Best Practice #11)
Autodesk Fabrication configurations can Compress their data files. It’s a good idea to have this enabled. Not only does this make the files smaller and take up less space, it makes them faster to load. This increases your performance as the data is expanded in memory as opposed to read more data from disk.
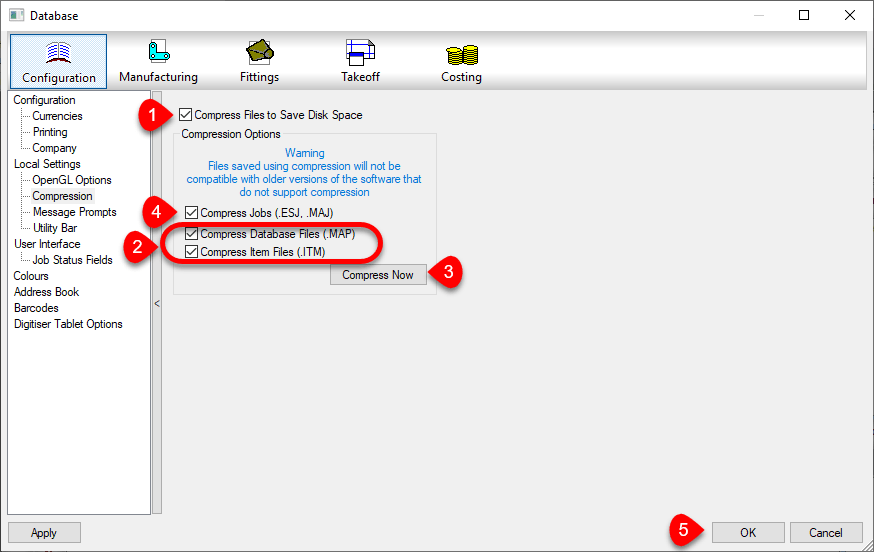
You can enable this option in your database settings. Doing this does not automatically compress existing data that’s not already compressed. The following image shows a suggested sequence of operations. This would both enable compression and compress the existing data.
First Enable Compression by selecting the Compress File to Save Disk Space toggle. Future writes to data tables will be compressed when if they are configured to.
Next, enable the toggles for Compress Database Files (.MAP) and Compress Item Files (.ITM) options. This will tell Fabrication to Compress the existing Database and Item files. Also, “unselect” the Compress Jobs (.ESJ .MAJ) option.
Click the Compress Now button. This compresses the Database and ITM files but will not scan your ESTmep and CAMduct job files.
Once compressed, select the Compress Jobs (.ESJ .MAJ) option. This will compress all Future ESJ and MAJ files but not existing ones. If you wanted, you could have left that option selected in Step 2. However it would significantly increase the time it takes to perform the compression process. Because most of your ESJ and MAJ files are likely past jobs, there’s really no value in processing them now….but you could.
Press the OK Button to save these settings.
Check Settings for Each Product, Version and User of Each Computer
You should also know that these settings are NOT saved in your configuration. The file that stores these settings is located here…
You can tell by the folders, that this setting is stored separately for each user on a computer. Because each product and each version is part of the path, those variations need to be set too.
Because Best Practice #9 tells you to use only one version for database administration, version may seem unimportant. But it IS important to know when you upgrade to a newer version for administration. Those versions should also have these settings reviewed.
Every user who does work in your database, should check each product and version for those settings. If they don’t, your work may compress files while their work may decompressed them.
Because clicking this just once makes it do it’s magic in your database, you don’t need to click the Compress Now button for each version, user, product or computer. The options merely need to be Set., telling those products what they should/should compressed or decompressed.
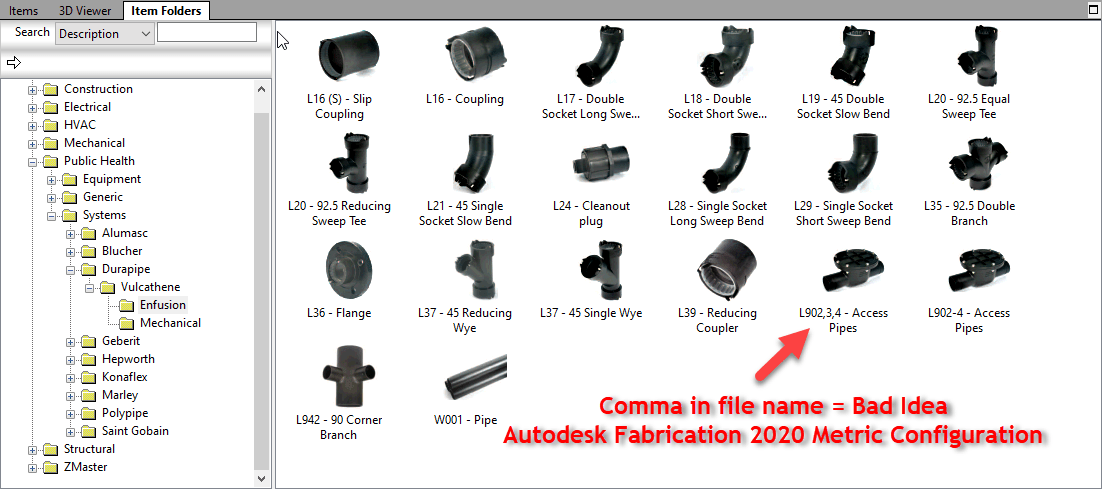
Don’t use Commas (,) in Database Entry Names, ITM File Names, Don’t Use Them Anywhere.
Similar to Best Practice #1 (Don’t use Double Quotes), you should avoid using commas. Commas are the delimiting character in a CSV file. Using a comma can throw off the data columns in data exports that use the CSV file format.
Below, you can see Autodesk let a comma slip into a file name in their Metric Configuration.Yes – Ancillary in Ancillary Kit
When you host a BIM360 Design project, adding members to the project is a common task. If you haven’t done this before, you may notice after typing the address thatBIM360 Design doesn’t seem to recognize it.
When you watch the video, you can notice the blue “Select” button grayed out after typing the Email address. You can type a ‘comma’ (,) after the address to make BIM360 recognize it. You’ll see the Email address converts to a boxed control when you type a properly formatted address.
When you type a comma, this tells BIM360 Design that you’re done typing the address. You can also use a comma to separate multiple addresses. This is why the comma works even when typing a single address.