CAMduct Machine Setup – Axis & Orgin

One of the things that can make machine setup difficult in CAMduct is setting up the coordinate system. This coordinate system must reflect the actual configuration of the machine. Some machines can be reconfigured to swap the axes or set the origin to any corner. This lets you configure the machine to match the software. Others can’t be reconfigured and require you to configure the software to the machine.

It doesn’t really matter where the origin is on the machine, just as long as the configuration in CAMduct matches. Matching the machine isn’t difficult, just as long as you understand what’s happening.

Default Origin and Axis Orientation

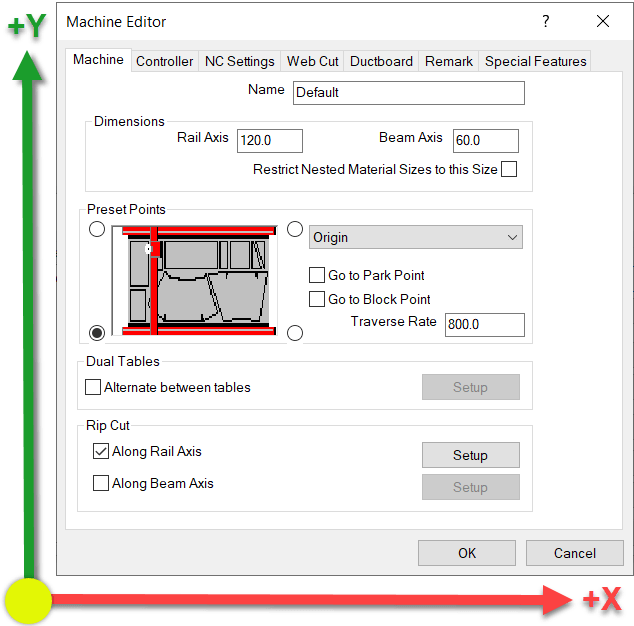
In the Machine Setup Dialog, the default Origin is in the lower left. Take a look at the settings and note the X-Axis and Y-Axis directions.
From this configuration, here’s a simulation of the code that’s generated.

If this configuration doesn’t work for your machine, it typically means the machine has a different origin and/or Axis configuration.

Coordinates Rotated 90 Degrees / X-Axis & Y-Axis Swapped

This next configuration rotates the coordinates which results of the X-Axis and Y-Axis being swapped. It also looks like the Origin location changes given the picture, but that’s not the case. This is why Machine Setup can be confusing. This picture does NOT change the origin location. This will become clear shortly.
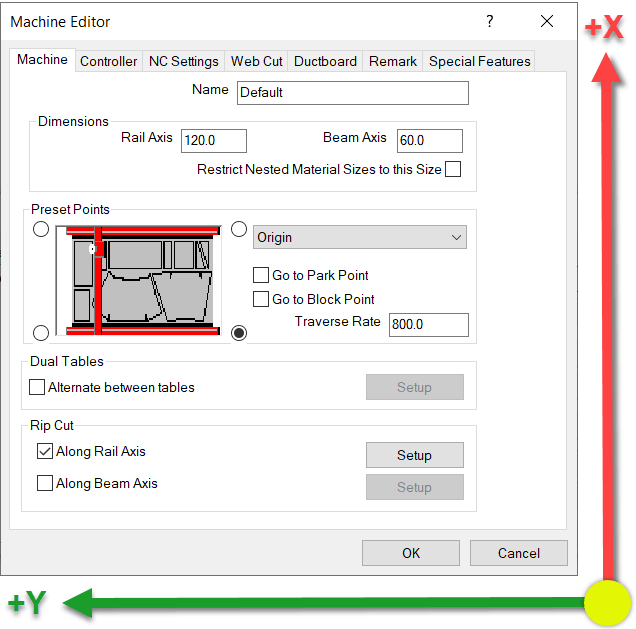
With this configuration, you’ve now rotated the Coordinate System. When you look at the Simulation below, you’ll that the origin doesn’t actually move. The sheet is still oriented the same way. Long direction is the Rail and the Short direction is the Beam.

What you’ll notice here when looking at the code, is that the Part is Still oriented in the Lower Left Corner of the sheet. However, the X-Axis and Y-Axis are swapped. Additionally, looking at the code on the right, you’ll see how the Y-Axis goes into Negative coordinates. This also isn’t what most machines want, they typically work in positive coordinates but this is easily fixed which we’ll show a little later.

Coordinates Rotated 180 Degrees / X-Axis & Y-Axis Mirrored

This next configuration sets the X-Axis and Y-Axis so that both are mirrored…or rotated 180 degrees.
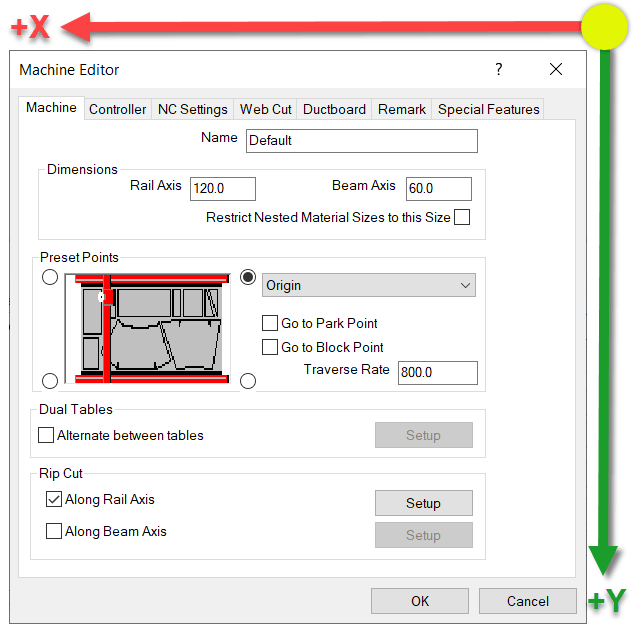
Looking at the simulation of this configuration, you’ll see both X & Y Axes are using negative coordinates.

Here the both Axes are in negative coordinates and the Part is still located in the lower left of the sheet. Again, not what a machine wants typically, but easily fixed and covered in a little bit.

Coordinates Rotated 270 Degrees / X-Axis & Y-Axis Reversed

Here’s the last configuration. Again notice which way the Axes are oriented.
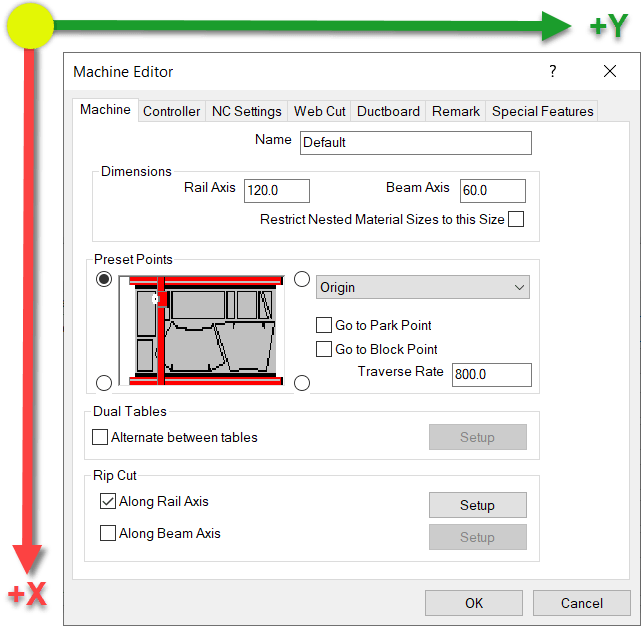
In this next configuration, the X-Axis and Y-Axis are reversed like before. But this time, the X-Axis is in negative coordinates where as the Y-Axis is in positive coordinates.

Fixing Negative Coordinates

What makes this hard, is that the setting in the dialog makes you think you’re moving the origin of the code. You are not. You’re merely rotating the coordinate system. This is critical when using a machine tool like a Lockformer or Vulcan that uses Trimble’s TookShop controller (formerly called Vulcan). Those are a couple of the most common machines where the X & Y Axis are reversed.

When you look at the simulations, the sheet is still oriented in the same location and the part starts in the same location on the sheet.

You can look at the configuration and see that the Rail is set to the long direction and the Beam is set to the Short setting. Remember this….it’ll be important in just a bit.

For this example, we’ll again use the 90 Degree rotated configuration (our second example) where the X & Y are reversed and the Y-Axis coordinates are negative. You can see in the code, that the Y-Axis is the LONG sheet dimension due to the rip cut along the Rail that’s cut at the end of the program.

Because the Rail Rip Cut starts at Y=0.0 and goes to Y-120.0, you can see that the Origin is still on the left side of the sheet not the right as the configuration screen suggests. Here’s a reminder of the Axis directions…

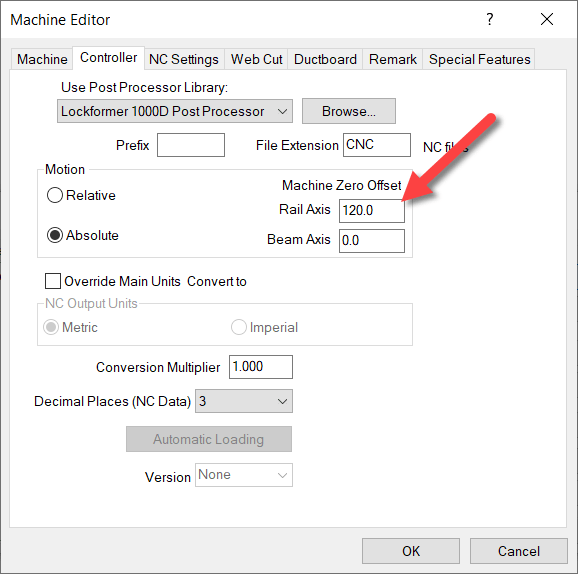
So if cutting the Rip Cut on the sheet from Left to Right for 120 units means the coordinates go negative, it’s clear the Origin is on the left. To make those coordinates go positive, you need to shift the Origin to the right on the Beam (Y-Axis). You can do this on the Controller tab and entering the shift amount for the Rail.

How, when you run a simulation on this setup, you’ll see the Y-Axis is still the long sheet direction, but they’re all positive coordinates.

Notice on the simulation that the part is STILL on the left side of the sheet and because we shifted the Origin to the right side the Rip cut along the Rail (long side) goes from Y=120.0 to Y=0.0.

You’ve now successfully swapped the X&Y Axis and corrected the coordinates to they’re all in positive units. From here, you can go back and finish configuring all your other preferences like where the parts get nested on the sheet, starting cut location, etc.
Fabrication 2022.0.1 Update Released

Update: 2022.09.04

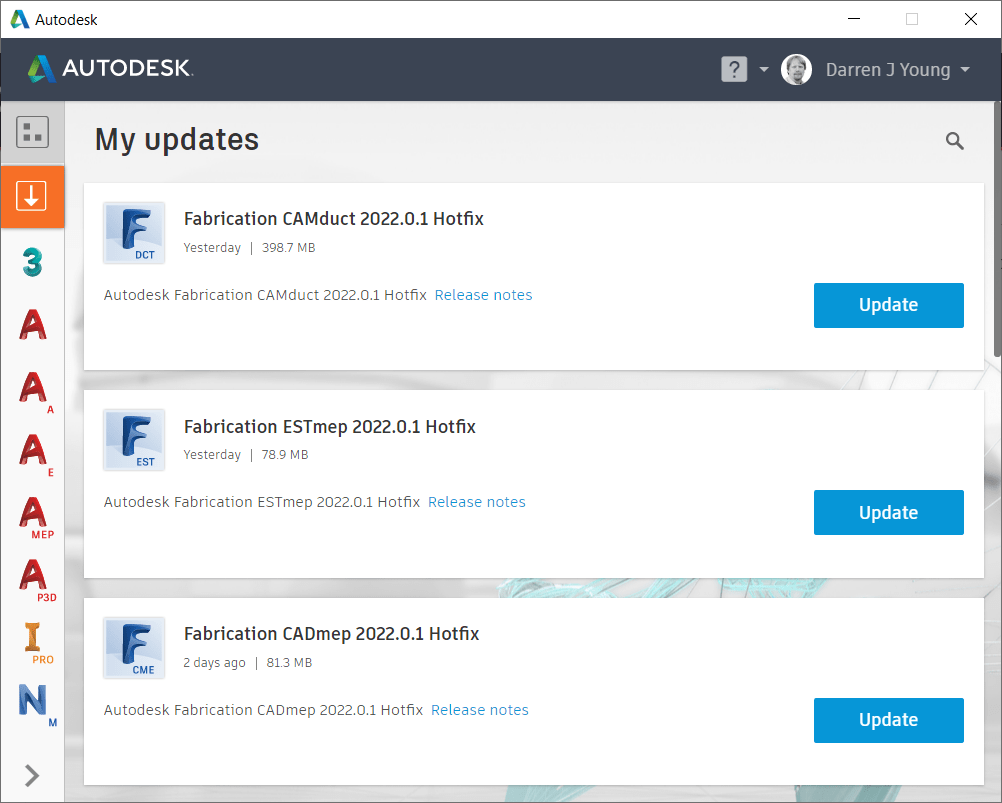
It’s recommended NOT to install this update for CAMduct or ESTmep. Installing the 2022.0.1 Update will prevent access to the Projects folder. CADmep does not appear to have issues with this update.

Thanks to Chris Nash of William R. Nash Company for reporting this issue on the XtraCAD.Com forums.

It’s been a long time, but Autodesk finally released an update to Autodesk Fabrication. 2022.0.1 Update was released recently and contains several fixes for 2022 versions of CADmep, CAMduct and ESTmep.

Install from the Autodesk Desktop App or download from your Autodesk Account portal (https://manage.autodesk.com)

Autodesk Fabrication: Best Practice #14

Eliminate All Broken Service ITM’s

Your services should not have broken links to ITM’s. Not only is it sloppy database management, it can slow performance of your database.

Use the Path Repair Tool to find (and fix) broken links in your services.

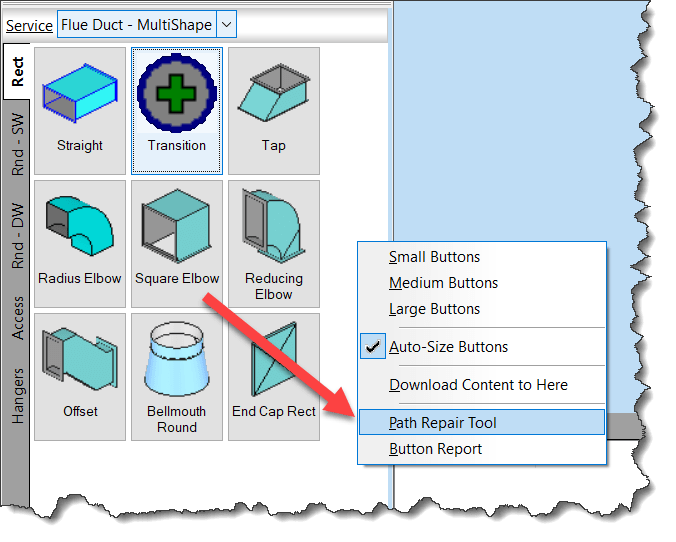
Right-Click and empty area of your Service Palette and select Path Repair Tool.

When you run the Path Repair Tool you’ll be asked to select a mapping file. You can click cancel and the tool will continue on. When it’s done, you’ll have a list of broken paths copied to the Windows Clipboard that you can paste into a file.

From this file, you can then create a mapping file. The mapping file is merely a text file in the format….

OLD PATH/NAME,NEW PATH/NAME

So the data you paste from the clipboard is good starting point, it lists all the broken paths. There may be duplicate paths listed if the path is used in multiple service templates. It’s ok to remove the duplicates.

Simply ass a comma after the broken path name and enter the new, corrected path. Once done, you can save the file and use it when you run Path Repair Tool again. It’ll then go and fix all those broken paths.

NOTE: This repair technique does NOT work if you have commas in your folder or file names. (See Best Practice #11)

Autodesk Fabrication COD Object Model

I’ve added graphics to better illustrate the Autodesk Fabrication Object Model for COD Scripting,

If you write COD scripts for CADmep, ESTmep or CAMduct, this can help you better understand how the various properties and objects are structured when you write your code.

If you want to learn more about Fabrication COD Scripting and how to use these resources, register for MEP Force 2021 and look for my Fabrication Scripting sessions.

You can find links with the other Fabrication COD Language Reference items here…

Fabrication COD Scripting Language Reference

Individual Object Models can be directly accessed here…

There’s also a link to a printable PDF of the Object Models….

Fabrication COD Script Library – Updated

If you’ve not downloaded the Autodesk Fabrication Script Libraries lately, you might want to grab an updated copy. There’s been several updates over the last month. Here’s what’s changed…

  • Damper Rotation Property (undocumented) has been added to all Debug, Job and Library scripts. Support for this property was added in 2017 but never documented. It’s there to support the rotation of Dampers on Fabrication Parts in Revit. It should be noted, that this value is Added to the Angle property of the assigned damper. As such, it acts as an Adjust and not an Override. e.g. Damper w/Angle of 90 + Rotation Property in the ITM of 90 results in a damper rotated 180 degrees.
  • Stiffener Group Property added to the Autodesk Fabrication 2022.0 and later versions of the Debug, Job and Library scripts.
  • Airturn Group Property added to the Autodesk Fabrication 2022.0 and later versions of the Debug, Job and Library scripts.
  • Splitter Group Property added to the Autodesk Fabrication 2022.0 and later versions of the Debug, Job and Library scripts.
  • Insulation StatusLock Property added but listed as “Unavailable” as it stopped working in 2017. Added in the hopes it gets fixed in future versions.
  • StructureType Property added to the Autodesk Fabrication 2022.0 and later versions of the Debug, Job and Library scripts. Property was “Write Only” in 2021 and prior versions so was unable to display in prior versions.
  • Product List HasCustomData Property has been added to all Debug, Job and Library scripts.
  • Product List HasFlow Property has been added to all Debug, Job and Library scripts.
  • Item PCFSKey Property has been added to all Debug, Job and Library scripts.
  • Item CostByLength Property removed from Material Debug scripts (never really belonged there).

You can find the updated scripts here….Script Library.

New Properties are documented here…Item Property Reference.

Autodesk Fabrication 2022 Updates

Autodesk Fabrication 2022 marks a decade that I’ve been updating various documentation for the program. As usual, in recent years not a lot has changed but there are a few changes. Here’s a review of the changes for the data I track…

Script Library Updated / Enhanced

COD Script Library was updated for JOB and LIBRARY Scripts. You can download them for free here. Here’s a summary of changes.


Script Consolidation

In the past, there were 69 to 75 COD Scripts to export all the various properties to separate TXT files. Properties that have multiple entries per ITM like Connectors or Seams are still exported to separate files because the data columns don’t line up between them and there are multiple lines per ITM.

All other properties where it’s a single property per ITM like Spool or Material have all been consolidated to a single script and single TXT file. The WriteAllMiscProperties(Job).cod and WriteAllMiscProperties(Library).cod scripts are where you can extract all other properties so no matter what combination of properties you want, there’s less data files to sort through or scripts to run.


Improved Script Properties Display

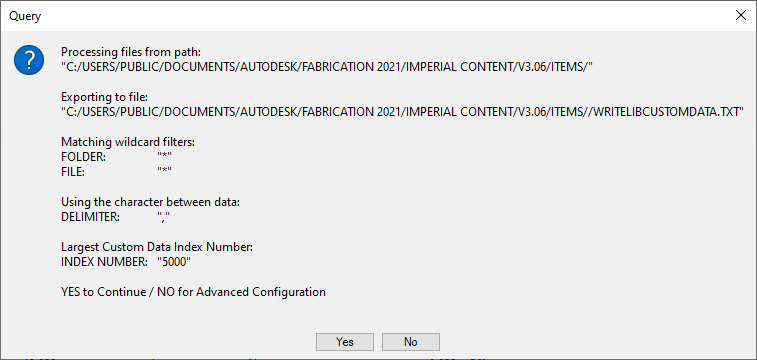
The properties scripts were displayed script settings before running the script. They still are but additional properties are displayed where appropriate along with some additional properties the scripts now support (both covered later). In addition to the additional items, you’ll note that clicking the No button no longer cancels the script. Instead, clicking No takes you to the Advanced Configuration (also covered later) where you can change some of those settings.


Advanced Configuration – Scan Folder (LIBRARY Scripts Only)

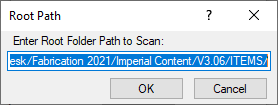
By default, the script looks to the root of your ITM Library folder of your database. This value can now be changed to point anywhere else. You may want to point to a folder of ITM’s outside your Configuration if that’s where you store your ITM’s. You can also scan further down the folder structure so you can perhaps skip exporting Duct ITMs but instead scan and export Piping ITMs.

Here’s what this looks like. Note that the path may use forward slashes ( / ). You can however paste a new path that uses backslashes ( \ ) and it should still work. There’s no option in COD Scripts to allow you to browse to a folder so make sure you type or copy/paste carefully.


Advanced Configuration – Export File (JOB and LIBRARY Scripts)

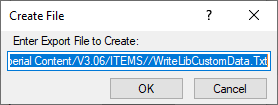
Similar to the Scan folder configuration, you can now also change the default export file name and location. Specifications for specifying paths are the same as above.

Also note that while you CAN specify “CSV” as the file extension, I recommend using “TXT“. When Excel sees a CSV file, it just opens it without giving you the ability to specify how data is interpreted. Using a “TXT” extension makes Excel prompt you for “How” the file should be read like which character is used as the delimiter or defining which columns are Text vs other data types.

Some numerical data or values can be interpreted incorrectly by Excel if you don’t explicitly tell Excel to treat them like Text. A good example of this is the size 1-1/2″ or 1-1/4″. Excel thinks these are dates and will display them as 1/1/2012 or 1/1/2014 respectively if you don’t explicitly tell Excel to treat them as Text. Using that “TXT” extension on the export file is a safe guard against this issue.

A lot more detail that you likely wanted but hopefully it’s helpful, here’s what that looks like….

Note you may see an extra slash character between the path and file name. This is can happen if your MAP.INI (Edit Configuration Utility) includes or doesn’t include an ending slash. I may add code to clean this up later but COD Scripts and Fabrication seem tolerant of this extra slash so no need to worry about it (or edit it out if you like).


Advanced Configuration – Folder/Path Wildcard (LIBRARY Scripts Only)

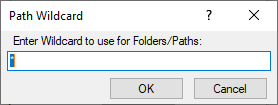
Instead of editing the folder you’re going to scan, alternatively you can specify a wildcard to use to limit which folders to export data from. As an example, you could specify *WELDBEND* and properties will only be extracted for ITM’s within folders containing the name “Weldbend”. Wildcard specification is not CaSe SeNsItIvE. By default, the wildcard is ( * ) to extract from all folders. Here’s what that looks like…


Advanced Configuration – File Wildcard (LIBRARY Scripts Only)

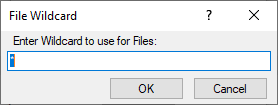
Just like the Folder/Path Wildcard specification, you can specify a wildcard for which ITM files to extract properties from. As an example, you could enter *PIPE* and you would export only from ITM files that contained the work “Pipe”. Again, the wildcard is not CaSe SeNsItIvE. You can use both Folder and File wildcards to very narrowly specify your data export scope. Default wildcard is an ( * ) to extract from all ITM files. Here’s what that looks like…


Advanced Configuration – Delimiter (JOB and LIBRARY Scripts)

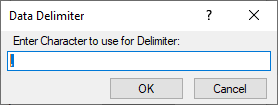
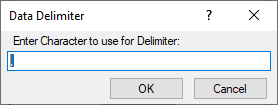
Data exports by default use a Comma ( , ) to create a Comma Separated Value file. If your Fabrication Database uses commas in folder names or ITM file names this can cause data fields to shift in Excel when opening the export file. If this is the case for you, you can specify a different character to use to separate the data fields in the export file. The Pipe ( | ) character is always a good “rarely used” character for this purpose.

As a side note, it’s not a good practice to have commas in folder or file names. You can read more about that here. This option is really here in case you’re stuck with commas and haven’t fixed them yet.


Advanced Configuration – Max Custom Data Index (Only Scripts that export Custom Data)

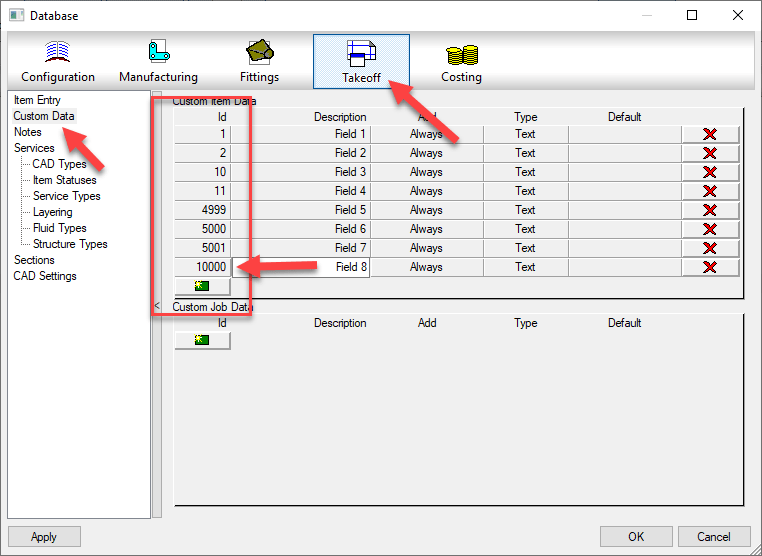
Only used for scripts that export Custom Data, you can specify the maximum Custom Index value. Unfortunately, COD scripts have no ability to determine how many custom data entries you have or which index numbers are used without jumping through some hoops. To work around this, you need to specify the maximum Custom Data Index value. The script will then loop through all those numbers and find which ones contain values and remembers them. It then exports only those custom index values so that the script runs efficiency.

By default the script uses 5000 as the maximum index number. But as you can see from the below example, the maximum index number is 10000 so we need to specify that. We look at all 10000 possibilities (it goes fairly quick) and takes note that there’s only 8 indices used and then extracts only those 8 from the ITM’s. In the past, the script would loop through all 10000 for each ITM really slowing things down. Now, even if your largest number is 6 or 7 digits (not recommended) the script will still be fairly quick.

Here’s what that Delimiter Character configuration option looks like…


Summary

In the past, if you didn’t like the export files names, where they went, or wanted to change the scope of which files or folders you extract data from, you could have always changed the COD script code yourself. You now shouldn’t have to. Hopefully this makes running these scripts a little more flexible and user friendly.

COD Script Extension for VS Code

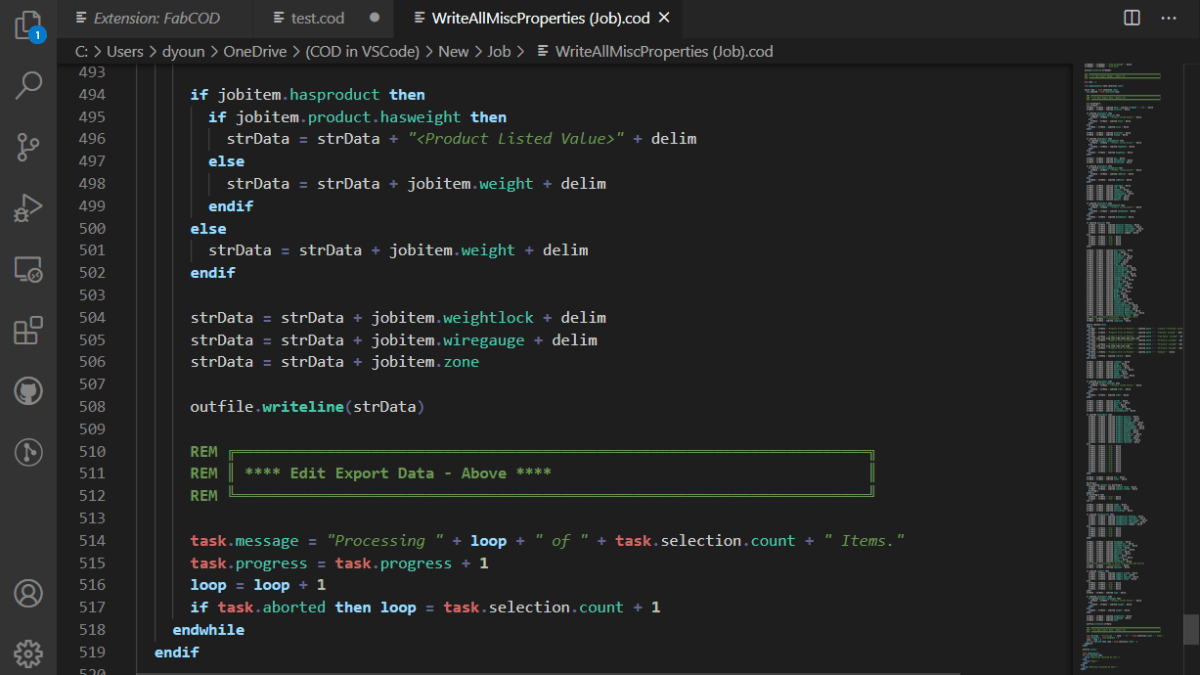
If you write COD Scripts for Autodesk Fabrication, take note. There’s now an Extension for Microsoft Visual Studio Code (VS Code) which is Microsoft’s free code editor. If you use Notepad or Notepad++ to edit your code today you may want to consider switching. The COD Extension has some really nice features. Color coding of your code is the most obvious as shown below. However, there’s a lot more than just color coding. Features like Auto-Complete, Folding Sections and Dimension/Option Picker are nice additions in addition to a lot more robust documentation.

Installing The Fabrication COD Extension

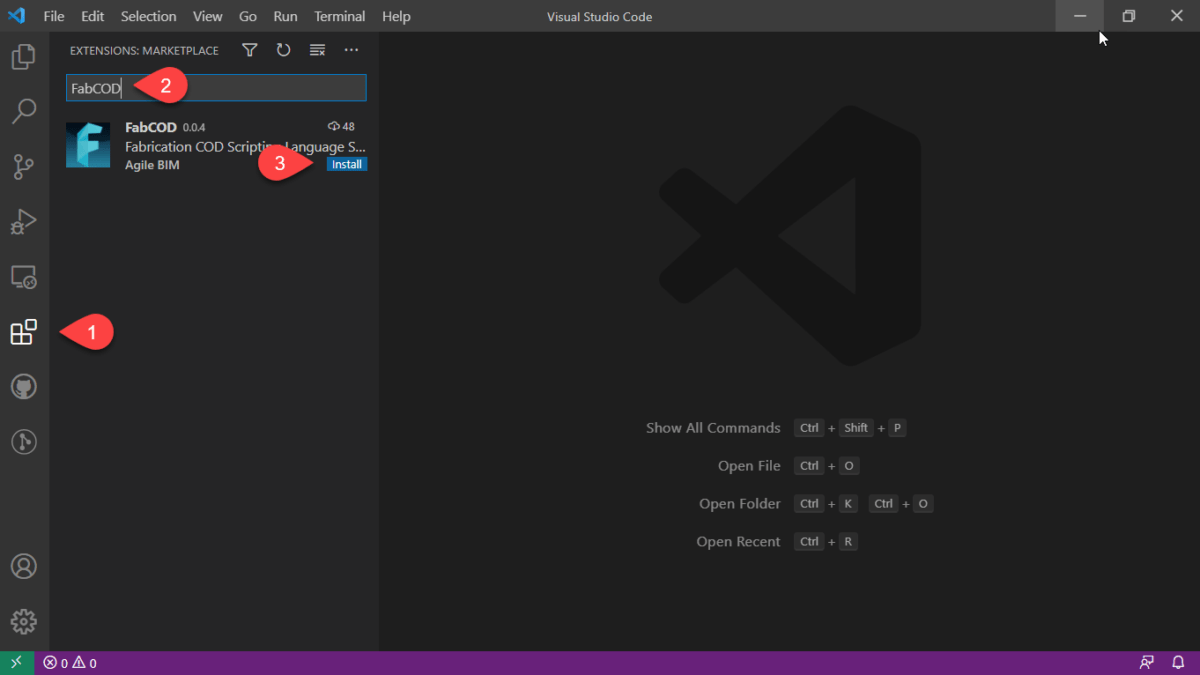
If you don’t already have it, you can download and install VS Code here…https://code.visualstudio.com/. Once installed, go to the Extension section, type FABCOD and click the Install button.

Extension Summary

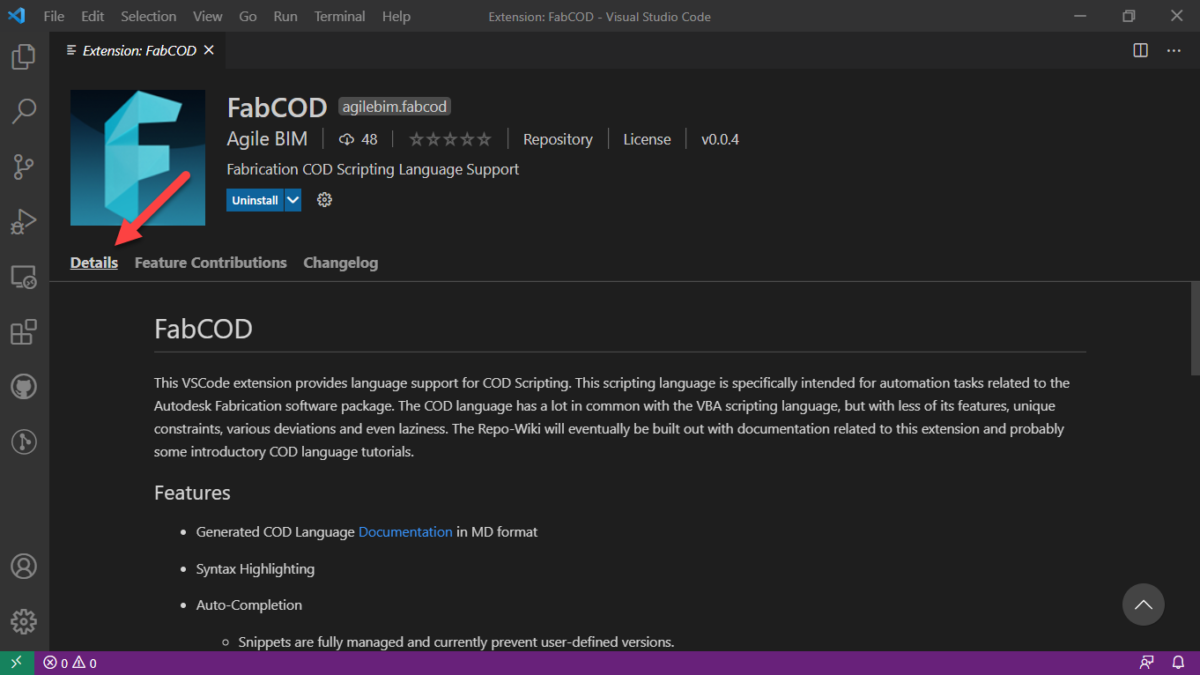
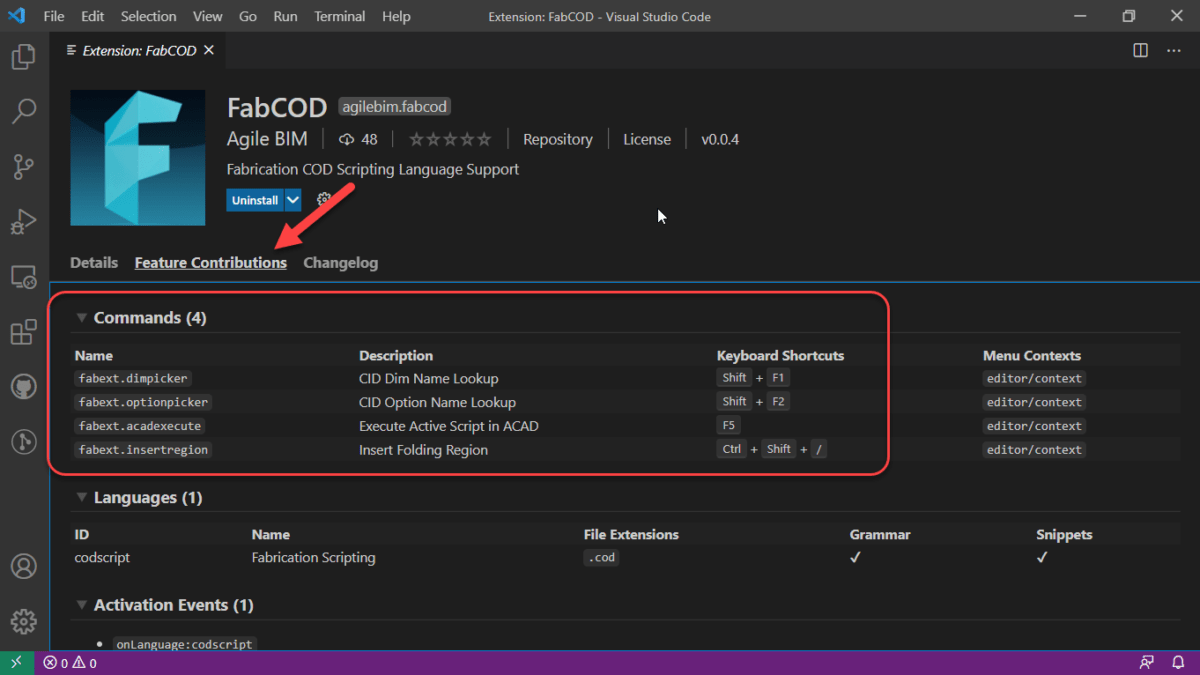
Once you’ve installed the Extension, you can review a summary of extension details here…

From here, you can review a couple of the key features and their keyboard shortcuts….

VS Code Feature – Mini-Map

Not a feature of the extension, but one reason VS Code is a nice editor is the Mini-Map which helps you visualize where you are your code.

FABCOD Extension Feature – Folding

One of the features the FABCOD extension exposes in VS Code is the ability to collapse/expand sections of code for Looping and Conditional function and other areas. When you move your cursor to the left margin, you see symbols that activate this functionality called Folding.

In addition to Folding sections of code, you can create your own areas of code to collapse/expand. These are Folding Regions and can be inserted (or typed manually using the proper syntax) by highlighting the code and pressing CTRL+SHIFT+/.

FABCOD Extension Feature – AutoComplete

Auto-Complete is another core feature of any code editor. VS Code’s Auto-Complete features is leveraged by the FABCOD extension. You’ll need to be editing a saved file with a COD file extension so the VS Code extension knows which code extension to use.

ABCOD Extension Feature – Hover Tips

If you hover over known functions/properties and their context can be determined, VS Code will display a tooltip for the function you’re hovering over. This can be a great way to learn coding as it’ll help you with the syntax.

FABCOD Extension Feature – DIM / OPTION Picker

One of the best features of the FABCOD extension is the ability to get suggestions for the Dimension (DIM) and Options. You can activate the DIM picker with SHIFT+F1 and the OPTION picker using SHIFT+F2 keyboard shortcuts. When using these features, you are presented with an edit box. You type the CID/Pattern Number you’re interested in and press Enter. You are then given a list of Dimensions or Options you’re interested in. It’s not fool proof because some patterns have variable DIM/OPTION values but it seriously helps none the less. Take a look here…

FABCOD Extension Feature – Additional Help

Sometimes you need added help for a function. The FABCOD extension is an open source project on GitHub (https://github.com/AgileBIM/FabCOD). This project contains added help for every function and property and is Auto-Generated and updated as the extension is developed. You can access this help from any of the popup ToolTips by clicking on the BLUE hyperlinked text.

FABCOD Extension Feature – AutoCAD Launcher

One of the other neat features of the FABCOD extension is the AutoCAD Launcher. Pressing F5 in the editor will initiate the script in CADmep. Simply Alt-Tab to AutoCAD and press enter. AutoCAD and CADmep must be loaded at the time for this to work. Due to Autodesk’s limitations in their API’s, this functionality does not work with ESTmep or CAMduct.

VC Code FABCOD Extension – Wrapup

There’s a lot more to VS Code that I won’t get into here. I’ve only covered the highlights of how it and the FABCOD extension can be used to help edit COD file in Autodesk Fabrication. As it’s an open source project, there’s instructions on how to become involved if you have the coding skills. You can also just head over and log issues or suggestions. (https://github.com/AgileBIM/FabCOD)

Fabrication Job Contains No Parts – Possible Fix?

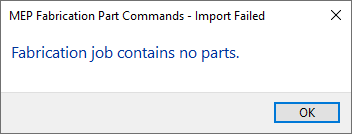
Have you ever tried importing an MAJ into Revit and received the following error….Fabrication Job Contains No Parts.

There’s a lot of reasons this can occur and it’s NEVER because there are no parts. So much for Autodesk’s QA/QC and Error checking.

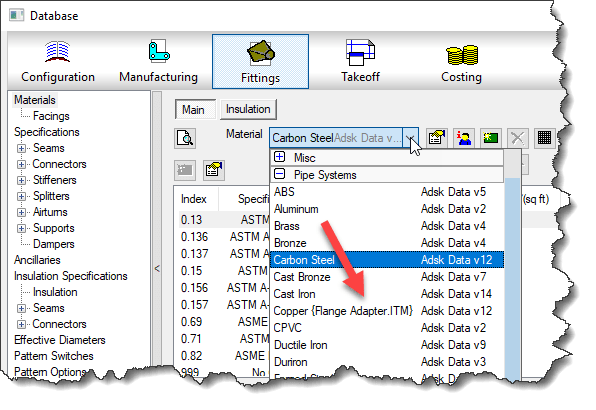
You may see this most commonly because parts used in the model contain data that’s no longer in your database. You’ve likely noticed from time to time database entries with curly braces around parts of the name like the following…

This happens when an entry in the database is used by an ITM but the database entry itself later gets deleted. Information is cached within the ITM so when it’s accessed, it creates a Proxy entry in your database if it was missing. Within the {Curley Braces} is the name of the object that created the entry.

While CADmep, ESTmep and CAMduct handle this fairly gracefully, Revit on the other hand does not. When it attempts to load an MAJ, it sees these entries and notices they’re missing from your database and prohibits you from importing the MAJ file. Revit thinks the database doesn’t match the MAJ and stops you cold!

A Possible Fix

If this is cause for the import error, you can use the following COD script to potentially work around the issue….

Take the following script and run in in CADmep, ESTmep or CAMduct. You should be logged in with Administrative Permissions while doing this. This script isn’t fixing Revit or the MAJ. What it’s doing is loading ALL the ITM’s from your Database Library into memory.

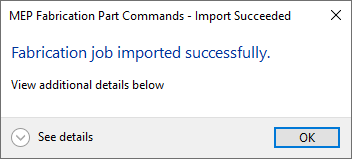
The process of loading all these ITM’s into memory creates all these proxy entries in your database. This way, when Revit attempts to import the MAJ, the data associated with those ITM’s are most likely present in your Database configuration. In many cases then results in a successful import of the MAJ.

If the Revit file you are importing the MAJ into already points to a Fabrication Configuration, you should reloaded the configuration FIRST before attempting to import the MAJ.

If for some reason this process still doesn’t work, verify that Revit is reading from the same database location as the version of CADmep, ESTmep or CAMduct where you ran the COD script.

In the event it still doesn’t work, there may be other reasons for the failure but this is often the most common, especially with MAJ’s created recently.

If it does work, you’ll want to use the other scripts I provide on this site to help analyze your database. You likely deleted those database entries in the first place for a reason. You either didn’t realize they were needed, or you didn’t know where they were used to repoint those ITM’s to a proper substitute. Those scripts can help you find which ITM’s use which database entries.

Hope this helps.

Autodesk Fabrication Scripting – Did You Know?

In the list of COD Scripting updates I just posted, there’s a couple undocumented functions that have been on my list to explore for more than a few years. I’ve finally gotten to them and figured out what they do.

I won’t comment on how long it took me to actually explore what I had listed in my “To Research” list for years other than to say, Procrastination is a Virtue for those with no Patience.

So without further delay…here you go….


Output Function

This first one is the OUTPUT function. You can call it a couple different ways, with and without parenthesis just like the DEBUG function. It doesn’t really seem to matter. It’s really kind of a worthless function in my opinion.

Not only does it only work in CAMduct and ESTmep (not CADmep) it really isn’t that helpful. It just outputs a message to the Console window. I was initially hopeful it would allow me to “script” some of the secret Console command but no such luck. It’s just a message.

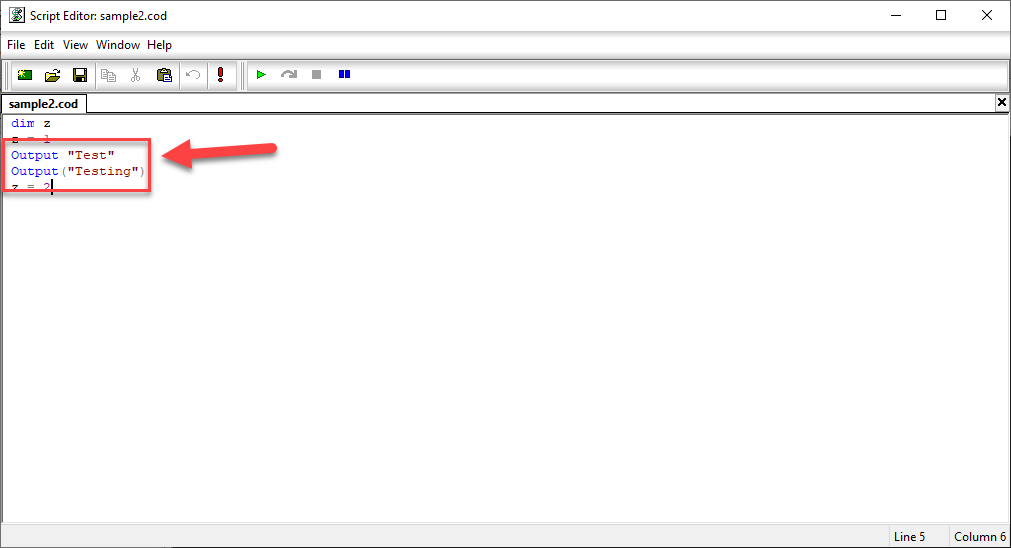
You can see in the COD Code editor the below with both syntax examples…

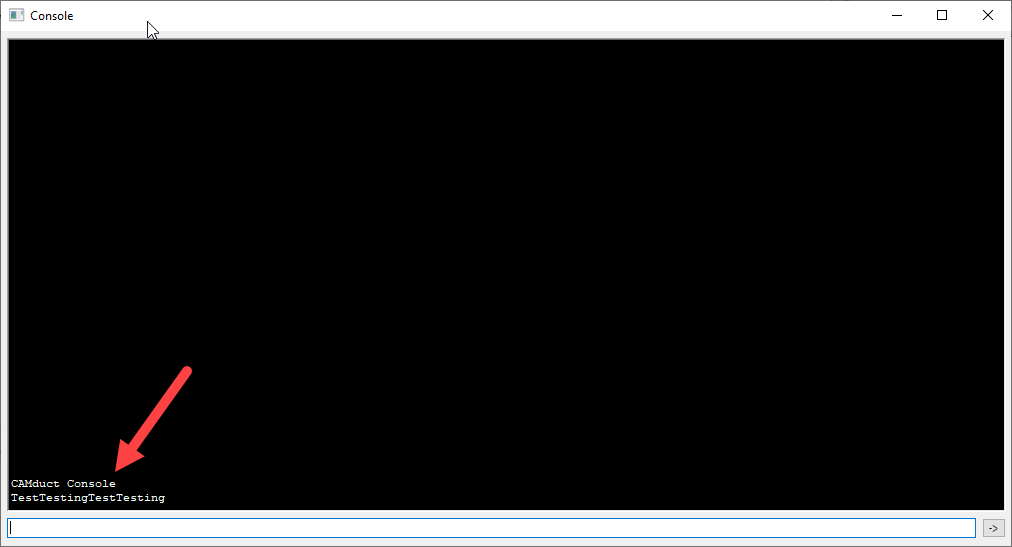
When you run the script, it’ll call up the Console and display the text you specified. You can see from the following example, it doesn’t even space the text when you call it multiple times. Even tried embedding a Carriage Return in the string and still no luck automating via the Console.


Breakpoint Command

The other command is much more helpful and something most folks don’t know about. I have run into a couple now who knew but most it’s not known. I wish I knew years ago…it’s actually a small step closer to what you’d expect in a modern IDE (Integrated Development Environment).

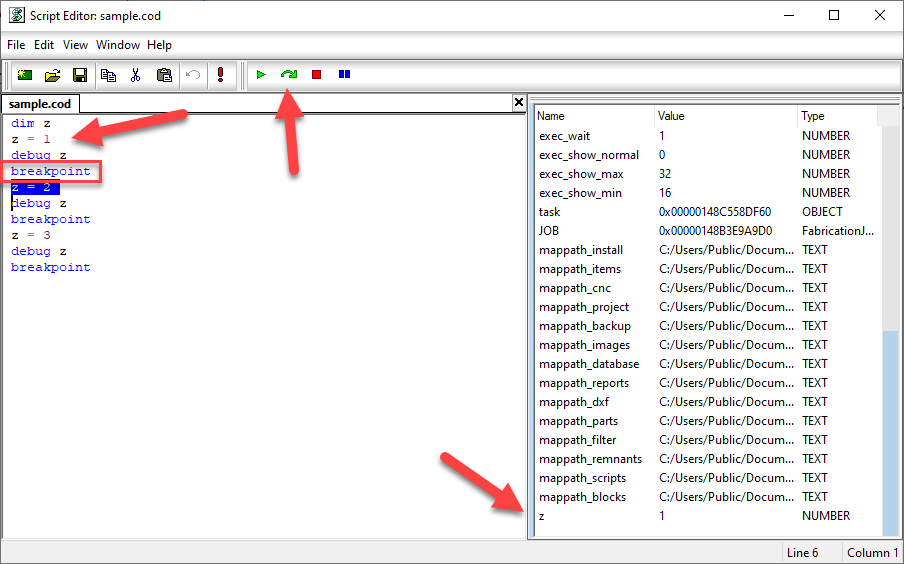
The Breakpoint function calls up the panel on the right. It displays the values of all your variables. You can see how the value of the “z” variable is displayed. When you hit a Breakpoint, code execution stops until you hit the green arc’d arrow. Code execution then continues until you get to the next Breakpoint if any.

You can access the COD Script editor in CAMduct or ESTmep using the FILE pulldown menu. You can also use the editor in CADmep but unfortunately, there’s no way to display it without writing intentionally wrong code to cause your program to fail and display it. You can then use the editor like you do in ESTmep or CAMduct.

One thing to note, BREAKPOINT only appears to work when you execute code from the Script Editor. If you call it from AutoLISP using (executescript “myscript.cod”) or the EXECUTESCRIPT command in CADmep or by right clicking in your Takeoff items in ESTmep or CAMduct, it runs without stopping your code. This means you can leave the breakpoints in your code and edit/debug via the script editor but not have to remove them when executing them un a production setting.