Fabrication Job Contains No Parts – Possible Fix?

Have you ever tried importing an MAJ into Revit and received the following error….Fabrication Job Contains No Parts.
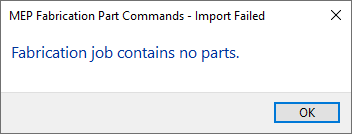
There’s a lot of reasons this can occur and it’s NEVER because there are no parts. So much for Autodesk’s QA/QC and Error checking.

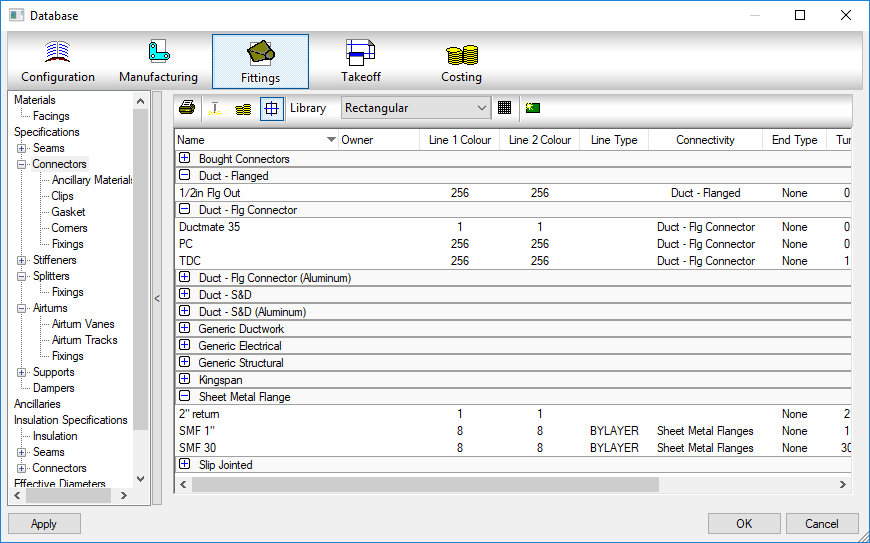
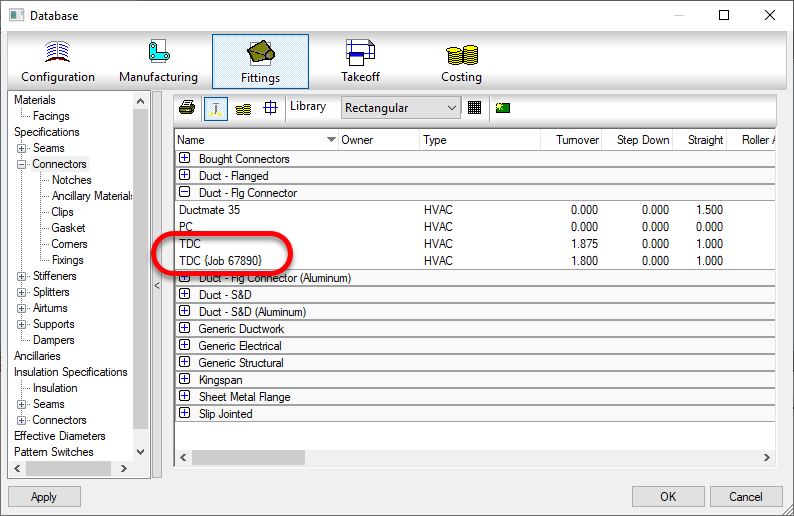
You may see this most commonly because parts used in the model contain data that’s no longer in your database. You’ve likely noticed from time to time database entries with curly braces around parts of the name like the following…
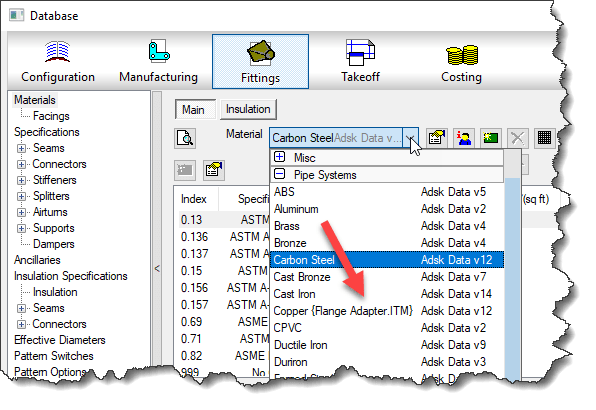
This happens when an entry in the database is used by an ITM but the database entry itself later gets deleted. Information is cached within the ITM so when it’s accessed, it creates a Proxy entry in your database if it was missing. Within the {Curley Braces} is the name of the object that created the entry.

While CADmep, ESTmep and CAMduct handle this fairly gracefully, Revit on the other hand does not. When it attempts to load an MAJ, it sees these entries and notices they’re missing from your database and prohibits you from importing the MAJ file. Revit thinks the database doesn’t match the MAJ and stops you cold!

A Possible Fix

If this is cause for the import error, you can use the following COD script to potentially work around the issue….

Take the following script and run in in CADmep, ESTmep or CAMduct. You should be logged in with Administrative Permissions while doing this. This script isn’t fixing Revit or the MAJ. What it’s doing is loading ALL the ITM’s from your Database Library into memory.

The process of loading all these ITM’s into memory creates all these proxy entries in your database. This way, when Revit attempts to import the MAJ, the data associated with those ITM’s are most likely present in your Database configuration. In many cases then results in a successful import of the MAJ.
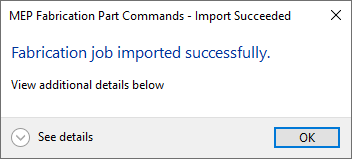
If the Revit file you are importing the MAJ into already points to a Fabrication Configuration, you should reloaded the configuration FIRST before attempting to import the MAJ.

If for some reason this process still doesn’t work, verify that Revit is reading from the same database location as the version of CADmep, ESTmep or CAMduct where you ran the COD script.

In the event it still doesn’t work, there may be other reasons for the failure but this is often the most common, especially with MAJ’s created recently.

If it does work, you’ll want to use the other scripts I provide on this site to help analyze your database. You likely deleted those database entries in the first place for a reason. You either didn’t realize they were needed, or you didn’t know where they were used to repoint those ITM’s to a proper substitute. Those scripts can help you find which ITM’s use which database entries.

Hope this helps.
Autodesk Fabrication: Best Practice #13

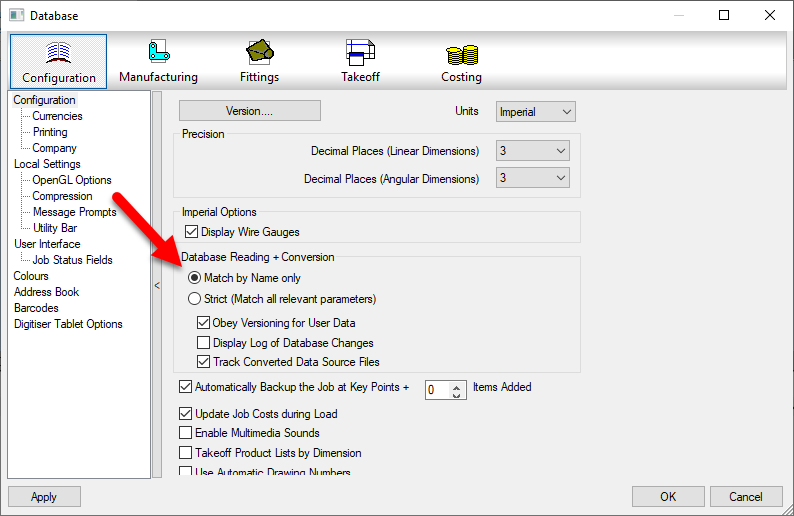
Use “Match by Name only” in Database Settings

Do you have issues with duplicate entries in your Fabrication Database? These could be proxy entries…those followed by text enclosed within {brackets}. Or they could be identical..if someone made the proxy item permanent,

This can be caused by using the Strict matching setting in your database setting. It’s recommended to use Match by Name only.

When you use Strict naming, when you open drawings or MAJ files, the database settings within those files are compared to those in your configuration. If the data is deemed relevant and it varies, even something as small as a number 3 decimals vs. 4 decimals can add another entry into your configuration.

When using Match by Name only, as long as the name (and group) matches, the entry is considered the same and you don’t end up with duplicate entries.

Autodesk Fabrication: Best Practice #12

Compress Fabrication Data Files.

Autodesk Fabrication configurations can Compress their data files. It’s a good idea to have this enabled. Not only does this make the files smaller and take up less space, it makes them faster to load. This increases your performance as the data is expanded in memory as opposed to read more data from disk.

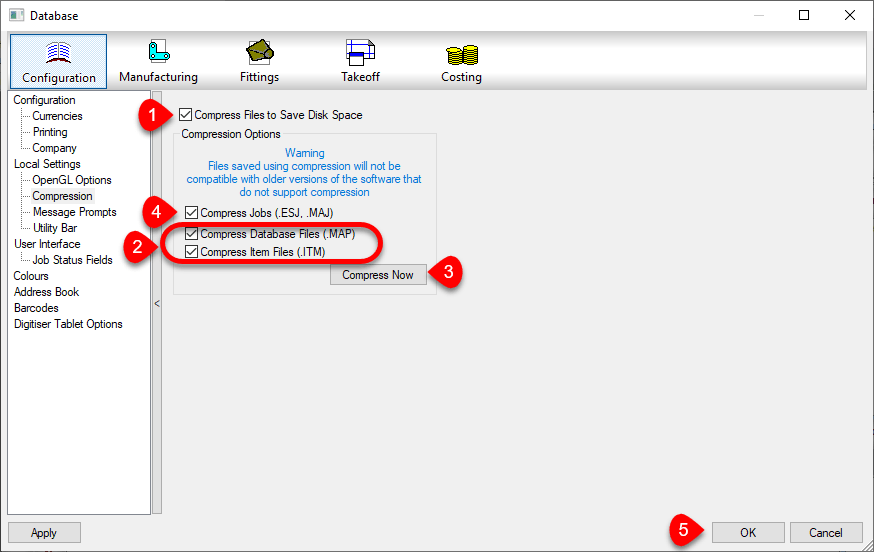
You can enable this option in your database settings. Doing this does not automatically compress existing data that’s not already compressed. The following image shows a suggested sequence of operations. This would both enable compression and compress the existing data.

  1. First Enable Compression by selecting the Compress File to Save Disk Space toggle. Future writes to data tables will be compressed when if they are configured to.
  2. Next, enable the toggles for Compress Database Files (.MAP) and Compress Item Files (.ITM) options. This will tell Fabrication to Compress the existing Database and Item files. Also, “unselect” the Compress Jobs (.ESJ .MAJ) option.
  3. Click the Compress Now button. This compresses the Database and ITM files but will not scan your ESTmep and CAMduct job files.
  4. Once compressed, select the Compress Jobs (.ESJ .MAJ) option. This will compress all Future ESJ and MAJ files but not existing ones. If you wanted, you could have left that option selected in Step 2. However it would significantly increase the time it takes to perform the compression process. Because most of your ESJ and MAJ files are likely past jobs, there’s really no value in processing them now….but you could.
  5. Press the OK Button to save these settings.

Check Settings for Each Product, Version and User of Each Computer

You should also know that these settings are NOT saved in your configuration. The file that stores these settings is located here…

C:\Users\<user>\AppData\Local\Autodesk\Fabrication <version>\<product>\UserOpt.MAP

<user> = User's Windows Login Name
<version> = Autodesk product version. (e.g. 2018, 2019, 2020, etc.)
<product> = Autodesk Fabrication product (e.g. CADmep, ESTmep, CAMduct)

You can tell by the folders, that this setting is stored separately for each user on a computer. Because each product and each version is part of the path, those variations need to be set too.

Because Best Practice #9 tells you to use only one version for database administration, version may seem unimportant. But it IS important to know when you upgrade to a newer version for administration. Those versions should also have these settings reviewed.

Every user who does work in your database, should check each product and version for those settings. If they don’t, your work may compress files while their work may decompressed them.

Because clicking this just once makes it do it’s magic in your database, you don’t need to click the Compress Now button for each version, user, product or computer. The options merely need to be Set., telling those products what they should/should compressed or decompressed.

Autodesk Fabrication: Best Practice #11

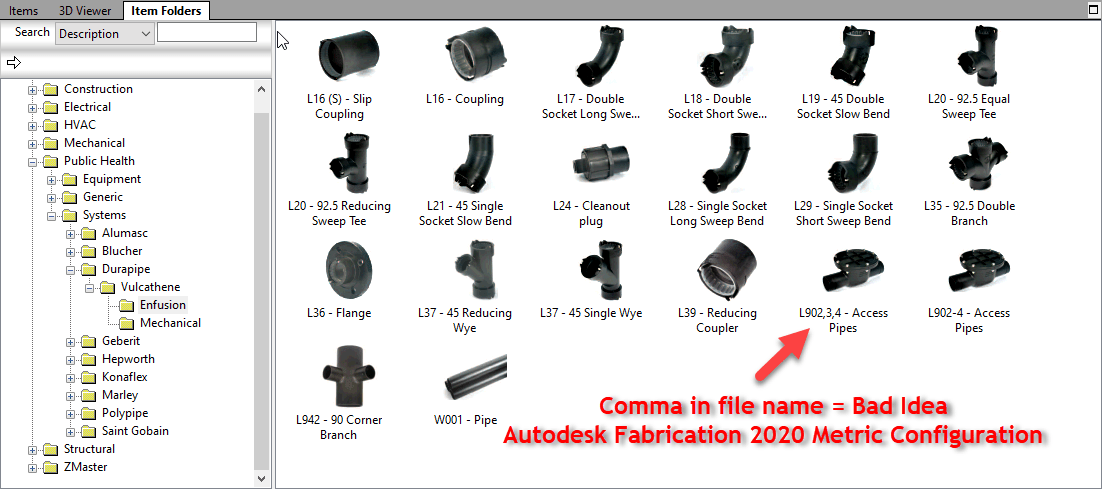
Don’t use Commas (,) in Database Entry Names, ITM File Names, Don’t Use Them Anywhere.

Similar to Best Practice #1 (Don’t use Double Quotes), you should avoid using commas. Commas are the delimiting character in a CSV file. Using a comma can throw off the data columns in data exports that use the CSV file format.

Below, you can see Autodesk let a comma slip into a file name in their Metric Configuration.Yes – Ancillary in Ancillary Kit

Autodesk Fabrication: Best Practice #6

Don’t PURGE or COMPACT Your Database When In Use

A Fabrication Database that’s well managed should have changes being made. This can mean things like materials, specifications, services, connectors and such may be occasionally deleted and removed. If there are proxy items in your database that have {brackets} around them, they should be made permanent or removed as well.

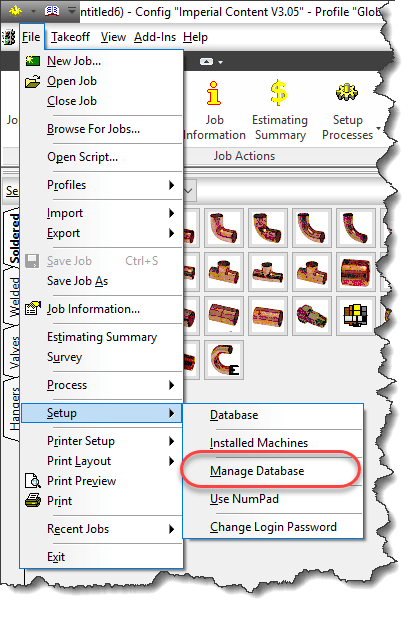
The way to do this is to PURGE and/or COMPACT your database, You can do this by typing PURGEDB on AutoCAD’s command line or by selecting File -> Setup -> Manage Database from ESTmep or CAMduct as sown in the following image.

When you initiate this process, you’ll be presented with a standard “Backup Your Database…” warning which you can click OK to.

From there, you are then presented with the following dialog.

Items that show up here are the ones that show up with {Brackets} in your database, They should either be made permanent or removed in a well managed system.

The Make Permanent option is fairly safe. The items are in your database already there and already have indexes assigned.

On the other hand, the Purge Database option will remove them from your database. When you do this, the’s a chance that some of the database indexes will change as those indexes are how the various database tables relate to each other.

If you do this while others are using the database in CADmep, ESTmep or CAMduct, they already have the database tables loaded into memory. Depending what they are doing, some activities may cause parts of the database to be reloaded while others are not. When this happens, strange things can happen to your drawing…your systems might loose their service or change services or connectors change without notice. More times than not, unless you catch it right away,by the time you find the issue you’ll need to remodel your data or retrieve it from a backup.

In a Database, records are not actually deleted so while the Purge command appears to remove items from the database, it  actually just flags them as being unused so those areas in the database can be overwritten with new data later. This is where Compacting the database comes into play. The Compact the Database Now option will rewrite and re-sequence all the database files and their indexes to recapture that unused space. Again, this causes issues for others who are currently referencing the database and doing work.

While there is danger in using these commands, they should be used to properly manage your database. The key here is to use them after hours when other users are not using the database. Another option would be to do your development work in a copy of the database so nobody is ever “using” the database you’re performing administration work in. When you’re done, you can “copy” this database to the production database but again, after hours when nobody is doing work or you could have all users log out temporarily (perhaps at lunch) and copy the database then.

To the best of my knowledge, this issue is NOT present for those of you using Revit with Fabrication parts. Revit loads in your services and content and caches it in the Revit model. It doesn’t reference the database configuration again while you work unless you manually “reload” the configuration, So unlike CADmep, ESTmep or CAMduct which may reload parts of your database just by using the software, Revit won’t do this unless you manually reload in which care it will reload everything and keep all those database sequences sin check.

If you’ve ever opened an AutoCAD drawing and your parts appeared orphaned from their services, connectors changed to things that don’t make sense or your Cast Iron NoHub Waste system suddenly reports as Rectangular Supply Air, this likely was the cause and this Best Practice is for you.

Autodesk Fabrication: Best Practice #1

Don’t use Double Quotes ( ” )….Ever.

An Autodesk Fabrication Configuration contains a lot of information. One of the best tools for managing, sorting, filtering and maintaining lots of information is Microsoft Excel. There are some functions in Fabrication that export information into CSV format. Commands like SYSSCRREPORT in CADmep. You may even have some scripts or API code that exports data to a CSV.

When Double Quotes are used, this can and does often confuse Excel into thinking that it’s a separator between multiple pieces of Text and it can shift the data in some rows to different columns.

If you use feet-inch format/units and like the look of double quotes for inch marks, an easy workaround is to use 2 single quotes ( ” ) as opposed to a single double quote ( ” ). When using 2 Single Quotes, it’s hardly noticeable even when looking for it like in this text. Try selecting the text sand you’ll see they are indeed different.

While this rule should be adhered to anywhere in the fabrication database, there’s 4 primary areas where it’s most likely to cause you grief.


Database Entries – Materials, Specification, Connectors, Seams, Airturns, Ancillaries, etc.


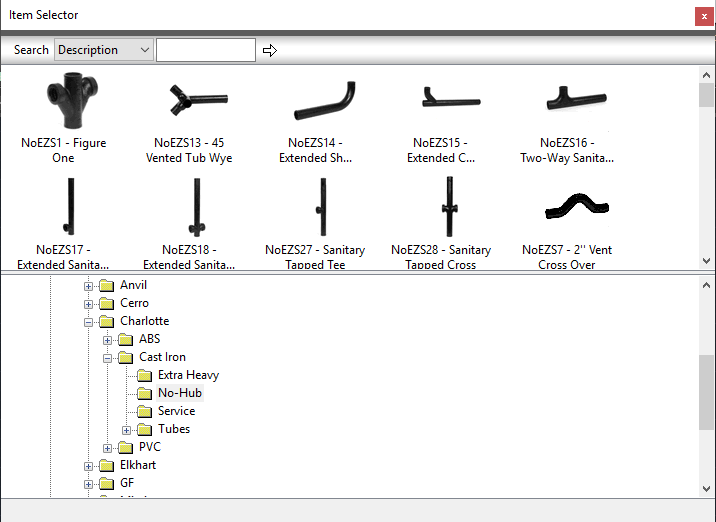
Folder and ITM Names – While a perfectly valid character in Windows for files and folders, it’s not a good idea when using Autodesk Fabrication.


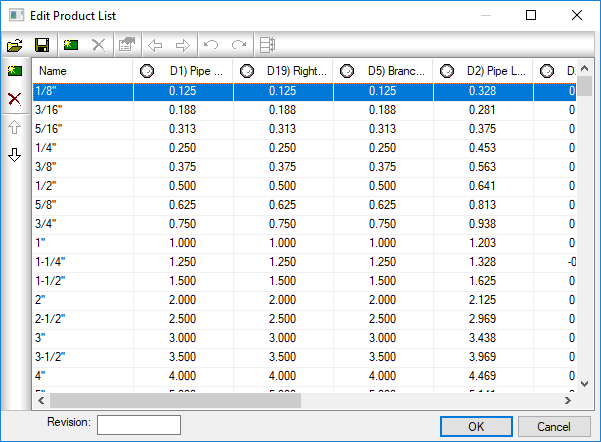
Product List Names – One of the most common areas to see the inch mark.


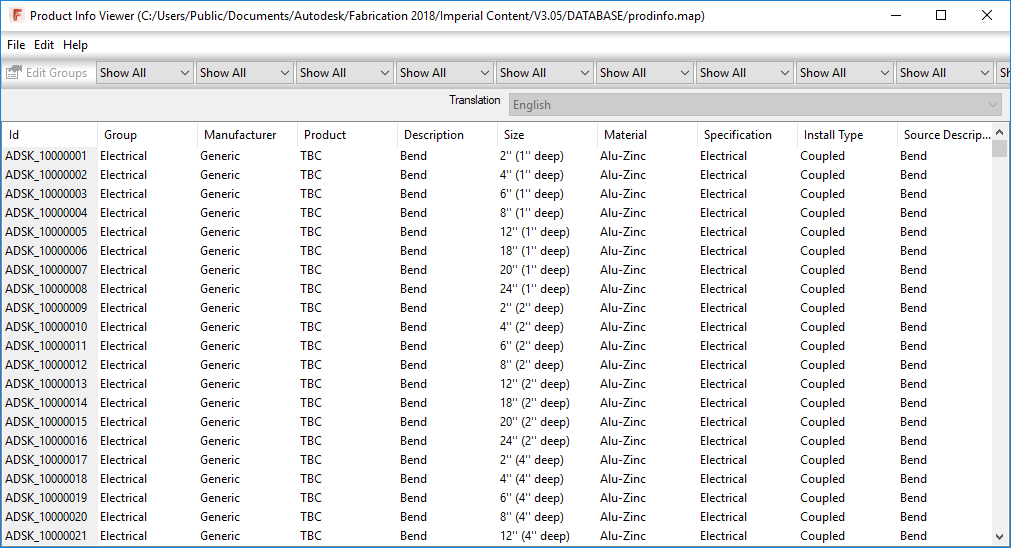
Product Information Editor – Another common location where you’re tempted to add double quotes. It’s common for people to maintain this data in Excel in the first place so it’ll be really easy to do a global search and replace to fix it.


In future posts, I’ll share some processes and scripts that can be affected by using Double Quotes. Until then, just trust that it’s a bad idea.