Swap Patterns (CID) or ITM’s in CAMduct, ESTmep & CADmep

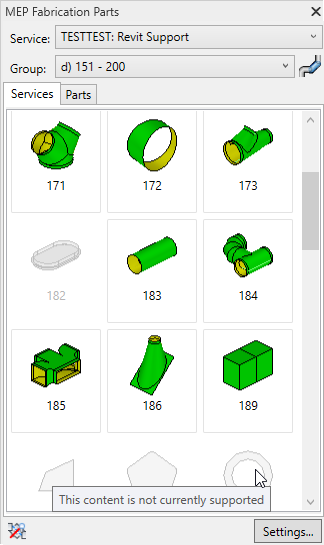
Did you know you can change the Pattern (CID) of an Items in your Takeoff or Drawing in Fabrication? A Simple COD script is all it takes. Obviously, you an do some irrational things like try to change a piece of Decoiled Straight (Pattern #866) to a Square Elbow (Pattern #3). But there’s plenty of cases where swapping ITM’s and Patterns makes a lot of sense.

You may want to take a piece of Machine Cut Straight (Pattern #1) and change it to Decoiled (Pattern #35) or Sheared (Pattern #36) or the universal Straight (Pattern #866).

You may even want to keep the same pattern number and merely load a new ITM to get dfferent options like going from a Gored to Adjustable Elbow based on your library. The possibilities are really endless.

Credit for this technique goes to Christopher Kelly (https://www.linkedin.com/in/kelleychristopher/) of Infinate CAD Solutions (https://infinitecad.com/) in Riverdale, Utah.

How It Works

The script itself is fairly simple if you know COD scripting. The Steps are as follows…

  1. Define the Path of the ITM file you want to Swap In.
  2. Define Restrictions on what ITM’s in your DWG/MAJ to apply to.
  3. Save Values you want to carry over.
  4. Load new ITM definition from Disk.
  5. Save Carry Over values to updated ITM definition.
  6. Update/Save Changes to ITM
REM - STEP 1
REM - Define Replacement ITM
dim itmName = MAPPATH_ITEMS + "\Imperial Content\CID866.itm"

REM - STEP 2
REM - If Item Matches Target You Want To Swap...
if item.PatNo = 1 Then

  REM - STEP 3
  REM - Save Values to Bring to New ITM
  dim saveAlias = item.Alias
  dim saveBoughtOut = item.BoughtOut
  dim saveDim1 = item.dim[1].Value
  dim saveDim2 = item.dim[2].Value
  dim saveDim3 = item.dim[3].Value
  dim saveDrawing = item.Drawing
  dim saveETag = item.ETag
  dim saveInsSpec = item.InsSpec
  if Upper(saveInsSpec) = "NOT SET" then saveInsSpec = ""
  dim saveISpecLock = item.ISpecLock
  dim saveNotes = item.Notes
  dim saveNumber = item.Number
  dim saveOrder = item.Order
  dim saveQty = item.Qty
  dim saveService = item.Service
  dim saveSpecification = item.Specification
  dim saveSpecLock = item.SpecLock
  dim saveSpool = item.Spool
  dim saveStatus = item.Status
  dim saveZone = item.Zone

  REM - STEP 4
  REM - If Loading New ITM Successful...
  if item.Load(itmName) Then

    REM - STEP 5
    REM - Restore SAves Values
    item.Alias = saveAlias
    item.BoughtOut = saveBoughtOut
    item.Dim[1].Value = saveDim1
    item.Dim[2].Value = saveDim2
    item.Dim[3].Value = saveDim3
    item.Drawing = saveDrawing
    item.ETag = saveETag
    item.InsSpec = saveInsSpec
    item.ISpecLock = saveISpecLock
    item.Notes = saveNotes
    item.Number = saveNumber
    item.Order = saveOrder
    item.Qty = saveQty
    item.Service = saveService
    item.Specification = saveSpecification
    item.SpecLock = saveSpecLock
    item.Spool = saveSpool
    item.Status = saveStatus
    item.Zone = saveZone

    REM - STEP 6
    REM - Updagte ITM and Save to Memory
    item.Update ()
    item.RefreshCosts ()
  else
    Debug "Error: Swap Failed. Unable to Load Replacement ITM."
  end if
end if

Fabrication 2025 – Coupling Limit

You may have noticed a new setting in Fabrication 2025. You can see it when you edit the properties of a Service Template. It’s shows as Maximum # couplings. Valid settings are 1 to 10. So what is this setting you may ask? Well, don’t go with your instincts. The name is as unintuitive as possible.

To start, couplings are any ITM made from Pattern (CID) 2522. So not necessarily an actual “pipe” coupling. So this setting only applies to any fitting made from Pattern 2522 regardless of what it does in the real world. No other patterns are affected.

Your initial instinct might be that this limits the number of coupling patterns on a service template. You’d be wrong. When you think about it, a lot of things are made from Pattern 2522. Couplings obviously, but also Welds, Flanges. some Reducers, Adaptors, Unions, Bolt Sets, Gaskets, etc. That can easily push the number over 10. So what exactly does this do?

First, a little background. To start this setting only applies to Revit. No other Fabrication products are affected aside from using them to edit the setting. Next, you should know that there was always a coupling limit as it pertained to Revit. It was hard coded to 6 I’m told. This change in the 2025 Fabrication products made it editable to a smaller (minimum 1) or larger number (maximum 10).

What this settings does is control the connect and coupling logic in Revit. Revit’s autofill features like Route and Fill, Multi-Point Routing, Quick Connect and Design to Fabrication are affected. This is because the coupling pattern is special. In most scenarios, pipe is connected to fittings. In come cases, fittings to fittings. Coupling patterns on the other hand, can connect to other coupling patterns repeatedly.

These autofill functions need to process the various options for fittings. This can have performance implications that increase exponentially the more parts you have using those patterns. Let’s look at an example….

The below image shows a pipe flange connection. It’s using 6 coupling patterns in a row in the model. But in your service, there may be even more. Different types of flanges, welds, gasket and bolt set options, etc. It needs to look at all of those to determine the options available. In this case, a coupling limit of 6 would work. That’s how many 2522 patterns you would ever string together to make this connection. So after 6, Revit no longer needs to keep looking for couplings and can limit it’s analysis to other pipe or fittings in your service.

As you can see, the old hard coded value of 7 would be enough to cover most flanged or dielectric connection options. In some very limited edge cases, you might need more. So now you can bump it up to 10. However, you may want to actually reduce it lower. If you’re using ancillaries for gaskets and bolt sets and not drawing ITM’s to quantify them, a setting of 4 would be sufficient. For some systems, you might even be able to go lower.

What happens if the coupling limit is lower than what’s needed? Well, you might have to make those connections manually. Autofill functions wouldn’t provide all of the possible options. In some cases, you might event get broken connections.

Personally I’ve not been able to create a sample dataset and configuration that really demonstrates functionality working or not based on the setting. For the most part, it’s likely not going to affect most users however lowering it might provide some performance improvements in Revit. They tell me ideally the setting would be 3 or 4. But as you can see, if you’re using ITM parts for Bolt Sets and Gaskets, 6 is likely your “Go To” number. But on a plastic system? 3 or 4, maybe even 2 would be sufficient.

Fabrication Parts – Riser Clamps in Revit (Problems & Solutions)

I run into a number of people who have had problems with Riser Clamps and Revit Fabrication Parts. I have as well. Here’s how you can work around them…fairly easily.

Problem #1 – Clamp Will Not Attach to Vertical Riser

The first problem I see is with Riser Clamps not attaching to vertical pipe. I’ve seen some creative workarounds. From just placing a clamp in space and moving it to near where it should be to using a modified form of a Grooved Coupling pattern. The following video shows what that would look like if you have this issue.

The fix for this issue is fairly simple. First, make sure you’re using Pattern Number (CID) 838. This is the original Hanger pattern that will allow you to make just about any hanger. Secondly, ensure that you select the ‘Slide‘ option on the pattern.

This is the ONLY Hanger option that will work for vertically oriented pipe.

Once you use the proper option, you can observe that a Riser Clamp will attach to the vertical pipe. This can be seen in the following video.

The second Riser Clamp’s configuration uses the ‘Slide’ option. This allows us to attach it to vertical pipe. This sets us up well for the next issue….oversizing.

Issue #2 – Oversized Riser Clamps

The second issue is that if you set your Insulation Specification’s material to Oversize Hangers, the Riser Clamp will also oversize. This isn’t something you do with a Riser Clamp. Many of us have brought this issue to Autodesk on several occasions, yet they seem to struggle with understanding of our need for an option in this pattern to “ignore” oversize.

Luckily, with a little added work and user intervention, we can work around this. To resolve the issue, create a secondary Riser Insulation Specification with a material that does not oversize hangers.

To do this, you’ll need a duplicate of your Insulation Material. In the image below, we configure the insulation on the right not to oversize for systems where we do not require thermal pipe inserts.

Once you have a secondary Insulation material, you can create the Insulation Specification for the Riser.

Now, all you need to do is override the Insulation Specification on the Riser (vertical pipe) before placing the Riser Clamp. You can see this in the following video.

You can see how the vertical pipe get’s a pipe sized Clamp, where as the horizontal pipe will still oversize because we didn’t change it’s insulation specification.

I’d like to thank Kevin Allen and William Tucker of Comfort Systems USA for pointing out this embarrassingly simple workaround for Insulation Specification that seemed to escaped me.

Fabrication References – 2024 Update

Fabrication 2024 is out. I’ve updated all the reference information to include 2024 formats. As has been the trend the last few years, little has changed. Summary below…

Fabrication References – 2023 Update

Fabrication 2023 is out. I’ve updated all the reference information to include 2023 formats. As has been the trend the last few years, little has changed. Summary below…

COD Script Updates – 2020.07.08

I’ve made a couple updates to the Autodesk Fabrication script libraries. If you use them, you can download updated versions from here.

Scripts have been updated to include the Connector Material property found on CID/Patterns 522, 1522 & 2512 as shown below…

This property is intended to be used by a connector to specify a alternate material the connector can connect to. This allows a coupling to connect to alternate materials such as with transition couplings.

Credit for discovering the COD function to extract this property goes to Liz Fong at MacDonald Miller Facility Solutions in Seattle, WA.

Note: This property has also been added to the list of COD Item Properties located here.

Scripts Updated

  • Debug Scripts
    • Debug ITEM Connectors.cod
  • Job Item Scripts
    • WriteAllConnectors (Job).cod
    • WriteAll_Props (Job).cod
  • Library Item Scripts
    • WriteAllConnectors (Library).cod
    • WriteAll_Props (Library).cod

COD Script Updates – 2019.11.10

I’ve made a couple updates to the Autodesk Fabrication script libraries. If you use them, you can download updated versions from here.

Scripts Updated

  • Job Items
    • All Scripts updated to now include the Item Number which makes it easier to track back report entries to ITM’s in your job.
    • Fix a couple syntax issues in a few scripts which caused errors.
  • Revit Support Report
    • Added Reporting on Revit 2020 status
    • Changed CID/Pattern # 1175 from NO to YES.

Known Issues

End Location properties appear to be crashing 2020.1 Versions of Fabrication. Other versions may/may not crash as well.

COD Script Updates

I’ve made a couple updates to the Autodesk Fabrication script libraries. If you use them, you can download updated versions from here.

Scripts Updated

  • Debug
    • Debug ITEM Library.cod
    • Debug ITEM Sealant.cod
  • Job Items
    • WriteAllLibrary (Job).cod
    • WriteAllSealant (Job).cod
    • WriteAll_Props (Job).cod
  • Library Items
    • WriteAllLibraries (Library).cod
    • WriteAllSealant (Library).cod
    • WriteAll_Props (Library).cod

Issues Corrected

Issue 1: Scripts accessing the “Library” property were failing on CID/Pattern 2199. Scripts have been updated to watch for this and report it as an ‘Unknown‘ Library.

Issue 2: Some CID/Patterns can be configured to be pipework or duct work depending on the “Pipework” option’s “Yes/No” status. Scripts were updated to properly report or ignore this property depending on the Sealant value being present.

If the option is set to “Yes“, the pattern is a pipework item. If set to “No”, the pattern is a sheet metal item. Sheet metal items contain the “Sealant” property where as Pipework items do not.

This condition is present in the following CID/Patterns…

149838 902110112381239
12401241124212471248

Special thanks to Kyle Speropoulos of MMC Contractors in Kansas City for alerting me to this issue.

Fabrication 2020 Resources Updated

Resource information for Autodesk Fabrication has been updated. They now include information on the 2020 version of CADmep, ESTmep and CAMduct. In short, nothing has changed.

The FabViewer Command Reference did have one new command added. However, this was not new to the 2020 version. The CADmep 2019.1 update added a command which was missed previously.

Pages that were updated are the following…

Revit Fabrication Parts – Pattern Support Analysis

It no secret that not every Autodesk Fabrication pattern is supported in Revit. I’ve recently finished a more in-depth analysis of which patterns are and are not supported in Revit. Each of the 703 different pattern types were tested in each version and each update of Revit.

On the Fabrication COD Scripts page, you can find a Revit Support Report script. That script will analyse your ITM library and generate a CSV report of the status of every ITM in your Fabrication Configuration.

You can also find the complete results of my testing on the Revit Support page. Here’s a summary of the the testing…


Tested Version

Each of the below versions of Revit were tested with all the the 704 different patterns:

20162016R22061R2SP7
2017.02017.12017.2
2018.02018.12018.22018.3
2019.02019.12019.2

Testing Criteria

“Supported” for purposes of this testing is based on whether Revit allows a particular pattern to be used in the Fabrication Part Browser.


Testing Results

Testing results will have one of the following status descriptions.

  • No – No Revit support
  • Varies ({verison}) – Revit support varies between Revit version
  • Yes (Risk) – Revit does support but use NOT recommended due to issues
  • New ({version}) – New Pattern supported in later Revit versions
  • Yes – Pattern is supported in all Revit versions with no significant issues

Support Status = No

No – Parts not supported by the Parts Browser are obviously listed as having “No” support. There are a total of 84 different patterns listed in this category. They are as follows…

125126127
128129130141158202203
204205206207208209210211212213
215216218220221228230301302308
503505521530764765803804805806
833873910913928960961964966969
974980983985994996999104911021106
1114114211501152115711611162116511681169
1181119411961198218521892190219121922199
2200287331083873

Support Status = Varies

Varies (version) – In some cases, Fabrication Parts were initially allowed or supported in earlier versions and later were restricted. These parts have a status of “Varies” followed by the version where the change occurred. It’s recommended you avoid use of these patterns even in versions where they work as they will not be supported in later versions. There are 17 patterns that once worked in Revit but are no longer supported. They are as follows…

0182222381845853855864876898
903912915971110511701175

Support Status = Yes (Risk)

Yes (Risk) – Patterns that list “Yes (Risk)” are technically supported in Revit but I highly recommend avoiding their use. Patterns with this status have issues like inserting at the Revit’s Project Base Point and not the cursor location. They also have a tendency to crash Revit if you attempt to grip or edit them. As a result, I highly recommend avoiding their use. There are 29 patterns in this category. They are listed here…

119189317346347348349350351352
353368369390392397398415810828
922930962963968973115911601176

Support Status = New

New (version) – Some patterns were not around in earlier versions of Revit but later added and supported in Revit. These patterns are listed as “New” followed by the version of Revit they became available in. These patterns are generally safe to use for Revit. There are 19 patterns in this category which are listed here…

217120612071238123912401241124212431244
124512461247124812491250219721982217

Support Status = Yes

Yes – Parts allowed by the browser that work across all versions of Revit are listed with e “Yes” status. There are 555 patterns in this category. They are listed here…

12345678910
11121314151617181920
21222324252627282930
31323334353637383940
41424344454647484950
51525354555657585960
61626364656667686970
71727374757778798081
82838586878889909192
939596979899100101102103
104105106107108109110111112113
114115116117118120121122123124
132133134135136137139140142147
148149150151152153154155159160
162163165166169170171172173183
184185186231250251252253254255
309311313314315316318319320321
322323324325326327328329330336
338340341342343344345354355356
357358359360365366367376377378
379380382383384385386387388391
393394395399401410411412413417
420421430431440441450451460461
470471472480501502504506507509
514515518519522523524525526533
535555556557580751760761800801
802807808809811812813814815817
818819820821822823824825826827
830831832834835836837838839840
841842843844846847848849850851
852854856857858859860861862863
865866867868869870871872874875
877878879880881882883884885886
887888889890891892893894895896
899900901902904905906907908909
911914916917918919920921923924
925926927929931932933934935936
938939940941942943944945946947
948950951952953954955956957958
959965967970972976977978979981
9849869879889899951000110111041107
1108110911101111111211131115111611171118
1119112011211122112411251126112711281129
1130113111331134113511361137113811391140
1141114311441145114611471148114911511153
1154115511561158116311641166116711711172
1173117411771178117911801183118411851186
1187118811891190119111921193119711991200
1201120212031204120515221972204020412042
2044204720512060207120722082209721082148
2149215521602182218321842186218721882193
2194219521962326238623882522252325242751
2814282128572868286928752881288228832884
2885288628992900290129022903290429052906
2907291629382965296629672979304130513060
30713386352235234522