CID’s That Support Field Layout
I’ve been asked from time to time, which Autodesk Fabrication Patterns (CID’s) support exporting points for field layout. If you want to use Trimble, Topcon or similar hardware for field layout like hanger inserts for MEP, these points are important.
So, with this post, we’ll show you that information but also hope to accomplish something else in the process. I’ll walk you through a couple ways to do it, one significantly better than the other. It’s not really important that you know how to do this same process again, once you have the information, you’ll likely save it somewhere. However, knowing how to do this process will hopefully give you ideas about techniques you can use for other types of data mining and extraction. It’s not hard after all, you just need to get creative with few things you already likely know how to do.
If you’d rather just get to the data, scroll to the end of this post and you’ll find the list of pattern numbers. Otherwise, follow along and at the same time, explore some options for learning how to get this type of data yourself.
Step 1 – Get a copy of Every CID
The MAKEPAT command in Fabrication is how we create new ITM’s based on a particular CID. Most people working with Fabrication for a while know that. What they may not know is that you don’t have to randomly type patter numbers and run the command hundreds of times. CAMduct can do them all at once. If you don’ have CAMduct, install a trail version which you can download from Autodesk’s web site.
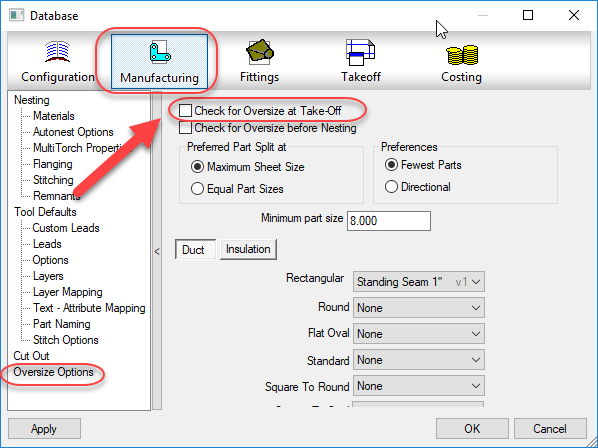
After starting CAMduct with a new project, the first step is to turn off prompting for Oversize which would keep prompting you on some large sheet metal patterns that exceed the material size. We turn this off to make the process run without pausing for user input.
The next step is to display CAMduct’s Command Window screen by pressing “CTRL-SHIFT-C“.
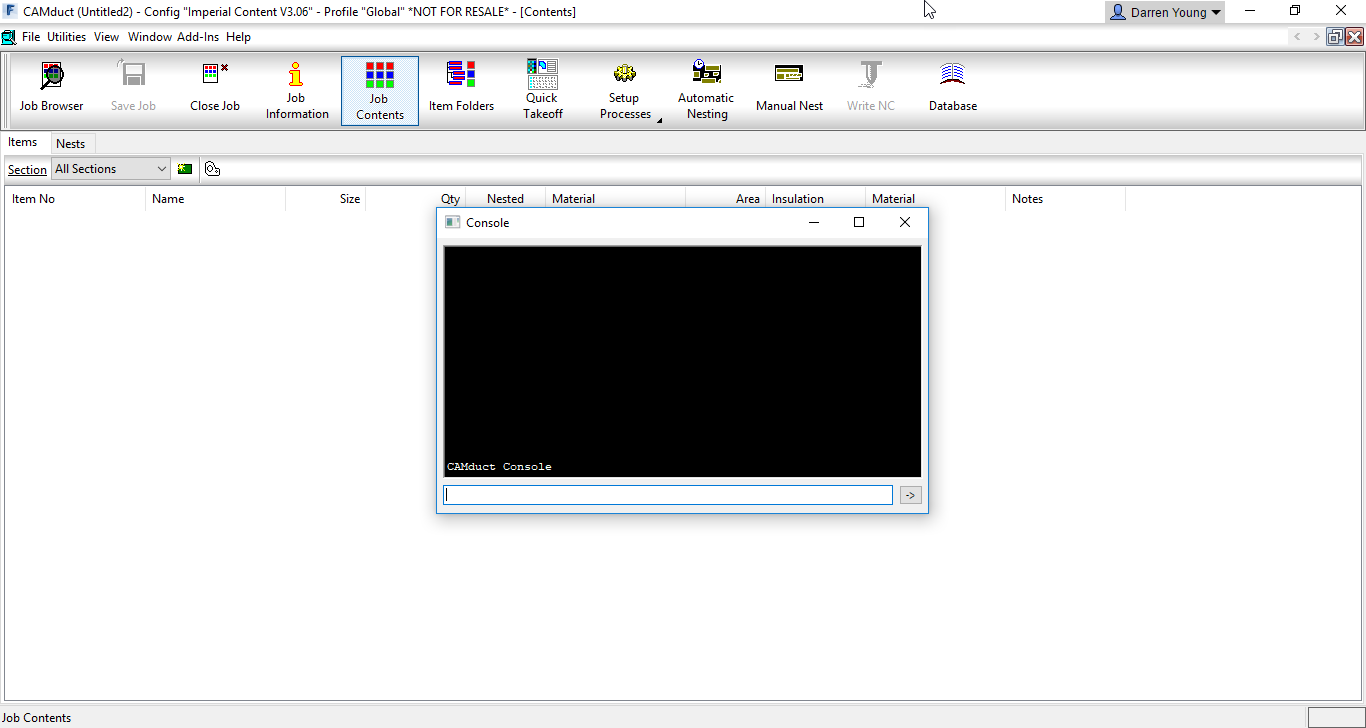
Next, in the Command Window, type the command “MAKEPAT ALL” and press <Enter>. (Note that the Command Window is also part of ESTmep but the MAKEPAT ALL function is not supported in ESTmep, only CAMduct.)
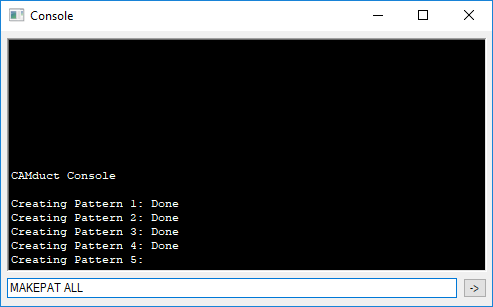
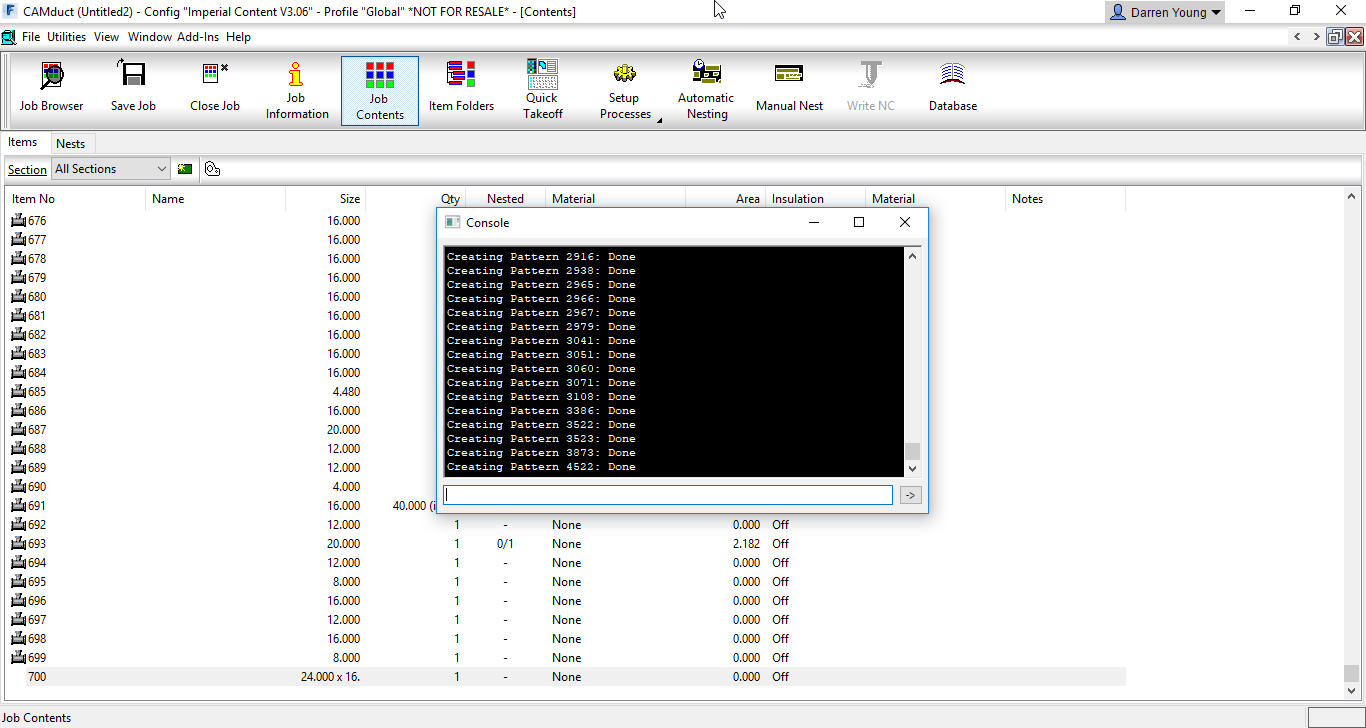
Depending on the speed and resources of your computer or even other running processes, this can appear as if it’s locked up CAMduct at times. However, be patient and let it sit. Unless the software crashes, the process will complete. I’ve seen cases where it can take over 10 minutes or more.
When complete, there is no prompt. You’ll just notice the cursor back in the Command Window’s typing area. The last pattern should be CID 4522. You’ll also see the Job Contents will contain each pattern that was successfully taken off. These patterns exist only in this job, not in your database so you’ll want to save this job in CAMduct’s MAJ file format for future reference. If you like, you can download my copy here.
Step 2 – Examine Patterns
Now that we have a file with all the patterns, we can examine them. There’s a lot, and doing each one individually will take a lot of time. If you’ve ever been to one of my Autodesk University sessions, you’ll know that I frequently supply a lot of Fabrication COD scripts. This is where they can come in handy. You can download them here.
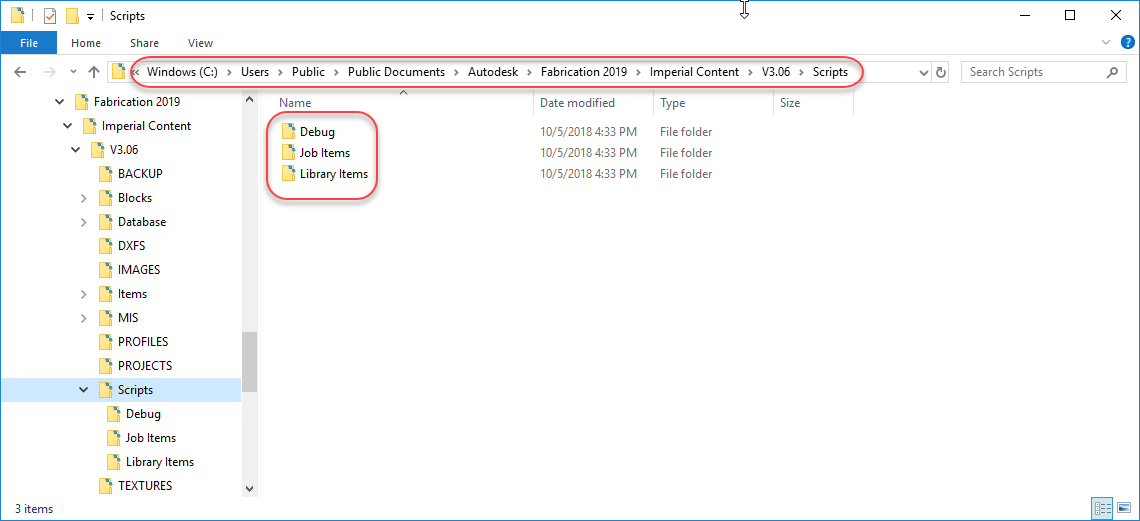
I typically place my COD scripts under the Scripts folder in my Fabrication Configuration like so…
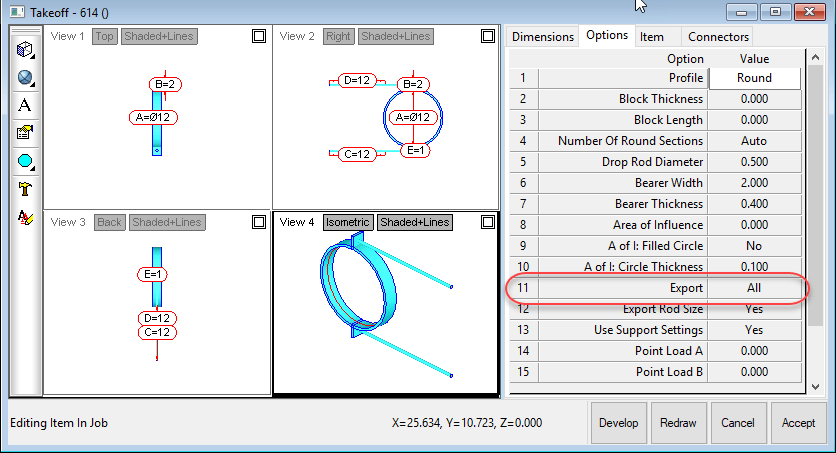
If you look at a Hanger CID (1249 for example) you’ll see in it’s Options tab that there’s an “Export” option that tells CADmep if it should export field layout points or not.
We’ll use this to determine which CID’s export points which is where the scripts come in. For this example, we’ll be using the following script…
.\Scripts\Job Items\WriteAllOptions (Job).cod
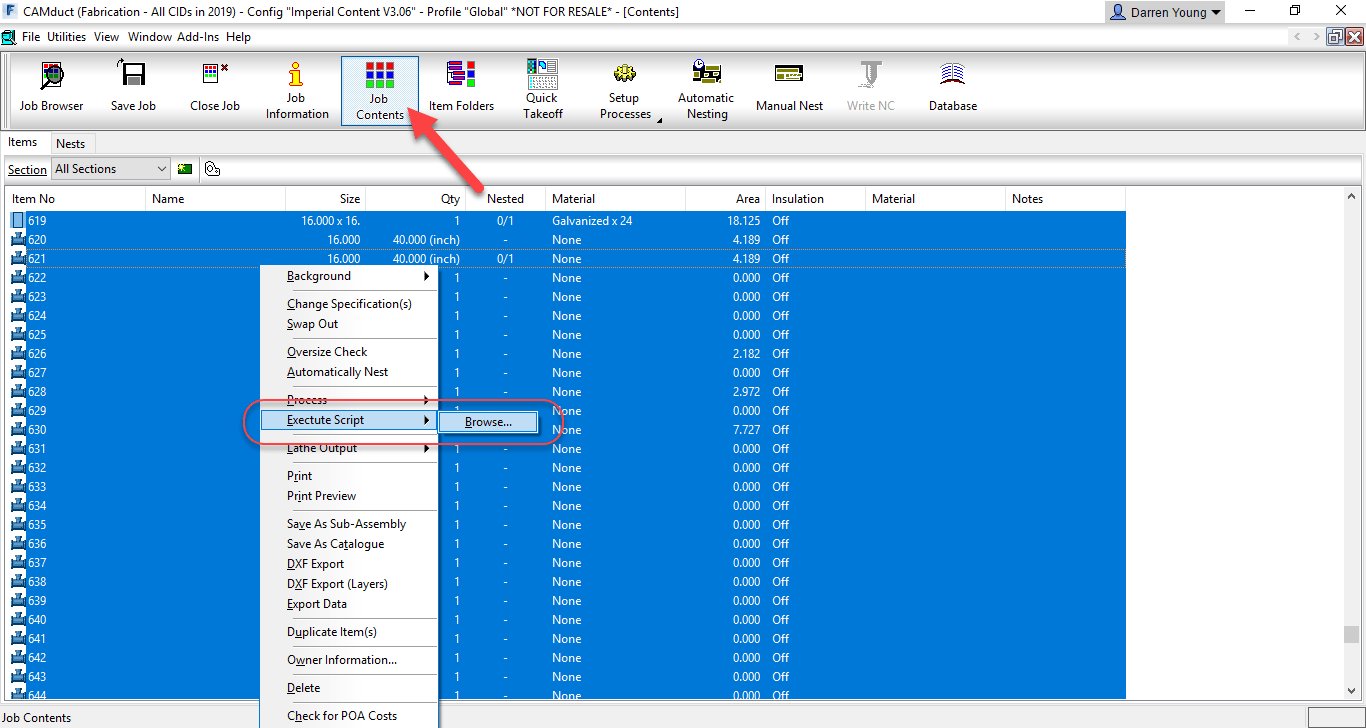
This script will write all the Options for all the item in the CAMduct Job. To do this, click the Job Contents button on the ribbon, select all the items in the job, Right-Click and select the Execute Script option then browse to the above referenced COD script.
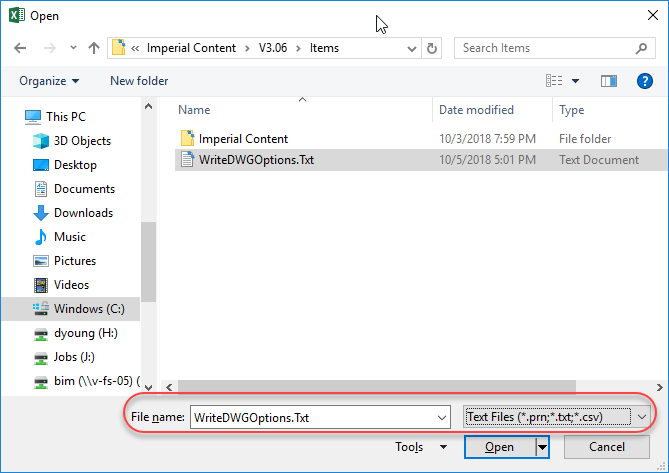
After the script completes, it’ll have written to a text file all the options and their values for each of the items in the job along with their CID. You can find the file located in the root of your fabrication configuration’s Items folder. This is the file you’ll be looking for…
.\Items\WriteDWGOptions.Txt
Using Microsoft Excel, open the text file. Make sure you change the file extension to Text Files so Excel displays the file you created.
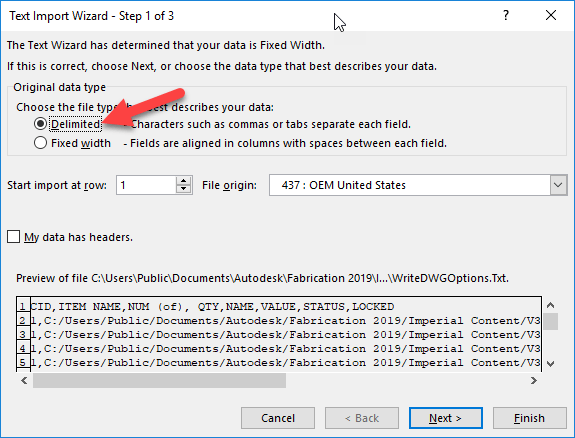
This will bring up Excel’s Text Import Wizard. Select the “Delimited” radio button and click Next.
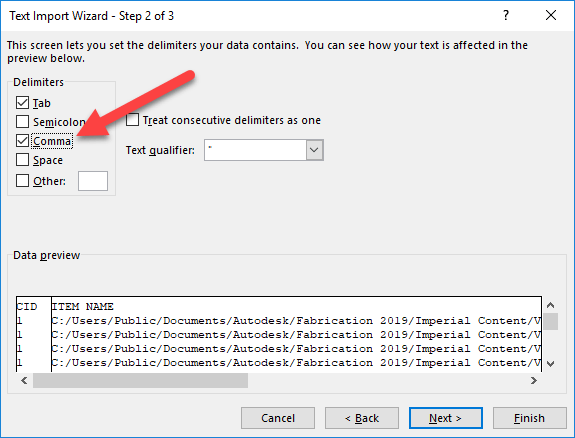
In the next screen of the Wizard, you’ll select the “Comma” toggle as one of the delimiters and then click the Next button.
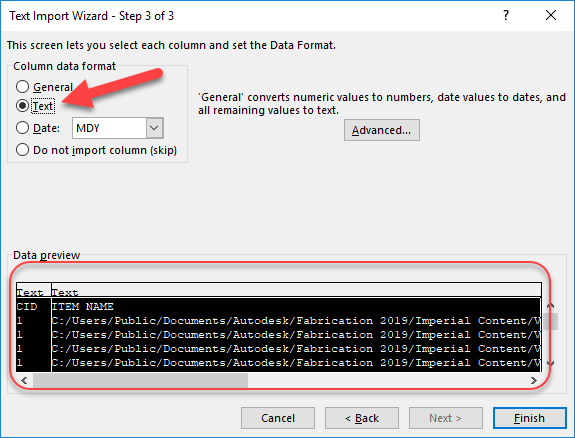
In the next wizard page, you’ll highlight all the columns in the bottom portion and select the “Text” radio button to tell Excel to treat all the columns as text. From there, click the Finish button.
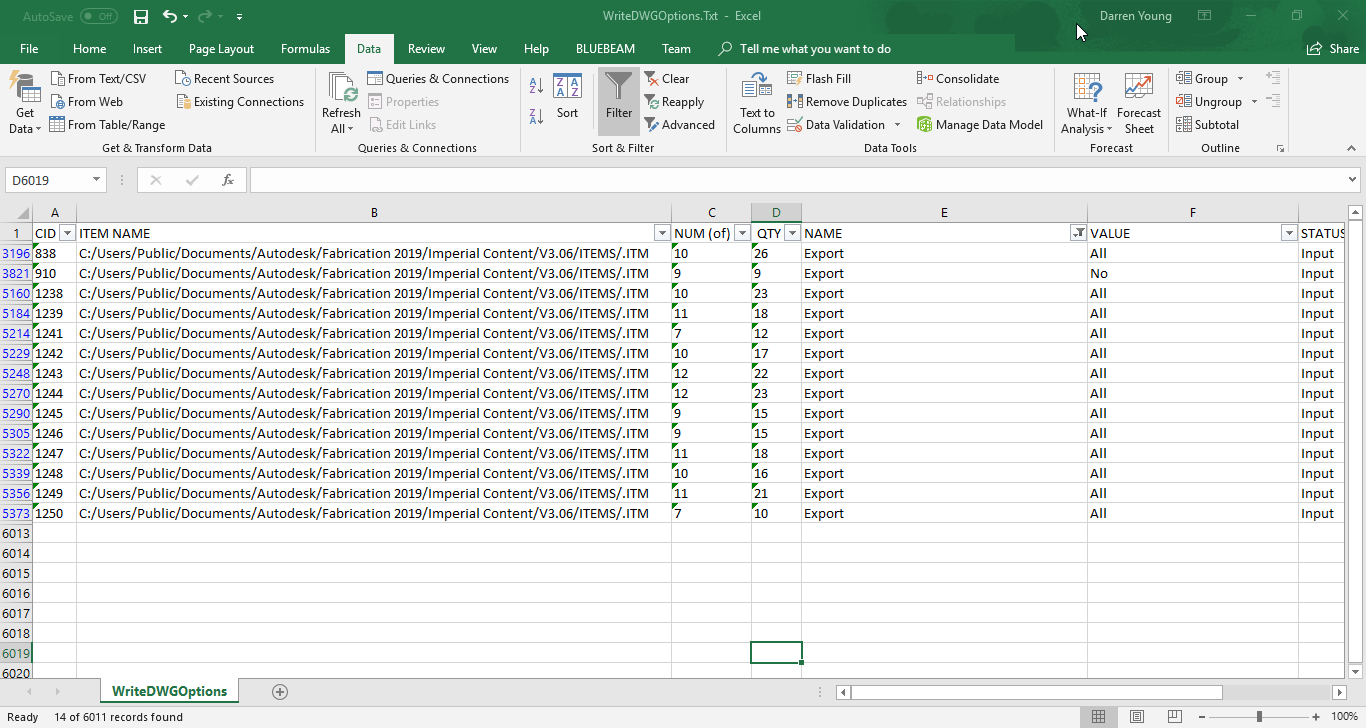
From here, Excel displays a line item for each option of each item in the job. You can now quickly filter this list by clicking the Data ribbon menu and selecting the Filter button. This adds a drop down arrow control in the first row of each column. “Column E” is the “Name” of the option. When you click the drop down arrow in that column, you see a list of all the values. Uncheck the top “(Select All)” option to deselect all the values and then scroll to the “Export” option and select it. This tells Excel to only display rows containing this text. From here, click the OK button.
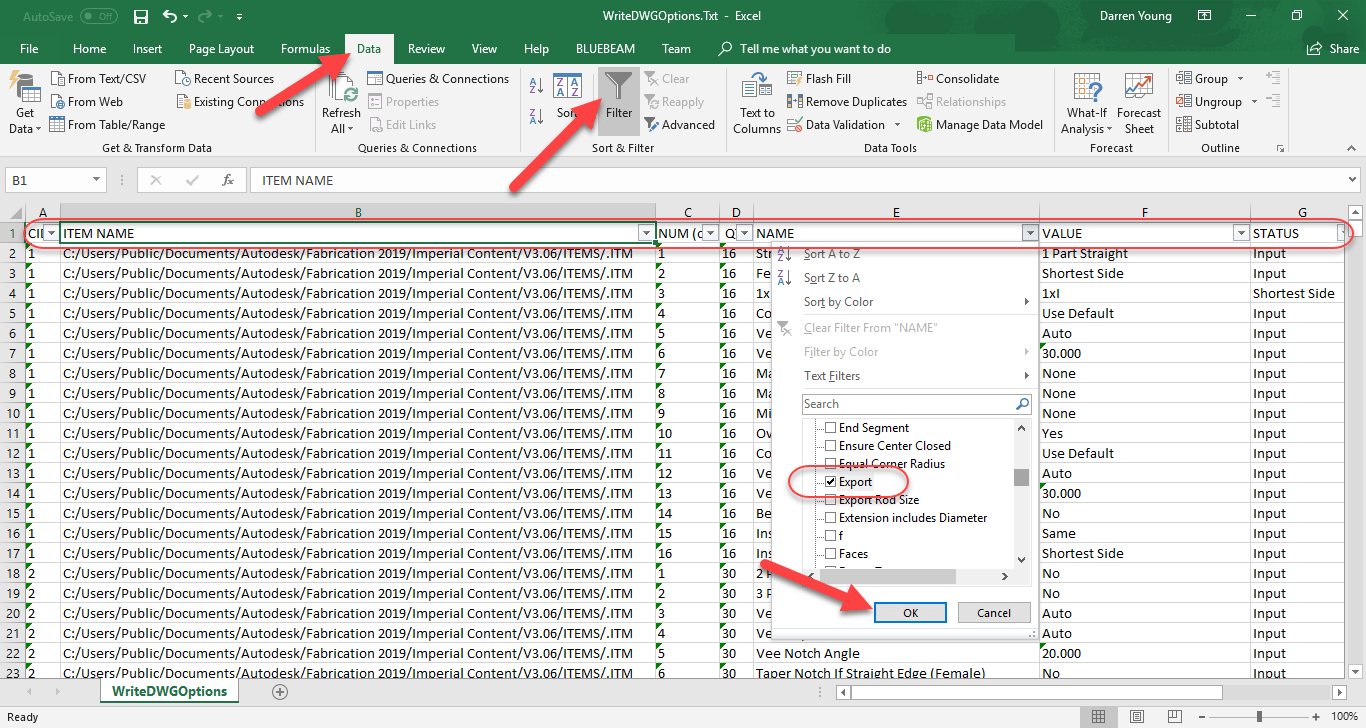
Once this is done, you’ll get a very short list in Excel. The left most column, “Column A“, is the CID or Pattern Number for each item in the job (we make one of each pattern) that has the Export option.
So now we have a list of Pattern Numbers that you know will export points for field layout. You also learned how you can use some of the scripts I have to Export and mine data from your fabrication configuration. The question you have to ask now is, are we certain this data is correct?
Autodesk Fabrication allows you to rename Dimension and Option names. That would suggest that it’s possible to miss an option that was renamed to something other than Export. In this case, because we used CAMduct to create all the patterns from scratch, it’s most likely that it’ll have all the default names for it’s Options and Dimensions.
We’re still not in the clear however. It’s possible some patterns that support field layout points don’t have an Export option or have a similar option but name it something else. For this reason, we can’t be certain we know ALL the CID’s but we can be certain that we know SOME of them.
Step 3 – An Second (Better) Approach
How can we be certain we know ALL the CID’s that support field layout point exports? The simple answer is to export all of the items and see which have points.
To do this, we can use Fabrication CADmep. Start AutoCAD and load Fabrication CADmep. From here, if you saved the job you created in CAMduct as an MAJ file, you can use the “OpenJob” command in CADmep to import all those Items into CADmep.
CADmep will display all the items in the Fab Viewer before importing. Simply click the OK button to complete the import process.
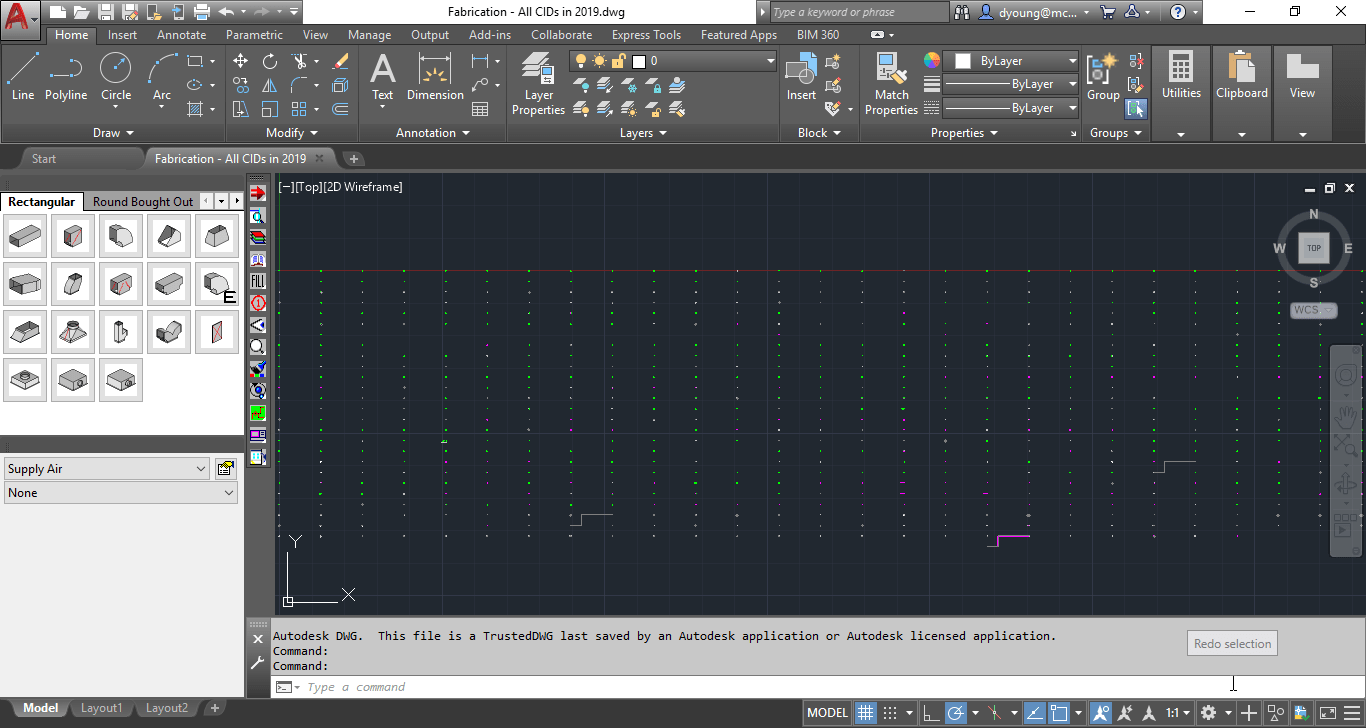
Once the MAJ is imported, CADmep will display all the Items in a large array. From here, we can use the “FPOINTE” command (previously the “TRIME” command) to export all the points. When the command asks you to select the points, type “ALL” at the select objects prompt. This will display the Field Point Sort dialog.
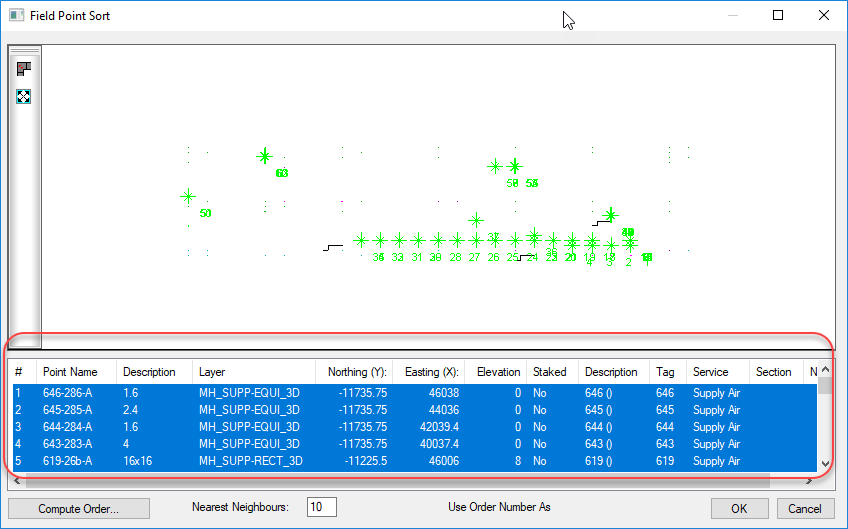
Now we could finish exporting the points at this time but we’re not going to. This is because not all the information in this window actually gets exported. Specifically, the Tag column which displays the Item number (not the CID) and we need to know which Item number (which CAMduct sequentially numbered) to find the Item so we can check it’s CID later.
Instead, we’re going to select all the points in the bottom of the dialog, Right-Click and select “Copy” to copy the entries into the Windows Clipboard.
Without going into all the steps here, the next thing we naturally want to try is to Paste the items into Excel. If you go ahead and try it, you’ll likely notice that the coordinate fields are missing (that’s an interesting story with some history in itself) which isn’t a big deal for our purpose. But upon closer examination, you’ll also see that the columns aren’t lining up in Excel. Pasting this data into Excel is not going to work without a lot of fixing of data.
So the next thing I try, I paste the data into a blank Notepad file to see what it looks like there.
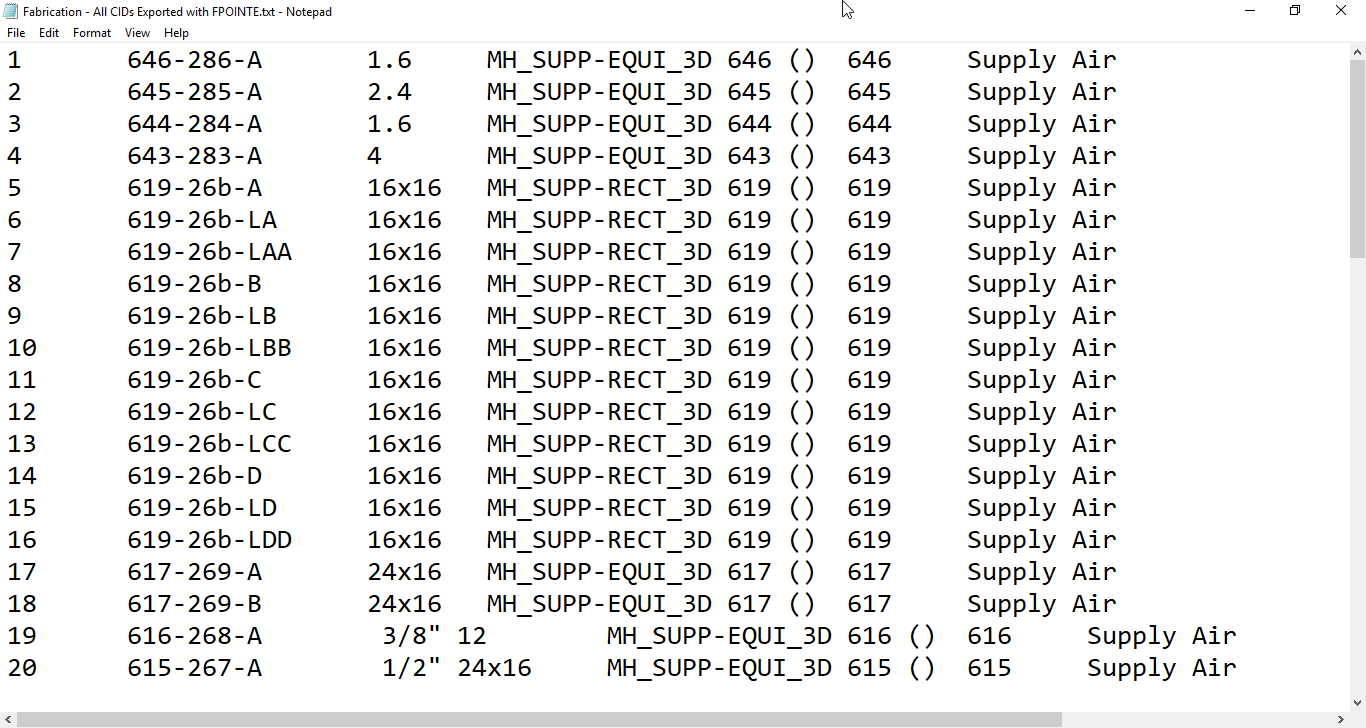
Looking at the data in Notepad, you can easily see there’s columns. A little lower in the file you see the columns tend to shift, bit there’s definitely columns there. A little further experimentation using the cursor and keyboard arrow keys you can see the cursor jump between columns. This is a clear indication that columns are separated with Tab character. If your data doesn’t look like this, try looking at the Word Wrap setting in the Format pull down menu and turning it off.
At this point, you should be guessing what’s next. Save the TXT file and open it in Excel like you did earlier. The only difference is that instead of selecting a comma as a delimiter, you want to make sure that Tab is selected as the delimiter, The resulting data in Excel should look like the following image…
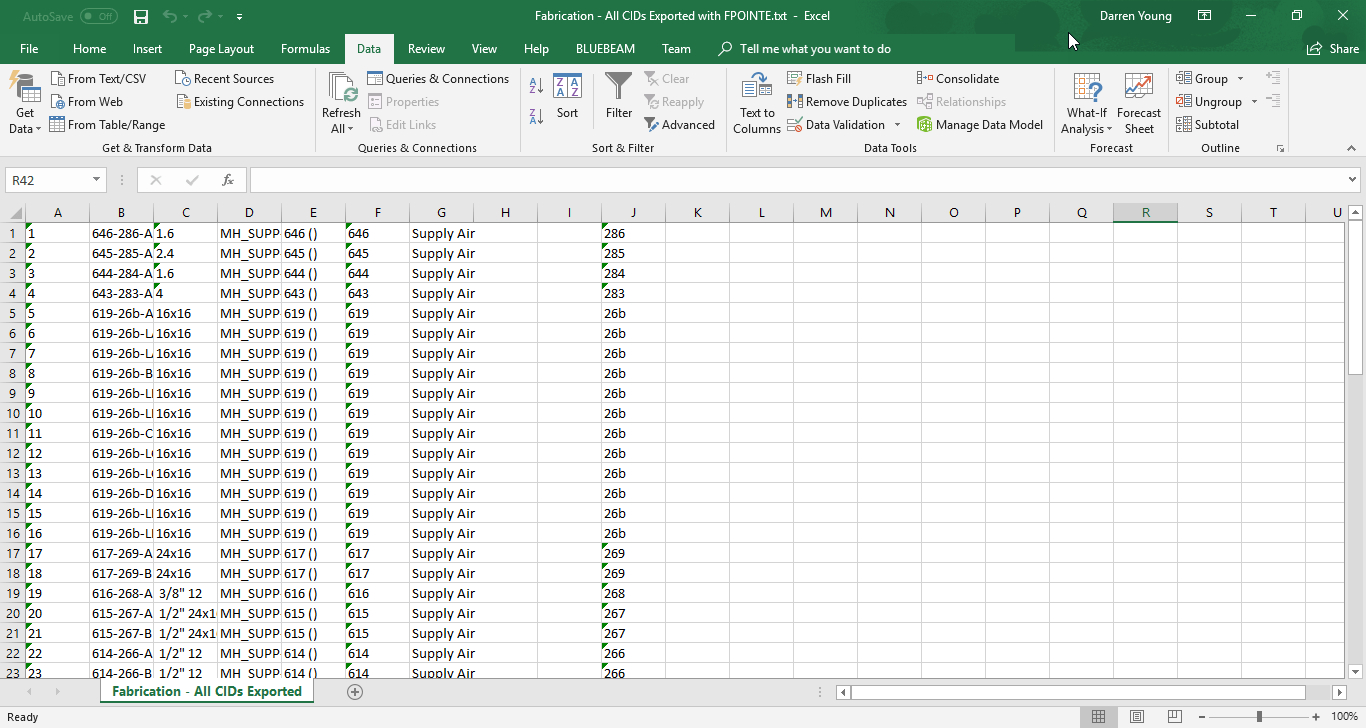
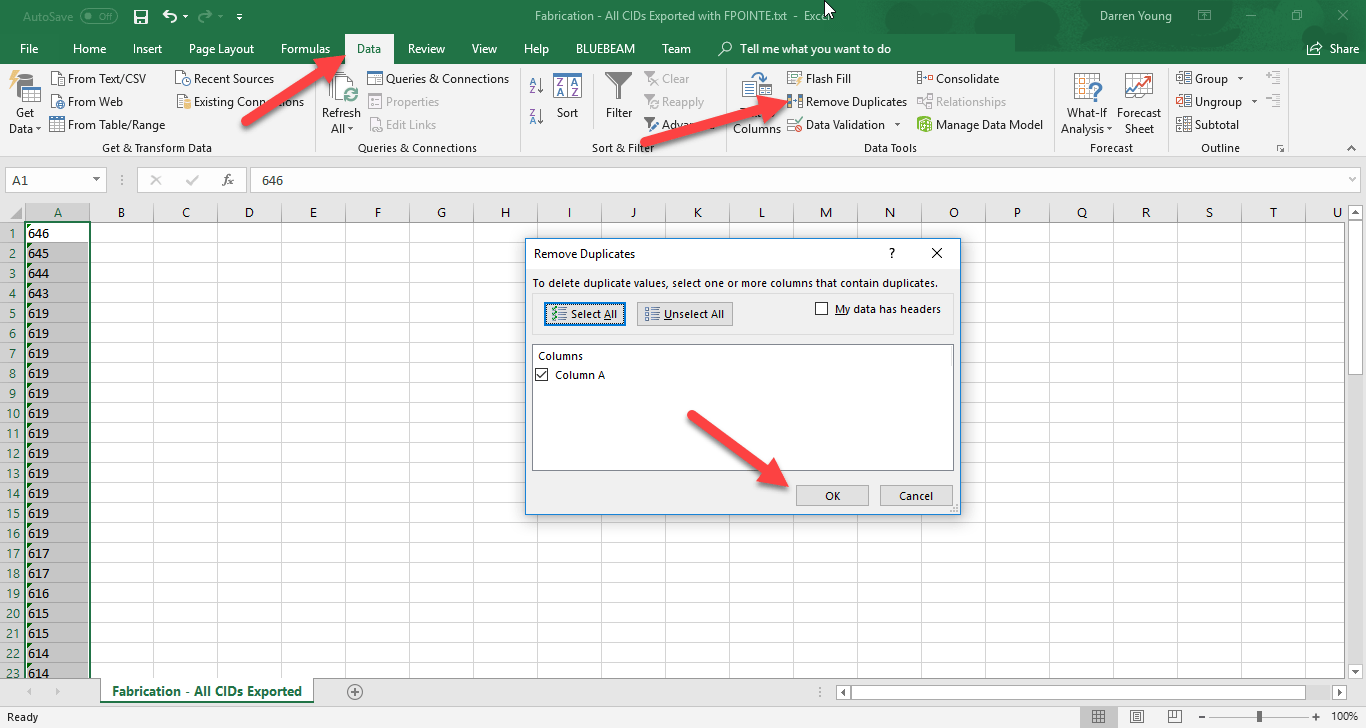
Lets keep in mind that some patterns export more than one point so there’s duplicates that aren’t needed. Additionally, we really don’t care about any of the exported data except for the Item Number which was in the Tag column in the Field Point Sort. This column is in Column F of Excel. For this reason, we’ll delete all the columns except for F. When you’re done, Column F will shift to Column A. From here, we can use Excel’s Remove Duplicates function on the Data ribbon to remove the duplicate Item Numbers.
When you’re done, you’ll have a nice short list of each pattern’s Item Number that was able to be exported. Note, this is the sequential Item Number that CAMduct assigned when creating the patterns. This is NOT the CID or Pattern Number. Keep this Excel file opened for now, we’ll get back to it later.
At this point, it wouldn’t be too hard to look up each item number in CADmep or CAMduct and check it’s properties to find the Pattern Number of the item. But that can still take some time. We’ll go through another step to automatically look up the Item Number and show you the Pattern Number of the Item.
Step 4 – Using The Item Number to Find The Pattern Number (CID)
We need to somehow tie the Item Number to the CID or Pattern Number. To accomplish this, we’ll again turn to our scripts. All of my COD Scripts typically export the CID number. There’s also typically a script for each property. So we’ll be using the following script which will export the CID and Item Number of all the items in our drawing.
.\Scripts\Job Items\WriteAllNumbers (Job).cod
Type “ExecuteScript” in CADmep and browse to the above script file. At the Select Objects prompt, type “ALL” to select all the items in the drawing to run the script on. When the script is finished, it’ll export the data to the root of the Items folder like before. Open it just the same as you did prior making sure you use a Comma for a delimiter and change the column data types to Text.
.\Items\WriteDWGNumbers.Txt
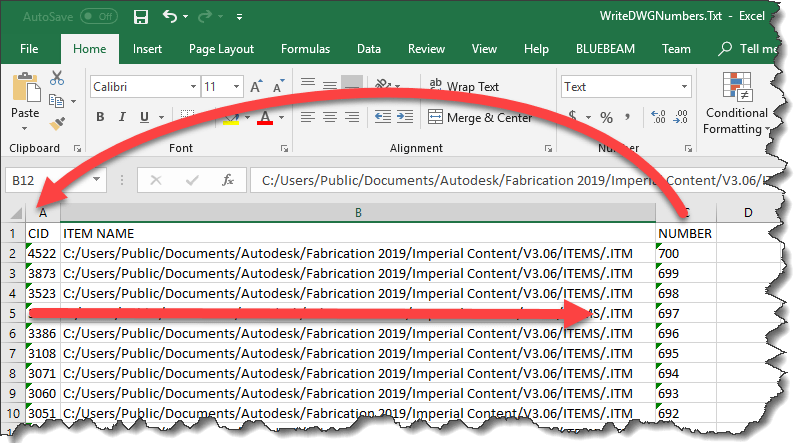
Once you open the Item Number export file, it’ll look like the following image. This is what we’ll use to cross reference the Item Numbers with their corresponding Pattern Number.
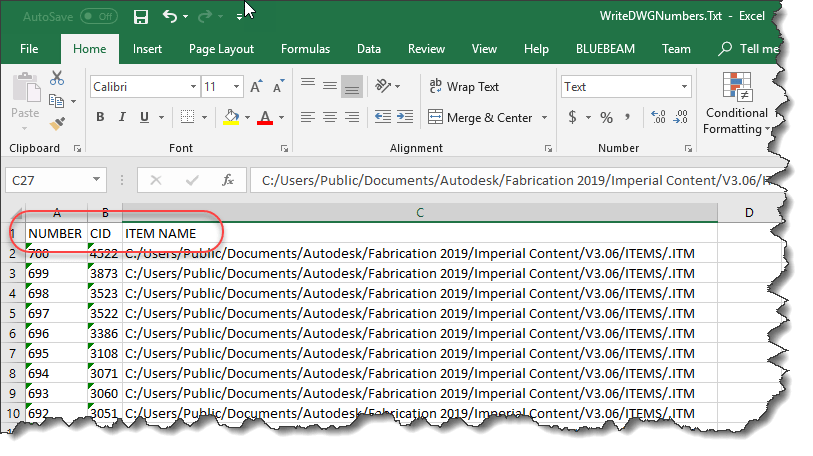
Because we need to look up the Item Number in Excel, we’ll want to move the Number column in front of the CID column. This is because the function that we’re going to use in Excel needs the number it’s looking up in the first column. When complete, your data should look like the following image…
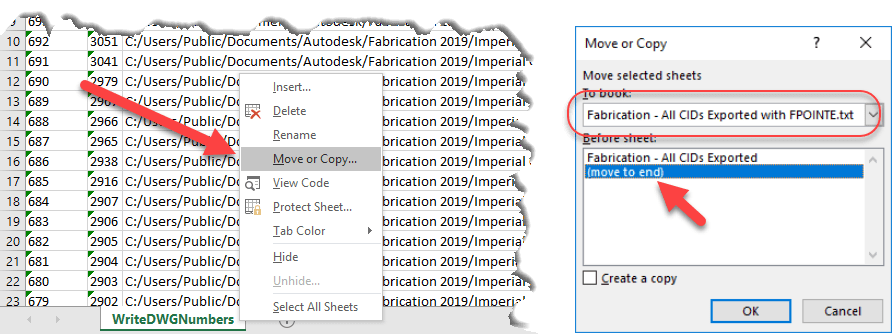
Next, we’ll move this entire worksheet to the first Excel file that contains our points. Right-Click on the worksheet tab and select “Move or Copy…“, use the drop down list in the Move or Copy dialog to select the spreadsheet with your exported point data and move it to the end. Click OK when done. This will move the sheet with exported Item Numbers and CID’s to the end of the other workbook.
When you’re done, you’ll have two separate tabs in your first Workbook. One lists only the Item Numbers of the successfully exported points, the other contains the Item Numbers and corresponding CID’s.
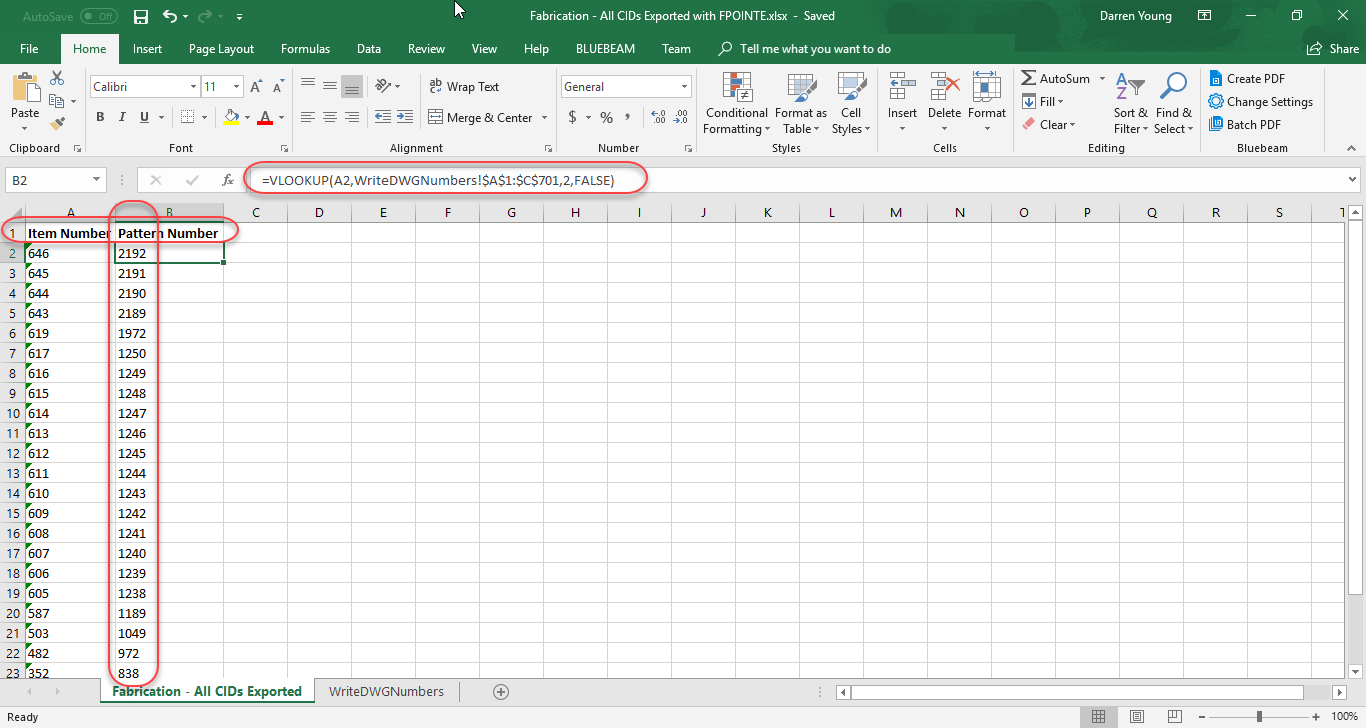
Go to the first worksheet tab where it lists a single column with the Items Numbers that were exported. Add a blank row at the top and type the text “Item Number” in Column A and “Pattern Number” in Column B. In cell B2, type the following formula…
=VLOOKUP(A2,WriteDWGNumbers!$A$1:$C$701,2,FALSE)
After typing the formula, copy it to the remaining cells in the column to complete the cross reference.
This formula tells Excel to look at the Item Number, and find it in the first column of the range in the second worksheet that lists all the Item Numbers and CID’s. When it finds that corresponding Item Number, return the value from the second column which contains the CID. The “$” in the cell address of the range tells Excel to NOT increment the range address as the formula is copied down…you want to look at the same range no matter what. Finally, the False flag tells Excel to do a strict match and not try to interpret close results. Your finished data should look like the following…
This completes our final list of Pattern Numbers (CID’s) that support Field Point Exports. You can look at my Excel file by downloading it from here.
Note that when we looked only at Items that contained the Export option, there were 14 patterns. However when we tested against the actual point export in CADmep, we ended up with 25 patterns. Our final list of Pattern Numbers (CID’s) that support field point exports is here…
| 149 | 321 | 322 | 838 | 972 |
| 1049 | 1189 | 1238 | 1239 | 1240 |
| 1241 | 1242 | 1243 | 1244 | 1245 |
| 1246 | 1247 | 1248 | 1249 | 1250 |
| 1972 | 2189 | 2190 | 2191 | 2192 |
Hopefully you’ve gained an idea on how to use some of the scripts, Excel and other processes to mine and extract data from your Fabrication configuration. It’s using techniques like these that allow me to assemble a lot of the information I have on this site like which versions of software have which CIDs’s and which ones are supported in Revit.