It no secret that not every Autodesk Fabrication pattern is supported in Revit. I’ve recently finished a more in-depth analysis of which patterns are and are not supported in Revit. Each of the 703 different pattern types were tested in each version and each update of Revit.
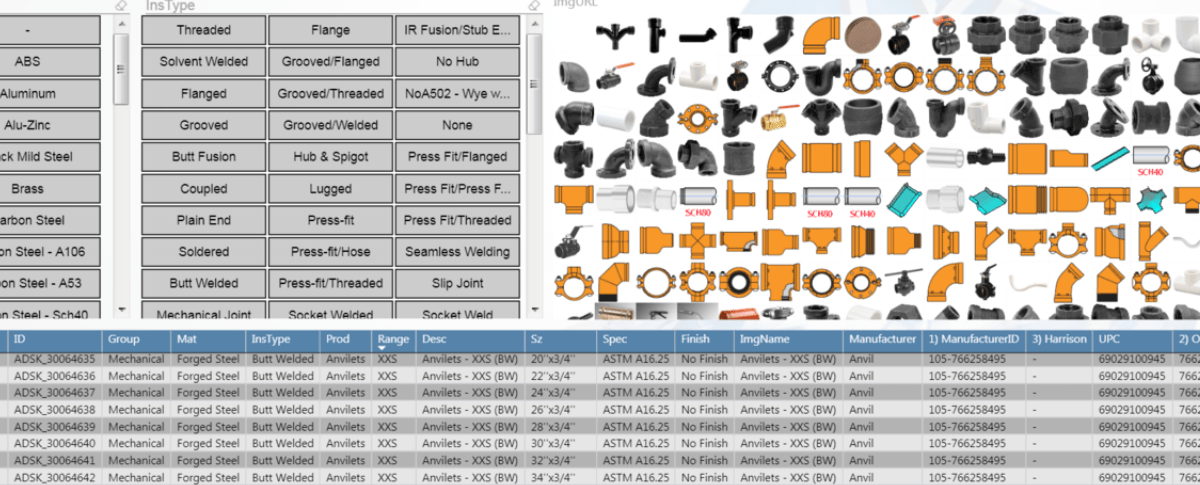
On the Fabrication COD Scripts page, you can find a Revit Support Report script. That script will analyse your ITM library and generate a CSV report of the status of every ITM in your Fabrication Configuration.
You can also find the complete results of my testing on the Revit Support page. Here’s a summary of the the testing…
Tested Version
Each of the below versions of Revit were tested with all the the 704 different patterns:
| 2016 | 2016R2 | 2061R2SP7 | |
| 2017.0 | 2017.1 | 2017.2 | |
| 2018.0 | 2018.1 | 2018.2 | 2018.3 |
| 2019.0 | 2019.1 | 2019.2 | |
Testing Criteria
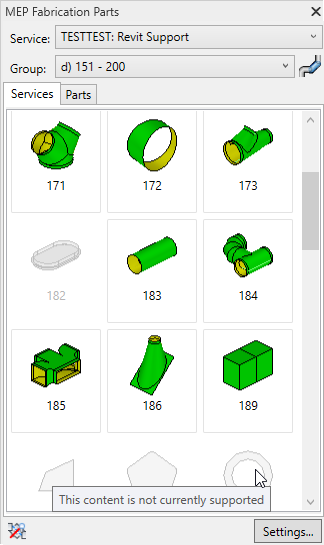
“Supported” for purposes of this testing is based on whether Revit allows a particular pattern to be used in the Fabrication Part Browser.
Testing Results
Testing results will have one of the following status descriptions.
- No – No Revit support
- Varies ({verison}) – Revit support varies between Revit version
- Yes (Risk) – Revit does support but use NOT recommended due to issues
- New ({version}) – New Pattern supported in later Revit versions
- Yes – Pattern is supported in all Revit versions with no significant issues
Support Status = No
No – Parts not supported by the Parts Browser are obviously listed as having “No” support. There are a total of 84 different patterns listed in this category. They are as follows…
| 125 | 126 | 127
| 128 | 129 | 130 | 141 | 158 | 202 | 203 |
| 204 | 205 | 206 | 207 | 208 | 209 | 210 | 211 | 212 | 213 |
| 215 | 216 | 218 | 220 | 221 | 228 | 230 | 301 | 302 | 308 |
| 503 | 505 | 521 | 530 | 764 | 765 | 803 | 804 | 805 | 806 |
| 833 | 873 | 910 | 913 | 928 | 960 | 961 | 964 | 966 | 969 |
| 974 | 980 | 983 | 985 | 994 | 996 | 999 | 1049 | 1102 | 1106 |
| 1114 | 1142 | 1150 | 1152 | 1157 | 1161 | 1162 | 1165 | 1168 | 1169 |
| 1181 | 1194 | 1196 | 1198 | 2185 | 2189 | 2190 | 2191 | 2192 | 2199 |
| 2200 | 2873 | 3108 | 3873 | | | | | | |
Support Status = Varies
Varies (version) – In some cases, Fabrication Parts were initially allowed or supported in earlier versions and later were restricted. These parts have a status of “Varies” followed by the version where the change occurred. It’s recommended you avoid use of these patterns even in versions where they work as they will not be supported in later versions. There are 17 patterns that once worked in Revit but are no longer supported. They are as follows…
| 0 | 182 | 222 | 381 | 845 | 853 | 855 | 864 | 876 | 898 |
| 903 | 912 | 915 | 971 | 1105 | 1170 | 1175 | | | |
Support Status = Yes (Risk)
Yes (Risk) – Patterns that list “Yes (Risk)” are technically supported in Revit but I highly recommend avoiding their use. Patterns with this status have issues like inserting at the Revit’s Project Base Point and not the cursor location. They also have a tendency to crash Revit if you attempt to grip or edit them. As a result, I highly recommend avoiding their use. There are 29 patterns in this category. They are listed here…
| 119 | 189 | 317 | 346 | 347 | 348 | 349 | 350 | 351 | 352 |
| 353 | 368 | 369 | 390 | 392 | 397 | 398 | 415 | 810 | 828 |
| 922 | 930 | 962 | 963 | 968 | 973 | 1159 | 1160 | 1176 | |
Support Status = New
New (version) – Some patterns were not around in earlier versions of Revit but later added and supported in Revit. These patterns are listed as “New” followed by the version of Revit they became available in. These patterns are generally safe to use for Revit. There are 19 patterns in this category which are listed here…
| 217 | 1206 | 1207 | 1238 | 1239 | 1240 | 1241 | 1242 | 1243 | 1244 |
| 1245 | 1246 | 1247 | 1248 | 1249 | 1250 | 2197 | 2198 | 2217 | |
Support Status = Yes
Yes – Parts allowed by the browser that work across all versions of Revit are listed with e “Yes” status. There are 555 patterns in this category. They are listed here…
| 1 | 2 | 3 | 4 | 5 | 6 | 7 | 8 | 9 | 10 |
| 11 | 12 | 13 | 14 | 15 | 16 | 17 | 18 | 19 | 20 |
| 21 | 22 | 23 | 24 | 25 | 26 | 27 | 28 | 29 | 30 |
| 31 | 32 | 33 | 34 | 35 | 36 | 37 | 38 | 39 | 40 |
| 41 | 42 | 43 | 44 | 45 | 46 | 47 | 48 | 49 | 50 |
| 51 | 52 | 53 | 54 | 55 | 56 | 57 | 58 | 59 | 60 |
| 61 | 62 | 63 | 64 | 65 | 66 | 67 | 68 | 69 | 70 |
| 71 | 72 | 73 | 74 | 75 | 77 | 78 | 79 | 80 | 81 |
| 82 | 83 | 85 | 86 | 87 | 88 | 89 | 90 | 91 | 92 |
| 93 | 95 | 96 | 97 | 98 | 99 | 100 | 101 | 102 | 103 |
| 104 | 105 | 106 | 107 | 108 | 109 | 110 | 111 | 112 | 113 |
| 114 | 115 | 116 | 117 | 118 | 120 | 121 | 122 | 123 | 124 |
| 132 | 133 | 134 | 135 | 136 | 137 | 139 | 140 | 142 | 147 |
| 148 | 149 | 150 | 151 | 152 | 153 | 154 | 155 | 159 | 160 |
| 162 | 163 | 165 | 166 | 169 | 170 | 171 | 172 | 173 | 183 |
| 184 | 185 | 186 | 231 | 250 | 251 | 252 | 253 | 254 | 255 |
| 309 | 311 | 313 | 314 | 315 | 316 | 318 | 319 | 320 | 321 |
| 322 | 323 | 324 | 325 | 326 | 327 | 328 | 329 | 330 | 336 |
| 338 | 340 | 341 | 342 | 343 | 344 | 345 | 354 | 355 | 356 |
| 357 | 358 | 359 | 360 | 365 | 366 | 367 | 376 | 377 | 378 |
| 379 | 380 | 382 | 383 | 384 | 385 | 386 | 387 | 388 | 391 |
| 393 | 394 | 395 | 399 | 401 | 410 | 411 | 412 | 413 | 417 |
| 420 | 421 | 430 | 431 | 440 | 441 | 450 | 451 | 460 | 461 |
| 470 | 471 | 472 | 480 | 501 | 502 | 504 | 506 | 507 | 509 |
| 514 | 515 | 518 | 519 | 522 | 523 | 524 | 525 | 526 | 533 |
| 535 | 555 | 556 | 557 | 580 | 751 | 760 | 761 | 800 | 801 |
| 802 | 807 | 808 | 809 | 811 | 812 | 813 | 814 | 815 | 817 |
| 818 | 819 | 820 | 821 | 822 | 823 | 824 | 825 | 826 | 827 |
| 830 | 831 | 832 | 834 | 835 | 836 | 837 | 838 | 839 | 840 |
| 841 | 842 | 843 | 844 | 846 | 847 | 848 | 849 | 850 | 851 |
| 852 | 854 | 856 | 857 | 858 | 859 | 860 | 861 | 862 | 863 |
| 865 | 866 | 867 | 868 | 869 | 870 | 871 | 872 | 874 | 875 |
| 877 | 878 | 879 | 880 | 881 | 882 | 883 | 884 | 885 | 886 |
| 887 | 888 | 889 | 890 | 891 | 892 | 893 | 894 | 895 | 896 |
| 899 | 900 | 901 | 902 | 904 | 905 | 906 | 907 | 908 | 909 |
| 911 | 914 | 916 | 917 | 918 | 919 | 920 | 921 | 923 | 924 |
| 925 | 926 | 927 | 929 | 931 | 932 | 933 | 934 | 935 | 936 |
| 938 | 939 | 940 | 941 | 942 | 943 | 944 | 945 | 946 | 947 |
| 948 | 950 | 951 | 952 | 953 | 954 | 955 | 956 | 957 | 958 |
| 959 | 965 | 967 | 970 | 972 | 976 | 977 | 978 | 979 | 981 |
| 984 | 986 | 987 | 988 | 989 | 995 | 1000 | 1101 | 1104 | 1107 |
| 1108 | 1109 | 1110 | 1111 | 1112 | 1113 | 1115 | 1116 | 1117 | 1118 |
| 1119 | 1120 | 1121 | 1122 | 1124 | 1125 | 1126 | 1127 | 1128 | 1129 |
| 1130 | 1131 | 1133 | 1134 | 1135 | 1136 | 1137 | 1138 | 1139 | 1140 |
| 1141 | 1143 | 1144 | 1145 | 1146 | 1147 | 1148 | 1149 | 1151 | 1153 |
| 1154 | 1155 | 1156 | 1158 | 1163 | 1164 | 1166 | 1167 | 1171 | 1172 |
| 1173 | 1174 | 1177 | 1178 | 1179 | 1180 | 1183 | 1184 | 1185 | 1186 |
| 1187 | 1188 | 1189 | 1190 | 1191 | 1192 | 1193 | 1197 | 1199 | 1200 |
| 1201 | 1202 | 1203 | 1204 | 1205 | 1522 | 1972 | 2040 | 2041 | 2042 |
| 2044 | 2047 | 2051 | 2060 | 2071 | 2072 | 2082 | 2097 | 2108 | 2148 |
| 2149 | 2155 | 2160 | 2182 | 2183 | 2184 | 2186 | 2187 | 2188 | 2193 |
| 2194 | 2195 | 2196 | 2326 | 2386 | 2388 | 2522 | 2523 | 2524 | 2751 |
| 2814 | 2821 | 2857 | 2868 | 2869 | 2875 | 2881 | 2882 | 2883 | 2884 |
| 2885 | 2886 | 2899 | 2900 | 2901 | 2902 | 2903 | 2904 | 2905 | 2906 |
| 2907 | 2916 | 2938 | 2965 | 2966 | 2967 | 2979 | 3041 | 3051 | 3060 |
| 3071 | 3386 | 3522 | 3523 | 4522 | | | | | |