Merging Autodesk Fabrication Databases (Method 2 of 4)
Warning: This is Part 2 of a 4 part series on merging Autodesk Fabrication Databases. Autodesk Fabrication software is extremely powerful and flexible but that also makes it very fragile. Use the below guidance with caution. I highly recommend backing up your configuration before attempting anything I’ve recommended. It never hurts to have a firm grasp of how Autodesk Fabrication functions from an administrative perspective. Consider yourself warned!
Method 2: ITM’s as Proxy
Another method of transferring data from one database to another is by using ITM’s. Simpy take an existing ITM or make a new one and set some of it’s properties to those you want to transfer. After you’ve completed this, copy the ITM to your desired database.
In your desired database, right-click on the newly copied ITM from the Folders view and select Edit or Properties as shown below.
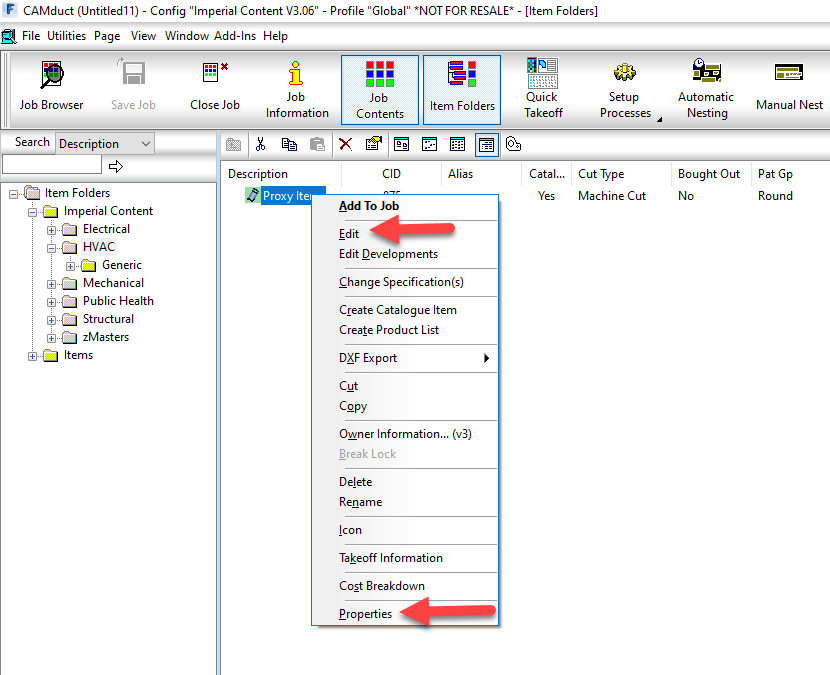
Once the Edit Item or Item Properties dialogs are displayed, you can simply close them. The only purpose in calling them up was to force Fabrication to read all of their settings which in turn causes them to be created as Proxy entries in your database if they don’t already exist.
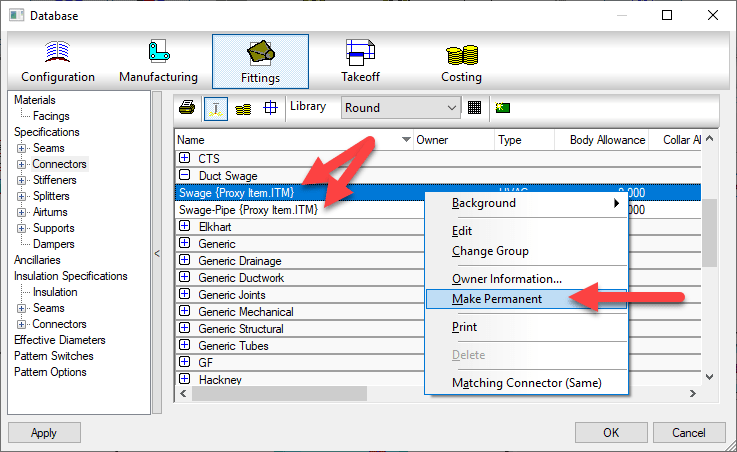
Once the database entries are in your new database, you’ll want to navigate to those database entries and make the proxy items permanent as shown below.
Pros:
> Every property an ITM uses is supported.
> Dependent database entries supported (e.g. Fixings on a Support)
Cons:
> Can bring in more properties than you want which need to be cleaned.
> Time consuming for large property sets as multiple ITM’s required.
> Proxy items must be manually made permanent afterward
Stay tuned for Method 3 of 4 in my next post.