Two Problems….One Solution
In CAMduct using OPUS parts and/or ITM’s with developments that have had edits made to them can on occasion cause some headaches. The following process can be used to resolve 2 different issues in CAMduct, Those are….
- Retain edited pattern developments
- Eliminate proxy database entries with {curly brackets}
1) Retaining Edited Developments
It’s fairly common for CAMduct users to edit pattern developments. Occasionally, they may want to save these edited developments for later use. A good example is using a number of separate ITM’s for damper blades. Each ITM is a different size with perhaps some edits to the pattern for slots/holes for U-Bolts, notching to clear screws, etc. A CAMduct user can use any CID Pattern for the basis of their edits. For example, they could use an Elbow CID, delete all the developments belonging to the elbow and redraw something completely from scratch. The problem with this is that if you ever try to change materials or edit the ITM in any other way, the development edits are lost and the original development is back minus your changes.
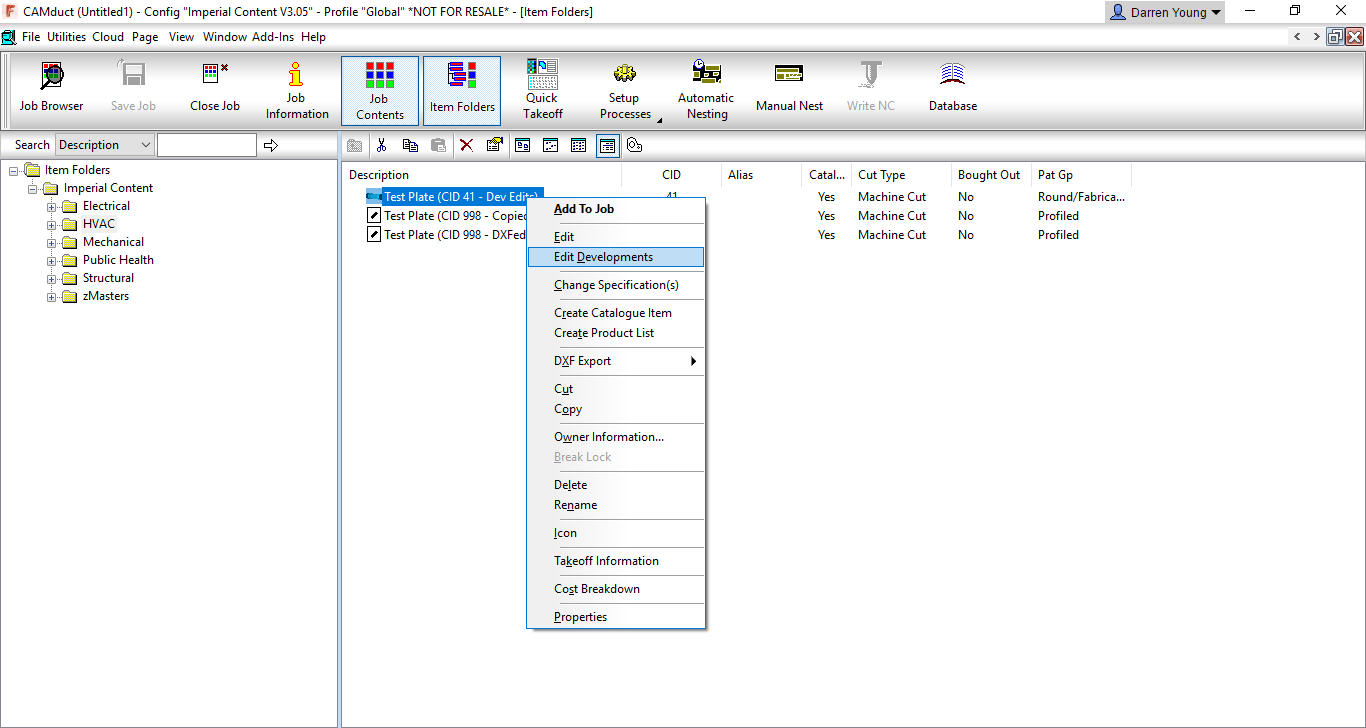
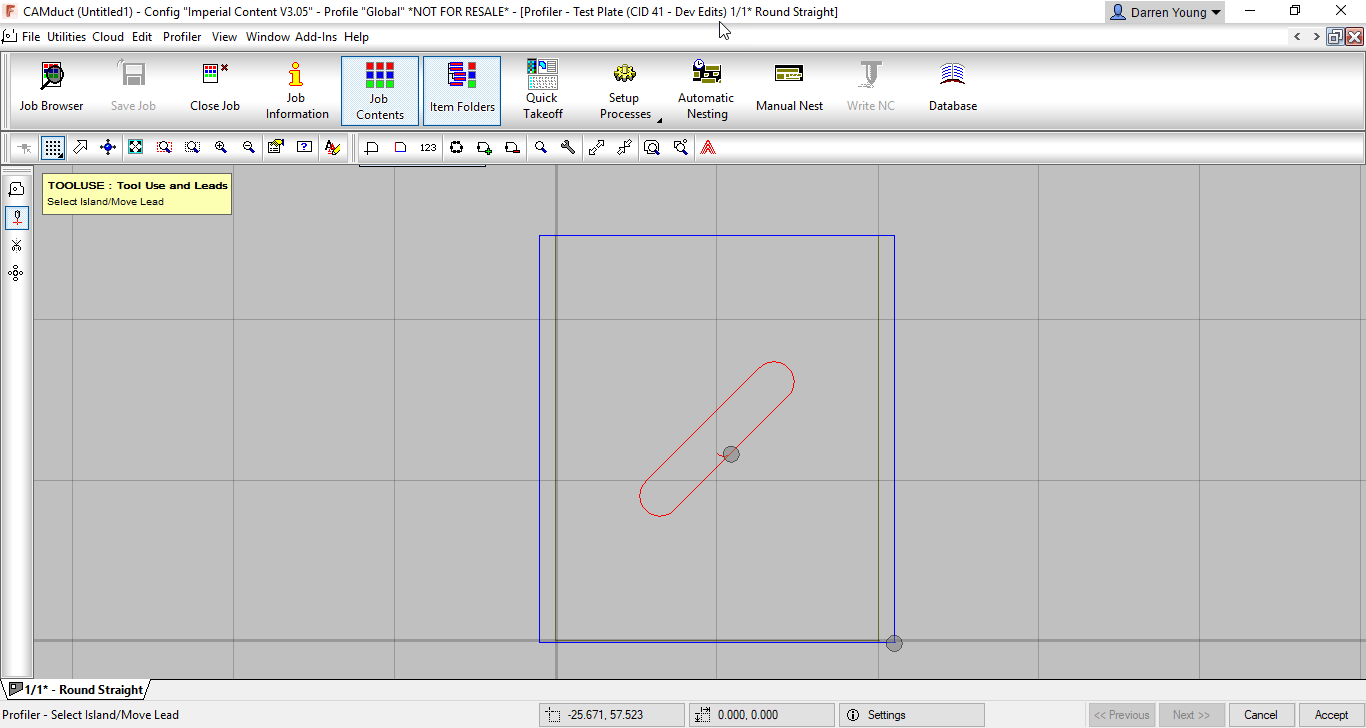
In the following image, you can see that Right-Clicking on an ITM made from CID 41 offers a couple editing options In this case, we’re going to select the Edit Developments option.
When you select the Edit Developments option, you’re brought to the OPUS Part editor shown in the next image. Here you’ll see that there’s been a 45 degree slot added to the development.
On the other hand, you can also Right-Click on the ITM and select EDIT from the menu as shown in the next image.
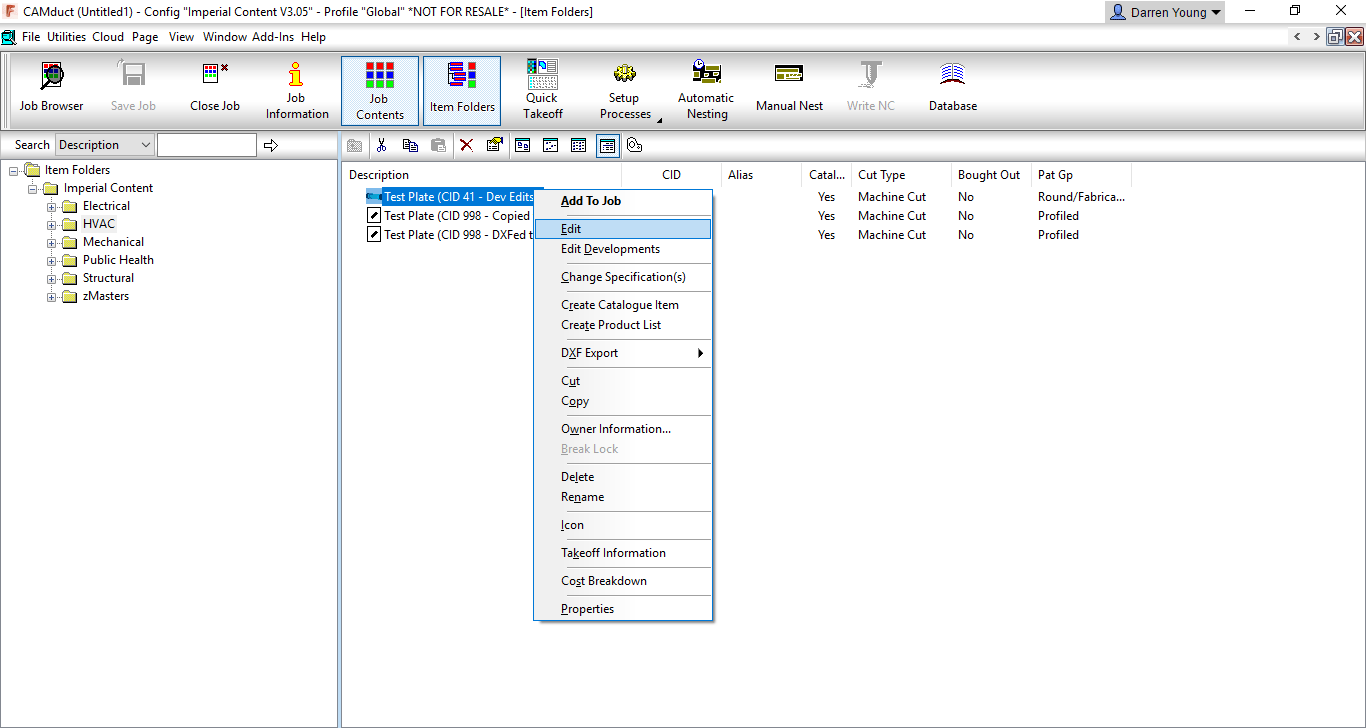
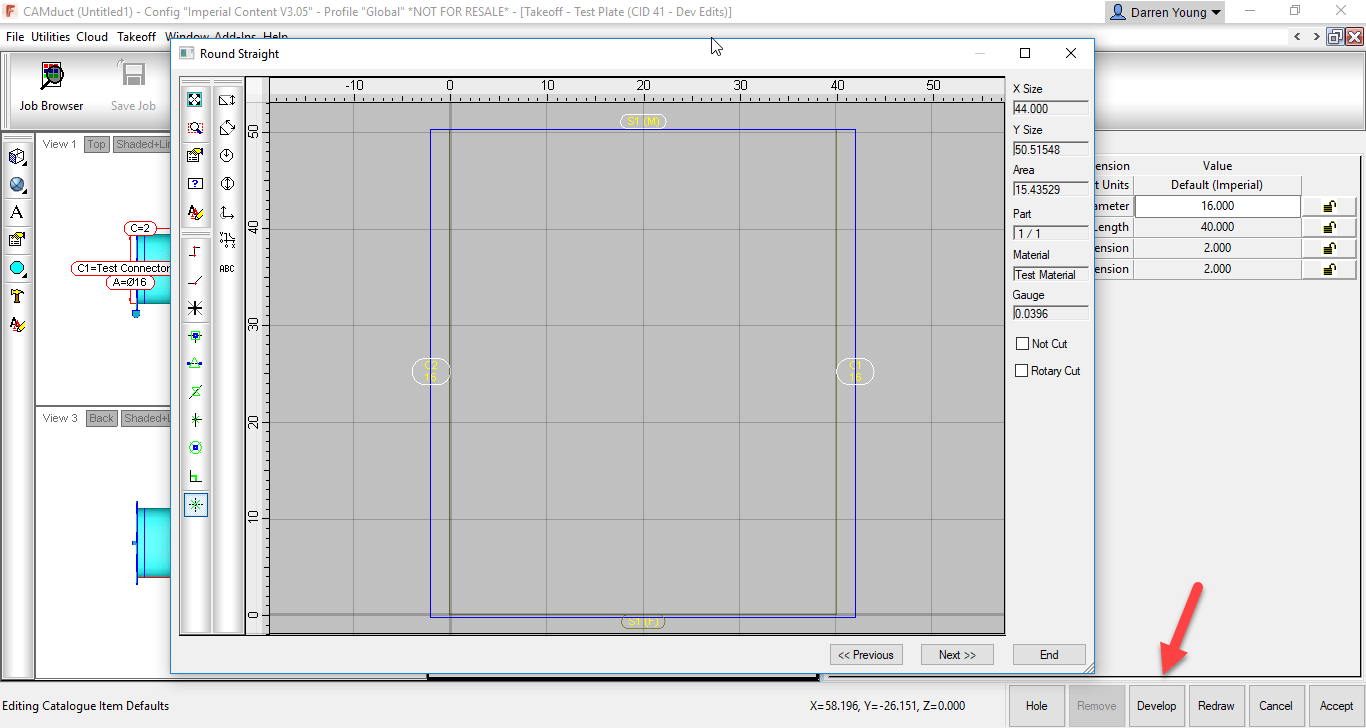
This option brings up the standard ITM editor which you should be fairly familiar with. The part you see in the ITM editor may not look anything like the development, it may look very similar or in fact be the same part developed if there were no edits made. From the ITM Editor, click the “Develop” button in the lower right and you’ll again be brought to a dialog that displays the part(s) developments. This time you’ll notice that the 45 degree slot is not shown. In fact, it’s displaying the unedited development for the CID you’ve selected based on the Dimensions, Options, etc. as entered in the ITM Editor. From the ITM editor, the dimensions, options and other settings drive the size/shape of the developments. It wouldn’t know what to do with your edits so it gets rid of them,
When you Edit the part in the ITM Editor, even if to change something simple as a material, the pattern gets redeveloped and the edits you made to the developments are lost. This makes ITM’s utilized this way very prone to getting wiped out of you’re not careful.
The solution to protecting these developments is to change them to a different CID pattern used exclusively for OPUS parts…CID 998 (or 0 depending how it’s created) OPUS parts contain only the development and not the originating ITM pattern. When you select the Edit option for an OPUS part, you go directly to the Opus Editor.
2) Proxy Database Entries
The other problem with edited developments is they can bring in proxy entries into your database. As an example, lets say the CID Pattern used was pointed to a Material, Connector or Seam in your database that no longer exists, was renamed or moved to a new group. As explained earlier, you can’t go back and edit the ITM to change them or your edits to the development will get wiped out. You can change the seams/connectors/materials with a COD script to avoid this but most people are not familiar with this process. When you use this type of ITM, the old materials, seams and.or connectors that were originally used come back into your database with {brackets} around them.
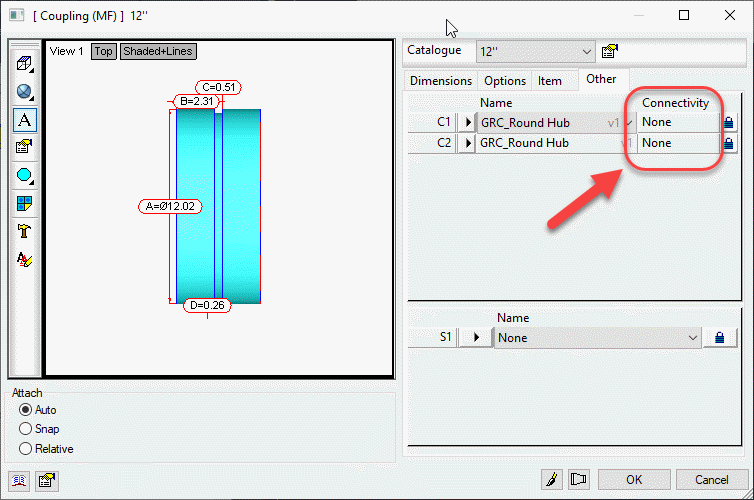
Even then, a Development Part is assigned a material separate from the material on the ITM. There is no way to change the development part’s material from a COD script. You can however, change it from the Development tab of the Properties dialog.
The following image shows the Properties option when Right-Clicking on an ITM.
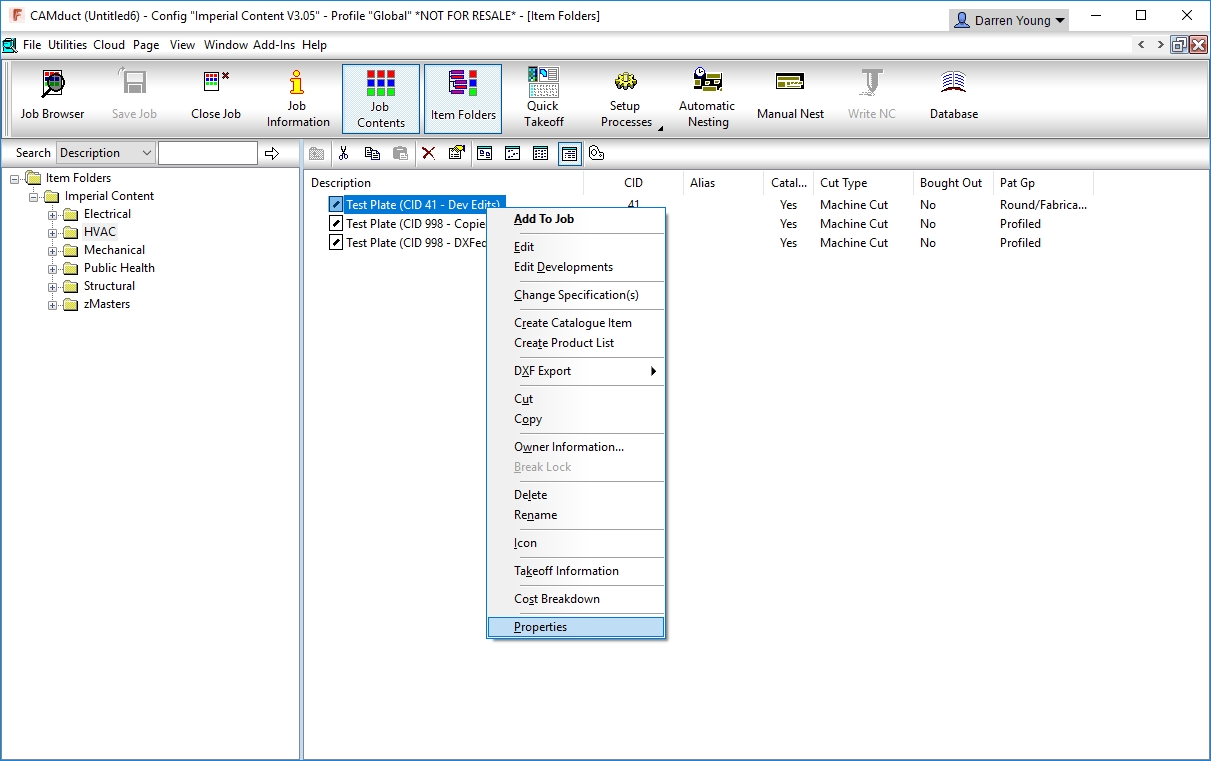
After clicking the Properties option, the properties dialog box will appear. Here, you can switch to the Developments tab to see the developments of the ITM. From this tab, you can then edit the Development Part material. This still presents a few possible difficulties…
- You have to edit the development part material one ITM at a time.
- You can’t script changing the development part material
- You can’t set the development part material to “None” as this is not an option
- Depending on the “Catalog” and/or other options of the ITM, the Development Part material drop down may not be enabled for selection.
As we mentioned earlier, a native OPUS part CID only contains the developments and avoids a lot of these issues.
The obvious thing to do is to go to the edited developments of the original ITM and copy the geometry to the Windows Clipboard (Ctrl-C). You could then go to an Empty OPUS part and paste the object there from the Windows Clipboard (Ctrl-V). But again, this presents yet more issues.
Even though you would only be copying/pasting the development entities, CAMduct still remembers there were seams and connectors applied and this data hitch hikes along for the ride on the geometry even though you can’t see it. Except now, you can’t get to the ITM editor any longer to change them and COD scripts can’t find any connectors to seams to change because an Opus part doesn’t have those options. The information i there,, hidden, but inaccessible.
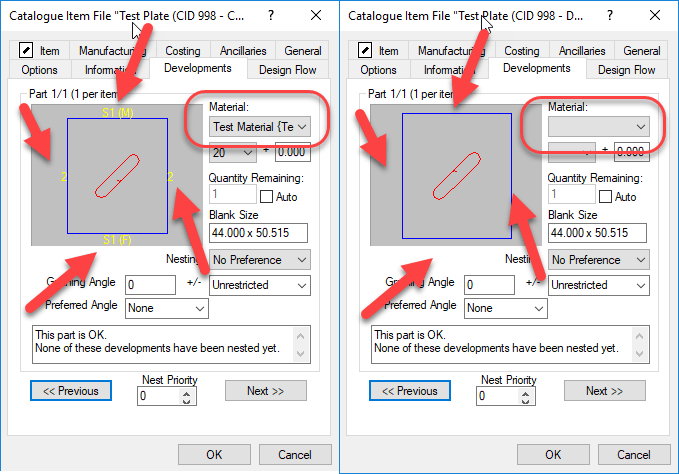
In the following image, you’ll see two ITM Properties dialog boxes side by side.
In the LEFT image, you’ll see what the Developments tab looks like on an ITM with edited Developments or even. It alo look this way on an OPUS part that was created using Copy/Paste method from a different CID. The OPUS Editor doesn’t show you, but the Developments tab in Properties displays text for the Seams/Connectors. The image in the RIGHT is an OPUS part created with a completely different process that we’ll show shortly.
Also notice the image on the LEFT shows a material in the drop down list where as the image on the RIGHT does not. Using the ITM that was the source of the Left image will bring in proxy Materials, Seams and Connectors if they no longer exist in your configuration. Using the ITM that was the source for the Right image, will not bring in these Proxy items. This means if you later reorganize your materials/seams/connectors, the ITM for the left image will keep corrupting your database and the ITM for the right image will not.
The Solution
To resolve both of these issues, Edited Developments on none OPUS CID Patterns and eliminating proxy database entries, we can use the same process. This process involve creating DXF files for the existing ITM’s an then creating new ITM’s from those same DXF files.
The following image shows how to Right-Click on the ITM and Export the DXF to a file on disk.

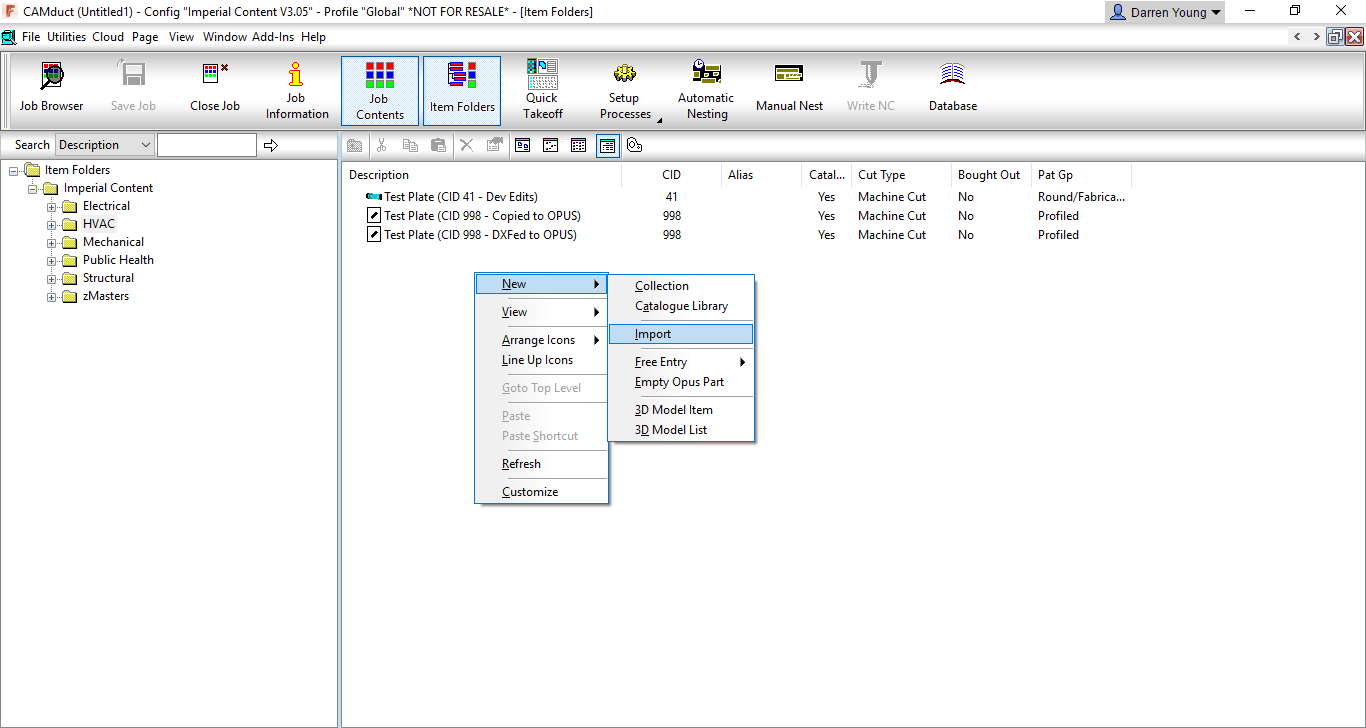
Once the DXF files are create, you can Right-Click on an empty area of the Folder display and select New, then Import as shown in the following image.
The import process is fairly self explanatory end leaves you in the Opus part editor. Here are can make any final changes and when clicking OK, you can overwrite the existing ITM or give it a new name. This new ITM is based on CID 998, has no material set in the developments and contains no traces of any seams or connectors. You also don’t need to worry about accidentally deleting the edited developments because editing this ITM brings you directly to the OPUS Part editor and does not bring you to the ITM editor.
Additional Considerations
What’s nice about the above process, is that you can select multiple ITM’s at one time to Export to DXF. And when you Import the DXF’s, you can also select multiple DXF files. There will be some additional or changed prompts in this process but it allows you to quickly clean up your existing OPUS parts and protect ITM’s made from non-OPUS CID’s.
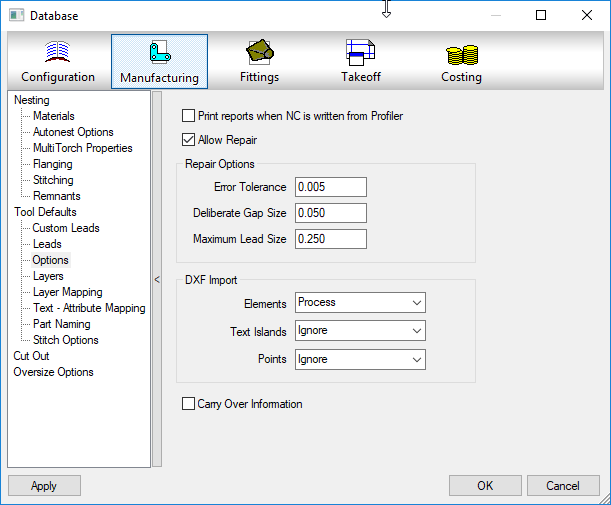
One thing to watch for is complex geometry with a lot of curves/arcs/lines. You’d typically see this type of geometry when cutting patterns that represent art or a lot of text. When dealing with this type of geometry, before you Import the DXF’s, you may want to explore some of the settings used by CAMduct to automatically detect a complete profile without any small gaps or overlaps causing issues, The following image shows where these settings can be made.
Use of these settings goes beyond the scope of this article so I’d recommend using a little trial and error to get the best results only if you encounter problems with importing DXF’s.
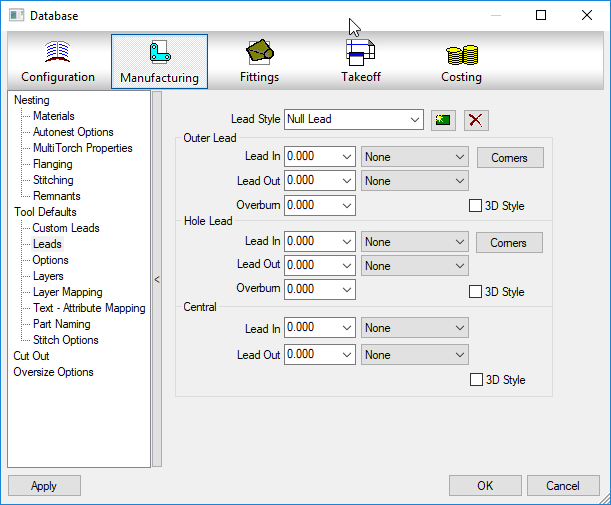
The other thing to watch for is the Kerf or offset used on the tools assigned to the profiled part and which types of lead in/out paths are used to start and end the profiles, While you can always edit these settings of the OPUS parts later on a case by case basis, you can set the defaults to use in CAMduct. The following image shows where to set these default values.
Taking a Closer Look
If you want to take a closer look, at the entire process, you can view the process this these two videos.
Here’s the process to cleanup a single ITM…
Here’s the process to cleanup a multiple ITMs…
If you want to play with a couple ITM’s yourself, you can download them here.
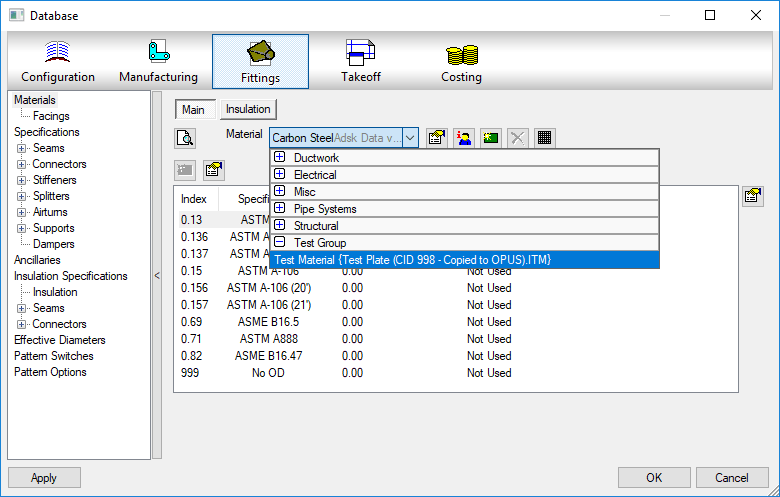
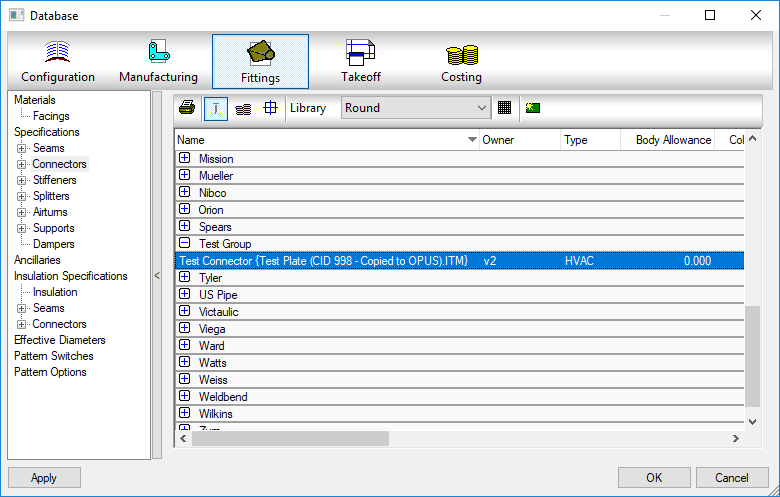
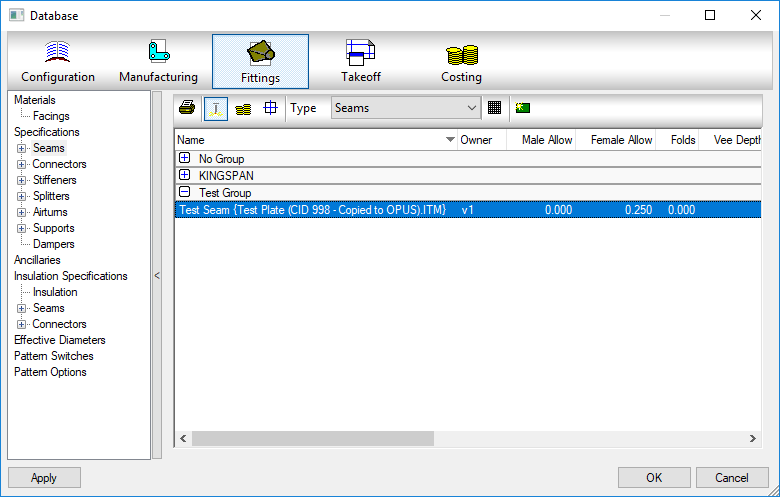
If you play with the original ITM Test Plate (CID 41 – Dev Edits).ITM or the OPUS part created with the flawed Copy//Paste method Test Plate (CID 998 – Copied to OPUS).ITM, you’ll see a custom Material, Seam and Connector added to your database, Delete them out and try again with the next ITM. You’ll see that the ITM created with the DXF process Test Plate (CID 998 – DXFed to OPUS).ITM we showed earlier does not bring the old materials, seams or connectors shown in the below images.