Fabrication COD Script Library – Updated

If you’ve not downloaded the Autodesk Fabrication Script Libraries lately, you might want to grab an updated copy. There’s been several updates over the last month. Here’s what’s changed…

  • Damper Rotation Property (undocumented) has been added to all Debug, Job and Library scripts. Support for this property was added in 2017 but never documented. It’s there to support the rotation of Dampers on Fabrication Parts in Revit. It should be noted, that this value is Added to the Angle property of the assigned damper. As such, it acts as an Adjust and not an Override. e.g. Damper w/Angle of 90 + Rotation Property in the ITM of 90 results in a damper rotated 180 degrees.
  • Stiffener Group Property added to the Autodesk Fabrication 2022.0 and later versions of the Debug, Job and Library scripts.
  • Airturn Group Property added to the Autodesk Fabrication 2022.0 and later versions of the Debug, Job and Library scripts.
  • Splitter Group Property added to the Autodesk Fabrication 2022.0 and later versions of the Debug, Job and Library scripts.
  • Insulation StatusLock Property added but listed as “Unavailable” as it stopped working in 2017. Added in the hopes it gets fixed in future versions.
  • StructureType Property added to the Autodesk Fabrication 2022.0 and later versions of the Debug, Job and Library scripts. Property was “Write Only” in 2021 and prior versions so was unable to display in prior versions.
  • Product List HasCustomData Property has been added to all Debug, Job and Library scripts.
  • Product List HasFlow Property has been added to all Debug, Job and Library scripts.
  • Item PCFSKey Property has been added to all Debug, Job and Library scripts.
  • Item CostByLength Property removed from Material Debug scripts (never really belonged there).

You can find the updated scripts here….Script Library.

New Properties are documented here…Item Property Reference.

Script Library Updated / Enhanced

COD Script Library was updated for JOB and LIBRARY Scripts. You can download them for free here. Here’s a summary of changes.


Script Consolidation

In the past, there were 69 to 75 COD Scripts to export all the various properties to separate TXT files. Properties that have multiple entries per ITM like Connectors or Seams are still exported to separate files because the data columns don’t line up between them and there are multiple lines per ITM.

All other properties where it’s a single property per ITM like Spool or Material have all been consolidated to a single script and single TXT file. The WriteAllMiscProperties(Job).cod and WriteAllMiscProperties(Library).cod scripts are where you can extract all other properties so no matter what combination of properties you want, there’s less data files to sort through or scripts to run.


Improved Script Properties Display

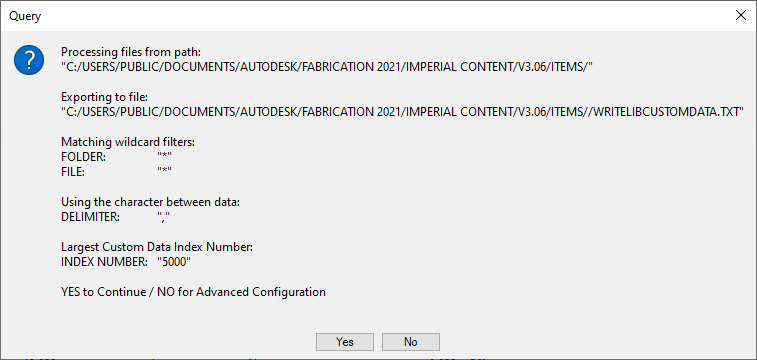
The properties scripts were displayed script settings before running the script. They still are but additional properties are displayed where appropriate along with some additional properties the scripts now support (both covered later). In addition to the additional items, you’ll note that clicking the No button no longer cancels the script. Instead, clicking No takes you to the Advanced Configuration (also covered later) where you can change some of those settings.


Advanced Configuration – Scan Folder (LIBRARY Scripts Only)

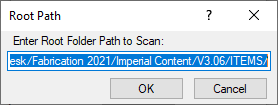
By default, the script looks to the root of your ITM Library folder of your database. This value can now be changed to point anywhere else. You may want to point to a folder of ITM’s outside your Configuration if that’s where you store your ITM’s. You can also scan further down the folder structure so you can perhaps skip exporting Duct ITMs but instead scan and export Piping ITMs.

Here’s what this looks like. Note that the path may use forward slashes ( / ). You can however paste a new path that uses backslashes ( \ ) and it should still work. There’s no option in COD Scripts to allow you to browse to a folder so make sure you type or copy/paste carefully.


Advanced Configuration – Export File (JOB and LIBRARY Scripts)

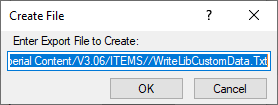
Similar to the Scan folder configuration, you can now also change the default export file name and location. Specifications for specifying paths are the same as above.

Also note that while you CAN specify “CSV” as the file extension, I recommend using “TXT“. When Excel sees a CSV file, it just opens it without giving you the ability to specify how data is interpreted. Using a “TXT” extension makes Excel prompt you for “How” the file should be read like which character is used as the delimiter or defining which columns are Text vs other data types.

Some numerical data or values can be interpreted incorrectly by Excel if you don’t explicitly tell Excel to treat them like Text. A good example of this is the size 1-1/2″ or 1-1/4″. Excel thinks these are dates and will display them as 1/1/2012 or 1/1/2014 respectively if you don’t explicitly tell Excel to treat them as Text. Using that “TXT” extension on the export file is a safe guard against this issue.

A lot more detail that you likely wanted but hopefully it’s helpful, here’s what that looks like….

Note you may see an extra slash character between the path and file name. This is can happen if your MAP.INI (Edit Configuration Utility) includes or doesn’t include an ending slash. I may add code to clean this up later but COD Scripts and Fabrication seem tolerant of this extra slash so no need to worry about it (or edit it out if you like).


Advanced Configuration – Folder/Path Wildcard (LIBRARY Scripts Only)

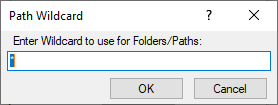
Instead of editing the folder you’re going to scan, alternatively you can specify a wildcard to use to limit which folders to export data from. As an example, you could specify *WELDBEND* and properties will only be extracted for ITM’s within folders containing the name “Weldbend”. Wildcard specification is not CaSe SeNsItIvE. By default, the wildcard is ( * ) to extract from all folders. Here’s what that looks like…


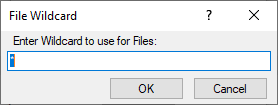
Advanced Configuration – File Wildcard (LIBRARY Scripts Only)

Just like the Folder/Path Wildcard specification, you can specify a wildcard for which ITM files to extract properties from. As an example, you could enter *PIPE* and you would export only from ITM files that contained the work “Pipe”. Again, the wildcard is not CaSe SeNsItIvE. You can use both Folder and File wildcards to very narrowly specify your data export scope. Default wildcard is an ( * ) to extract from all ITM files. Here’s what that looks like…


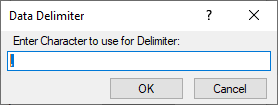
Advanced Configuration – Delimiter (JOB and LIBRARY Scripts)

Data exports by default use a Comma ( , ) to create a Comma Separated Value file. If your Fabrication Database uses commas in folder names or ITM file names this can cause data fields to shift in Excel when opening the export file. If this is the case for you, you can specify a different character to use to separate the data fields in the export file. The Pipe ( | ) character is always a good “rarely used” character for this purpose.

As a side note, it’s not a good practice to have commas in folder or file names. You can read more about that here. This option is really here in case you’re stuck with commas and haven’t fixed them yet.


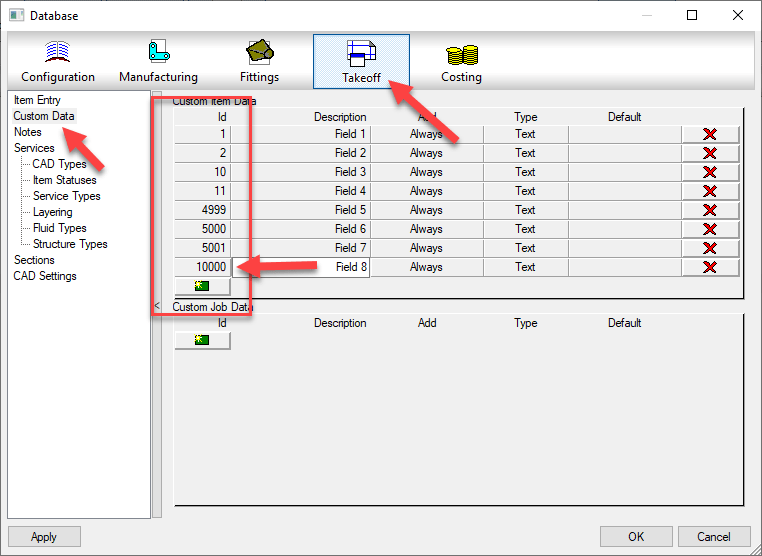
Advanced Configuration – Max Custom Data Index (Only Scripts that export Custom Data)

Only used for scripts that export Custom Data, you can specify the maximum Custom Index value. Unfortunately, COD scripts have no ability to determine how many custom data entries you have or which index numbers are used without jumping through some hoops. To work around this, you need to specify the maximum Custom Data Index value. The script will then loop through all those numbers and find which ones contain values and remembers them. It then exports only those custom index values so that the script runs efficiency.

By default the script uses 5000 as the maximum index number. But as you can see from the below example, the maximum index number is 10000 so we need to specify that. We look at all 10000 possibilities (it goes fairly quick) and takes note that there’s only 8 indices used and then extracts only those 8 from the ITM’s. In the past, the script would loop through all 10000 for each ITM really slowing things down. Now, even if your largest number is 6 or 7 digits (not recommended) the script will still be fairly quick.

Here’s what that Delimiter Character configuration option looks like…


Summary

In the past, if you didn’t like the export files names, where they went, or wanted to change the scope of which files or folders you extract data from, you could have always changed the COD script code yourself. You now shouldn’t have to. Hopefully this makes running these scripts a little more flexible and user friendly.

Fabrication Job Contains No Parts – Possible Fix?

Have you ever tried importing an MAJ into Revit and received the following error….Fabrication Job Contains No Parts.

There’s a lot of reasons this can occur and it’s NEVER because there are no parts. So much for Autodesk’s QA/QC and Error checking.

You may see this most commonly because parts used in the model contain data that’s no longer in your database. You’ve likely noticed from time to time database entries with curly braces around parts of the name like the following…

This happens when an entry in the database is used by an ITM but the database entry itself later gets deleted. Information is cached within the ITM so when it’s accessed, it creates a Proxy entry in your database if it was missing. Within the {Curley Braces} is the name of the object that created the entry.

While CADmep, ESTmep and CAMduct handle this fairly gracefully, Revit on the other hand does not. When it attempts to load an MAJ, it sees these entries and notices they’re missing from your database and prohibits you from importing the MAJ file. Revit thinks the database doesn’t match the MAJ and stops you cold!

A Possible Fix

If this is cause for the import error, you can use the following COD script to potentially work around the issue….

Take the following script and run in in CADmep, ESTmep or CAMduct. You should be logged in with Administrative Permissions while doing this. This script isn’t fixing Revit or the MAJ. What it’s doing is loading ALL the ITM’s from your Database Library into memory.

The process of loading all these ITM’s into memory creates all these proxy entries in your database. This way, when Revit attempts to import the MAJ, the data associated with those ITM’s are most likely present in your Database configuration. In many cases then results in a successful import of the MAJ.

If the Revit file you are importing the MAJ into already points to a Fabrication Configuration, you should reloaded the configuration FIRST before attempting to import the MAJ.

If for some reason this process still doesn’t work, verify that Revit is reading from the same database location as the version of CADmep, ESTmep or CAMduct where you ran the COD script.

In the event it still doesn’t work, there may be other reasons for the failure but this is often the most common, especially with MAJ’s created recently.

If it does work, you’ll want to use the other scripts I provide on this site to help analyze your database. You likely deleted those database entries in the first place for a reason. You either didn’t realize they were needed, or you didn’t know where they were used to repoint those ITM’s to a proper substitute. Those scripts can help you find which ITM’s use which database entries.

Hope this helps.

COD Script Updates – 2020.07.08

I’ve made a couple updates to the Autodesk Fabrication script libraries. If you use them, you can download updated versions from here.

Scripts have been updated to include the Connector Material property found on CID/Patterns 522, 1522 & 2512 as shown below…

This property is intended to be used by a connector to specify a alternate material the connector can connect to. This allows a coupling to connect to alternate materials such as with transition couplings.

Credit for discovering the COD function to extract this property goes to Liz Fong at MacDonald Miller Facility Solutions in Seattle, WA.

Note: This property has also been added to the list of COD Item Properties located here.

Scripts Updated

  • Debug Scripts
    • Debug ITEM Connectors.cod
  • Job Item Scripts
    • WriteAllConnectors (Job).cod
    • WriteAll_Props (Job).cod
  • Library Item Scripts
    • WriteAllConnectors (Library).cod
    • WriteAll_Props (Library).cod

COD Script Updates – 2019.11.10

I’ve made a couple updates to the Autodesk Fabrication script libraries. If you use them, you can download updated versions from here.

Scripts Updated

  • Job Items
    • All Scripts updated to now include the Item Number which makes it easier to track back report entries to ITM’s in your job.
    • Fix a couple syntax issues in a few scripts which caused errors.
  • Revit Support Report
    • Added Reporting on Revit 2020 status
    • Changed CID/Pattern # 1175 from NO to YES.

Known Issues

End Location properties appear to be crashing 2020.1 Versions of Fabrication. Other versions may/may not crash as well.

COD Script Updates – Part 2

I didn’t plan up updating scripts again so soon but I found a couple more undocumented properties. I thought I’d post them sooner rather than later.

The two ITM properties I found are “BOX” and “E-Tag“.

BOX is only visible from CAMduct. It’s intended purpose appears to be for specifying a “Box” for the ITM in question for shipping purposes but you could use it or anything. Despite it being visible only in CAMduct, using COD Scripts, you can read and write it from ESTmep or CADmep too.

E-TAG is visible from any of the Fabrication products. It’s used for Equipment Tags. You can see both properties from here if in CAMduct or only E-Tag is ESTmep or CADmep.

Scripts Updated

  • All Debug Scripts – Nothing major, just formatting in the comments section.
  • WriteAll_Props (Job).cod – Updated to support BOX & E-TAG properties.
  • WriteAll_Props (Library).cod – Updated to support BOX & E-TAG properties.

Scripts Added

  • Debug ITEM Box.cod
  • Debug ITEM E-Tag.cod
  • WriteAllBox (Job).cod
  • WriteAllETag (Job).cod
  • WriteAllBox (Library).cod
  • WriteAllETag (Library).cod

You can download the *current* versions here.

Scripting property reference has also been updated here.

COD Script Updates

I’ve made a couple updates to the Autodesk Fabrication script libraries. If you use them, you can download updated versions from here.

Scripts Updated

  • Debug
    • Debug ITEM Library.cod
    • Debug ITEM Sealant.cod
  • Job Items
    • WriteAllLibrary (Job).cod
    • WriteAllSealant (Job).cod
    • WriteAll_Props (Job).cod
  • Library Items
    • WriteAllLibraries (Library).cod
    • WriteAllSealant (Library).cod
    • WriteAll_Props (Library).cod

Issues Corrected

Issue 1: Scripts accessing the “Library” property were failing on CID/Pattern 2199. Scripts have been updated to watch for this and report it as an ‘Unknown‘ Library.

Issue 2: Some CID/Patterns can be configured to be pipework or duct work depending on the “Pipework” option’s “Yes/No” status. Scripts were updated to properly report or ignore this property depending on the Sealant value being present.

If the option is set to “Yes“, the pattern is a pipework item. If set to “No”, the pattern is a sheet metal item. Sheet metal items contain the “Sealant” property where as Pipework items do not.

This condition is present in the following CID/Patterns…

149838 902110112381239
12401241124212471248

Special thanks to Kyle Speropoulos of MMC Contractors in Kansas City for alerting me to this issue.