Merging Autodesk Fabrication Databases (Method 4 of 4)

Warning: This is last part (4 of a 4) in a series on merging Autodesk Fabrication Databases. Autodesk Fabrication software is extremely powerful and flexible but that also makes it very fragile. Use the below guidance with caution. I highly recommend backing up your configuration before attempting anything I’ve recommended. It never hurts to have a firm grasp of how Autodesk Fabrication functions from an administrative perspective. Consider yourself warned!

Method 4: MERGEDB (CAMduct only)

This last method is very quick and powerful but only available in CAMduct. If you’re not a CAMduct user, simply download and install to perform this process while in the 30-day trail period.

This method doesn’t let you pick and choose individual database entries but you can pick certain database types and quickly merge all of them into a new configuration. Unlike prior methods were you typically started in the old Database to export an *.IOX / *.IEZ file or create a Proxy ITM first, in this process, you start with the database you want the items to be imported into.

In addition to make of the database entries Method 1 supported, this method also supports these additional entries.

CutoutsLeadsRates
FacingsMaterialsSilencers
Hanger SpecificationsNotchesVanes

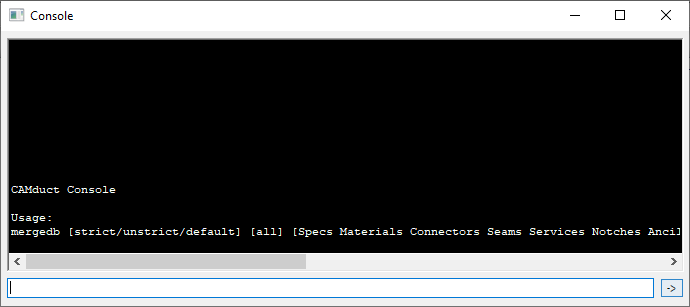
To use this method, start CAMduct and type CTRL-SHIFT-C to display the command window as shown below.

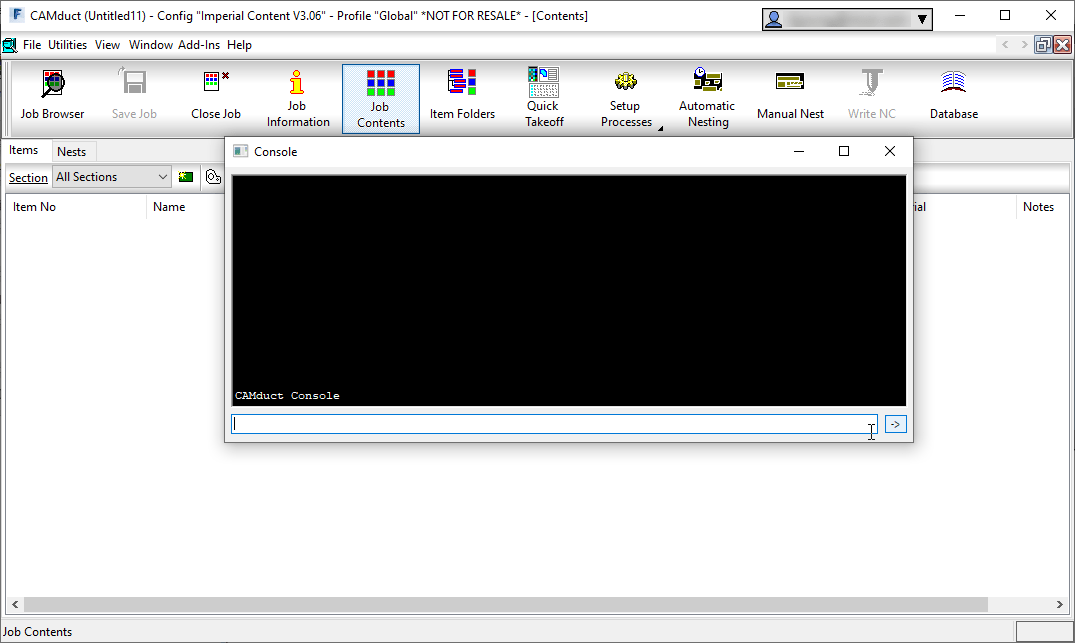
From the command window, type MERGEDB and press <Enter>. This doesn’t do anything other than tell you the data the command needs as shown below. The Strict/Unstrict options tell the merge process if it should only look at the name or the data to determine if it’s duplicate. If you choose strict and the items are already in your database, something as simple as 3 vs 4 digits after a decimal will cause a duplicate entry. In most cases, unstrict is all that’s required.

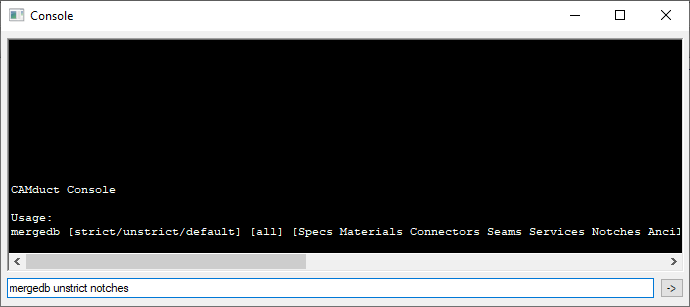
For this example, we’ll type MERGEDB UNSTRICT NOTCHES to import all the notches from one database to another as shown below.

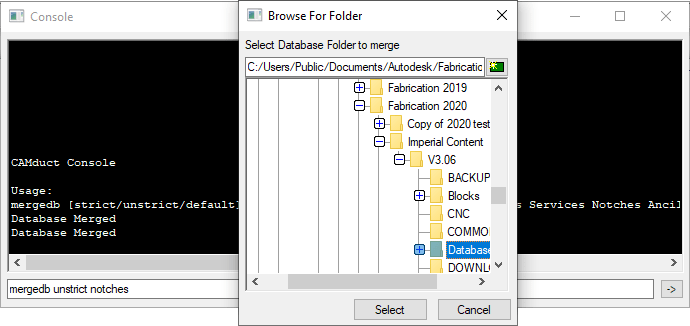
When you press enter, you’re prompted to select a folder. You should select the Database folder of the old database you want to merge into your current database.

If new items are found, you’ll be notified and prompted if you want to save the changes or not.

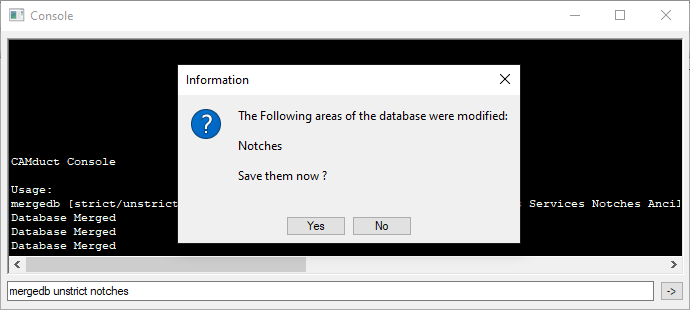
Upon completion of the merge, you’ll need to go to those items in your database and make permanent any you intend to keep and remove those you didn’t want.

Pros:
> Only way to import some database entry type.
> Easiest way to merge the bulk of 2 database together.
> Extremely fast and efficient.
Cons:
> Requires CAMduct.
> Can not pick and choose database entries, only database types.
> Requires post merge cleanup of deletion or making entries permanent

Merging Autodesk Fabrication Databases (Method 3 of 4)

Warning: This is Part 3 of a 4 part series on merging Autodesk Fabrication Databases. Autodesk Fabrication software is extremely powerful and flexible but that also makes it very fragile. Use the below guidance with caution. I highly recommend backing up your configuration before attempting anything I’ve recommended. It never hurts to have a firm grasp of how Autodesk Fabrication functions from an administrative perspective. Consider yourself warned!

Method 3: Service Export/Import

This method is very similar to Method 2 above except that it works on a full service and all the items within it’s service template. If you have an existing service you want to post from one Database to another, this is a great method. Even if you just have a library of multiple ITM’s, it’s very common to create a transport service. That service holds those ITM’s and can be used as a means to get ITM’s from one database to another. Here are the steps.

From CADmep, type EXPORTSYS at the command line or in ESTmep or CAMduct, while in the Takeoff screen, select Takeoff -> Services -> Export as shown below…

This displays the Export Systems dialog. Use the Browse button to select the location and name of the *.IEZ export file. Select the service(s) you wish to export and click the Export button.

Importing is a similar process. Type IMPORTSYS from CADmep or from the Takeoff screen in ESTmep or CAMduct, select Takeoff -> Services -> Import as shown below…

You are prompted to select an *.IEZ file for import. The file will be read and display all the services that were exported. Select those you want to import and click Import.

Because IEZ imports can contain a lot of data, it’s likely you may have a lot of duplicates. Upon import, you are prompted if you’d like to Import ALL or NEWER item. Select as appropriate for your situation as shown below.

If Estimating data is found, you are also prompted to Replace or Keep existing tables. Because the database you are importing to is likely your current desired database, I’d recommend to Keep existing tables and only Replace if you intend to bring over labor and cost data in the Import. Once again, choose the option that best suits your needs as shown below.

Like in Method 1 earlier, if the import finds a service or template it thinks is the same, it’ll prompt you how to proceed. I highly recommend NOT selecting the “….To All” options as it’s common for the database index to cause false matches and mislead you.

You are prompted once the import is complete. As with Method 2, if ITM’s imported through this process contain new database entries, you’ll need to find those and make them permanent in a similar way.

Pros:
> Easiest way to import large numbers if ITM’s and their related database entries.
> Easy way to import Services and Service Templates
Cons:
> Slowest of all process do to all the verification the Import process needs to do.
> Can Import a lot more data than you intend.
> Can not pick and choose individual database entries to import

Stay tuned for Method 4 in my next and last post in this series.