If you’ve not downloaded the Autodesk Fabrication Script Libraries lately, you might want to grab an updated copy. There’s been several updates over the last month. Here’s what’s changed…
DamperRotation Property (undocumented) has been added to all Debug, Job and Library scripts. Support for this property was added in 2017 but never documented. It’s there to support the rotation of Dampers on Fabrication Parts in Revit. It should be noted, that this value is Added to the Angle property of the assigned damper. As such, it acts as an Adjust and not an Override. e.g. Damper w/Angle of 90 + Rotation Property in the ITM of 90 results in a damper rotated 180 degrees.
StiffenerGroup Property added to the Autodesk Fabrication 2022.0 and later versions of the Debug, Job and Library scripts.
AirturnGroup Property added to the Autodesk Fabrication 2022.0 and later versions of the Debug, Job and Library scripts.
SplitterGroup Property added to the Autodesk Fabrication 2022.0 and later versions of the Debug, Job and Library scripts.
InsulationStatusLock Property added but listed as “Unavailable” as it stopped working in 2017. Added in the hopes it gets fixed in future versions.
StructureType Property added to the Autodesk Fabrication 2022.0 and later versions of the Debug, Job and Library scripts. Property was “Write Only” in 2021 and prior versions so was unable to display in prior versions.
Product ListHasCustomData Property has been added to all Debug, Job and Library scripts.
Product ListHasFlow Property has been added to all Debug, Job and Library scripts.
ItemPCFSKey Property has been added to all Debug, Job and Library scripts.
ItemCostByLength Property removed from Material Debug scripts (never really belonged there).
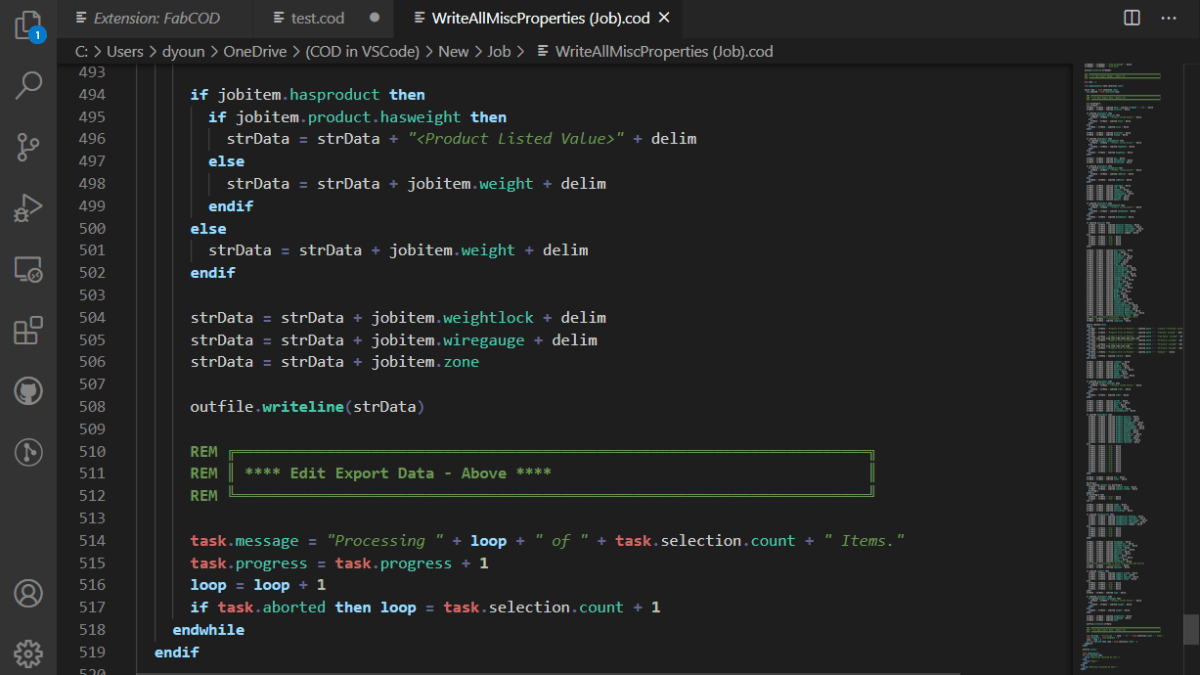
If you write COD Scripts for Autodesk Fabrication, take note. There’s now an Extension for Microsoft Visual Studio Code (VS Code) which is Microsoft’s free code editor. If you use Notepad or Notepad++ to edit your code today you may want to consider switching. The COD Extension has some really nice features. Color coding of your code is the most obvious as shown below. However, there’s a lot more than just color coding. Features like Auto-Complete, Folding Sections and Dimension/Option Picker are nice additions in addition to a lot more robust documentation.
Installing The Fabrication COD Extension
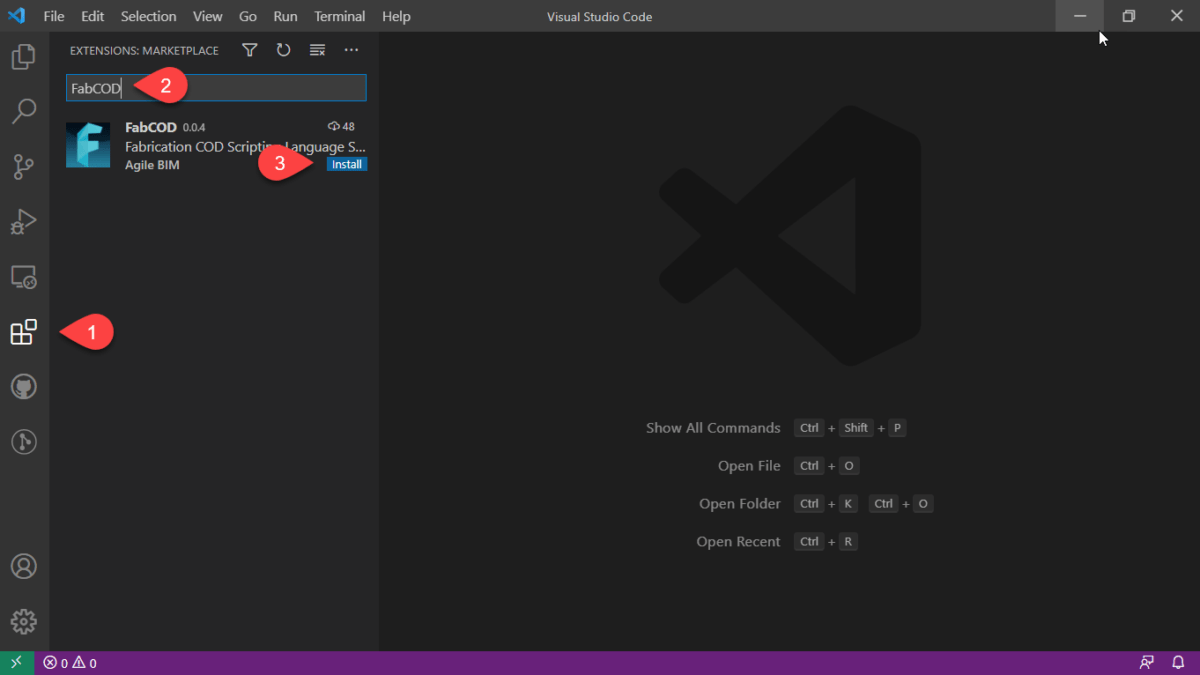
If you don’t already have it, you can download and install VS Code here…https://code.visualstudio.com/. Once installed, go to the Extension section, type FABCOD and click the Install button.
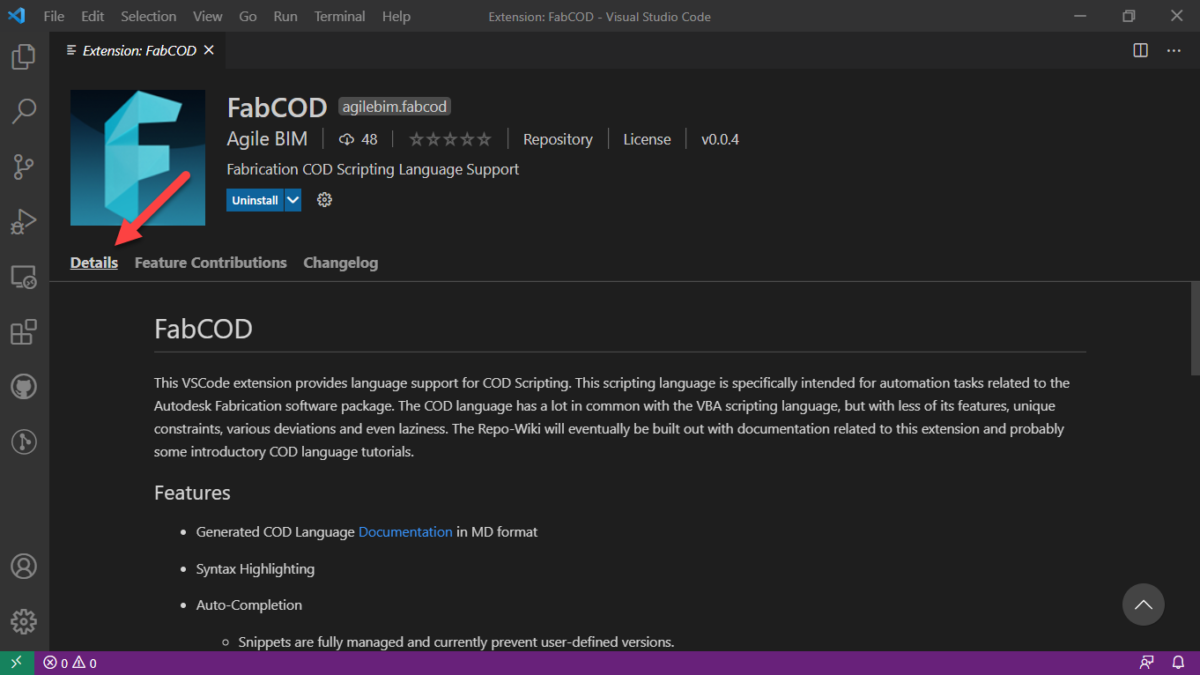
Extension Summary
Once you’ve installed the Extension, you can review a summary of extension details here…
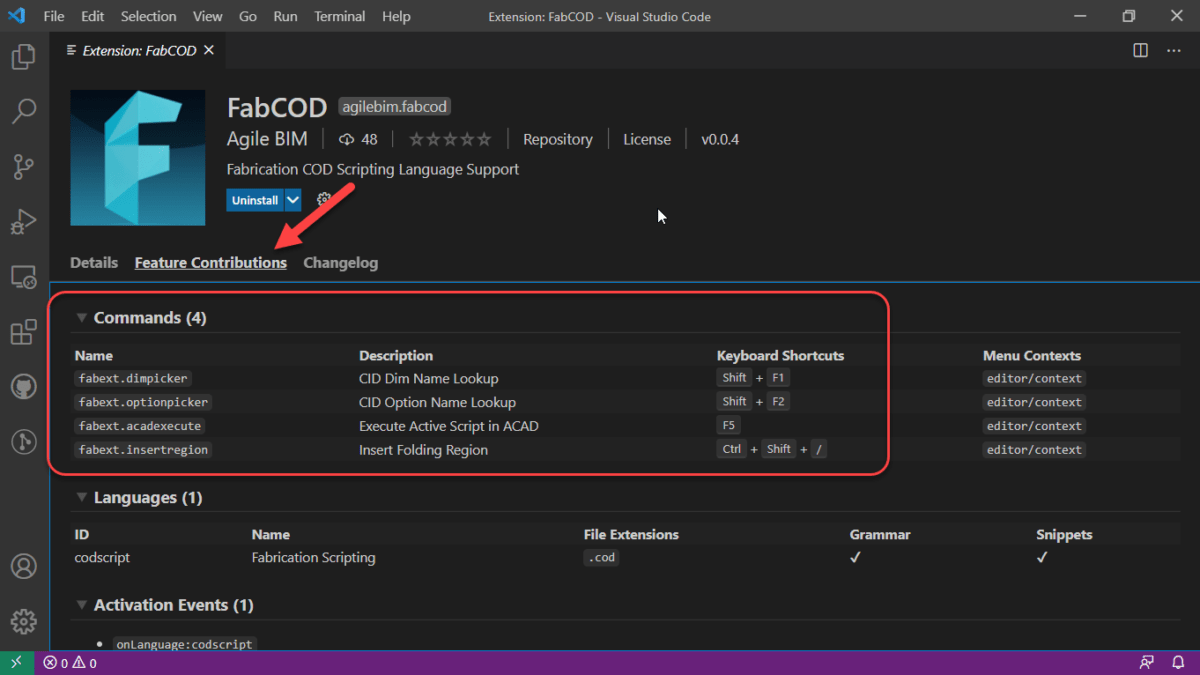
From here, you can review a couple of the key features and their keyboard shortcuts….
VS Code Feature – Mini-Map
Not a feature of the extension, but one reason VS Code is a nice editor is the Mini-Map which helps you visualize where you are your code.
FABCOD Extension Feature – Folding
One of the features the FABCOD extension exposes in VS Code is the ability to collapse/expand sections of code for Looping and Conditional function and other areas. When you move your cursor to the left margin, you see symbols that activate this functionality called Folding.
In addition to Folding sections of code, you can create your own areas of code to collapse/expand. These are Folding Regions and can be inserted (or typed manually using the proper syntax) by highlighting the code and pressing CTRL+SHIFT+/.
FABCOD Extension Feature – AutoComplete
Auto-Complete is another core feature of any code editor. VS Code’s Auto-Complete features is leveraged by the FABCOD extension. You’ll need to be editing a saved file with a COD file extension so the VS Code extension knows which code extension to use.
ABCOD Extension Feature – Hover Tips
If you hover over known functions/properties and their context can be determined, VS Code will display a tooltip for the function you’re hovering over. This can be a great way to learn coding as it’ll help you with the syntax.
FABCOD Extension Feature – DIM / OPTION Picker
One of the best features of the FABCOD extension is the ability to get suggestions for the Dimension (DIM) and Options. You can activate the DIM picker with SHIFT+F1 and the OPTION picker using SHIFT+F2 keyboard shortcuts. When using these features, you are presented with an edit box. You type the CID/Pattern Number you’re interested in and press Enter. You are then given a list of Dimensions or Options you’re interested in. It’s not fool proof because some patterns have variable DIM/OPTION values but it seriously helps none the less. Take a look here…
FABCOD Extension Feature – Additional Help
Sometimes you need added help for a function. The FABCOD extension is an open source project on GitHub (https://github.com/AgileBIM/FabCOD). This project contains added help for every function and property and is Auto-Generated and updated as the extension is developed. You can access this help from any of the popup ToolTips by clicking on the BLUE hyperlinked text.
FABCOD Extension Feature – AutoCAD Launcher
One of the other neat features of the FABCOD extension is the AutoCAD Launcher. Pressing F5 in the editor will initiate the script in CADmep. Simply Alt-Tab to AutoCAD and press enter. AutoCAD and CADmep must be loaded at the time for this to work. Due to Autodesk’s limitations in their API’s, this functionality does not work with ESTmep or CAMduct.
VC Code FABCOD Extension – Wrapup
There’s a lot more to VS Code that I won’t get into here. I’ve only covered the highlights of how it and the FABCOD extension can be used to help edit COD file in Autodesk Fabrication. As it’s an open source project, there’s instructions on how to become involved if you have the coding skills. You can also just head over and log issues or suggestions. (https://github.com/AgileBIM/FabCOD)
In the list of COD Scripting updates I just posted, there’s a couple undocumented functions that have been on my list to explore for more than a few years. I’ve finally gotten to them and figured out what they do.
I won’t comment on how long it took me to actually explore what I had listed in my “To Research” list for years other than to say, Procrastination is a Virtue for those with no Patience.
So without further delay…here you go….
Output Function
This first one is the OUTPUT function. You can call it a couple different ways, with and without parenthesis just like the DEBUG function. It doesn’t really seem to matter. It’s really kind of a worthless function in my opinion.
Not only does it only work in CAMduct and ESTmep (not CADmep) it really isn’t that helpful. It just outputs a message to the Console window. I was initially hopeful it would allow me to “script” some of the secret Console command but no such luck. It’s just a message.
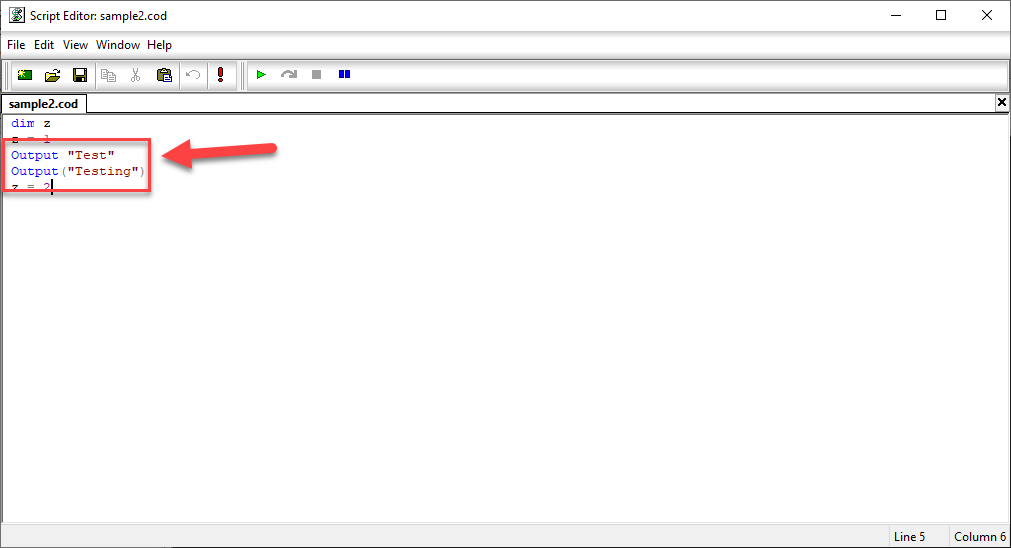
You can see in the COD Code editor the below with both syntax examples…
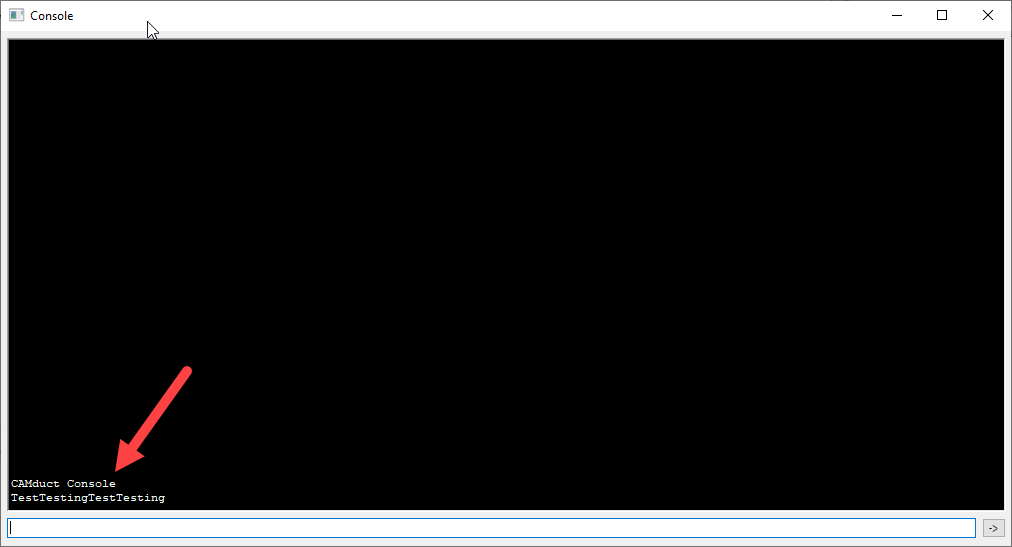
When you run the script, it’ll call up the Console and display the text you specified. You can see from the following example, it doesn’t even space the text when you call it multiple times. Even tried embedding a Carriage Return in the string and still no luck automating via the Console.
Breakpoint Command
The other command is much more helpful and something most folks don’t know about. I have run into a couple now who knew but most it’s not known. I wish I knew years ago…it’s actually a small step closer to what you’d expect in a modern IDE (Integrated Development Environment).
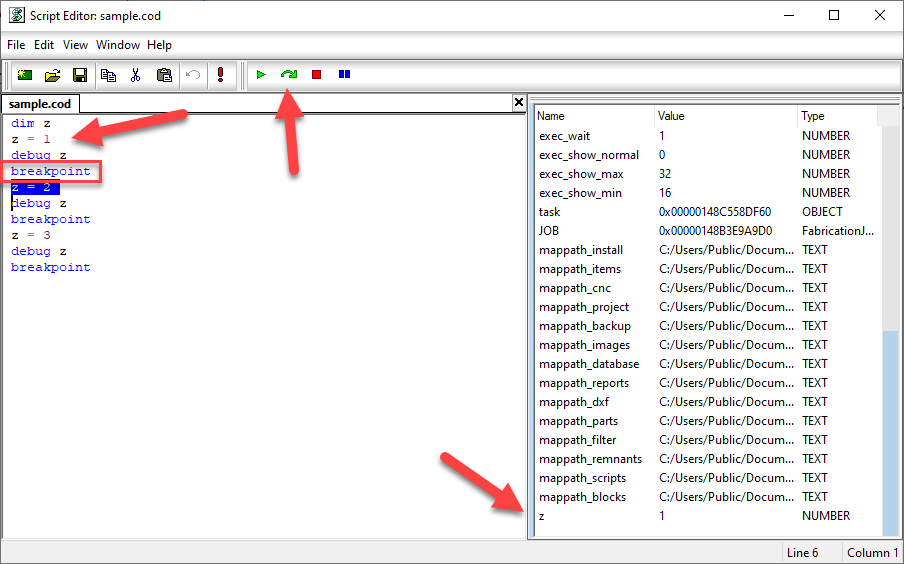
The Breakpoint function calls up the panel on the right. It displays the values of all your variables. You can see how the value of the “z” variable is displayed. When you hit a Breakpoint, code execution stops until you hit the green arc’d arrow. Code execution then continues until you get to the next Breakpoint if any.
You can access the COD Script editor in CAMduct or ESTmep using the FILE pulldown menu. You can also use the editor in CADmep but unfortunately, there’s no way to display it without writing intentionally wrong code to cause your program to fail and display it. You can then use the editor like you do in ESTmep or CAMduct.
One thing to note, BREAKPOINT only appears to work when you execute code from the Script Editor. If you call it from AutoLISP using (executescript “myscript.cod”) or the EXECUTESCRIPT command in CADmep or by right clicking in your Takeoff items in ESTmep or CAMduct, it runs without stopping your code. This means you can leave the breakpoints in your code and edit/debug via the script editor but not have to remove them when executing them un a production setting.