Autodesk Fabrication – Determining C1/C2 Connectors in Revit
Fabrication Parts in Revit allow you to edit their connectors just like in CADmep. However, unlike CADmep, you can’t simply hover over a connector to determine if it’s C1 or C2.
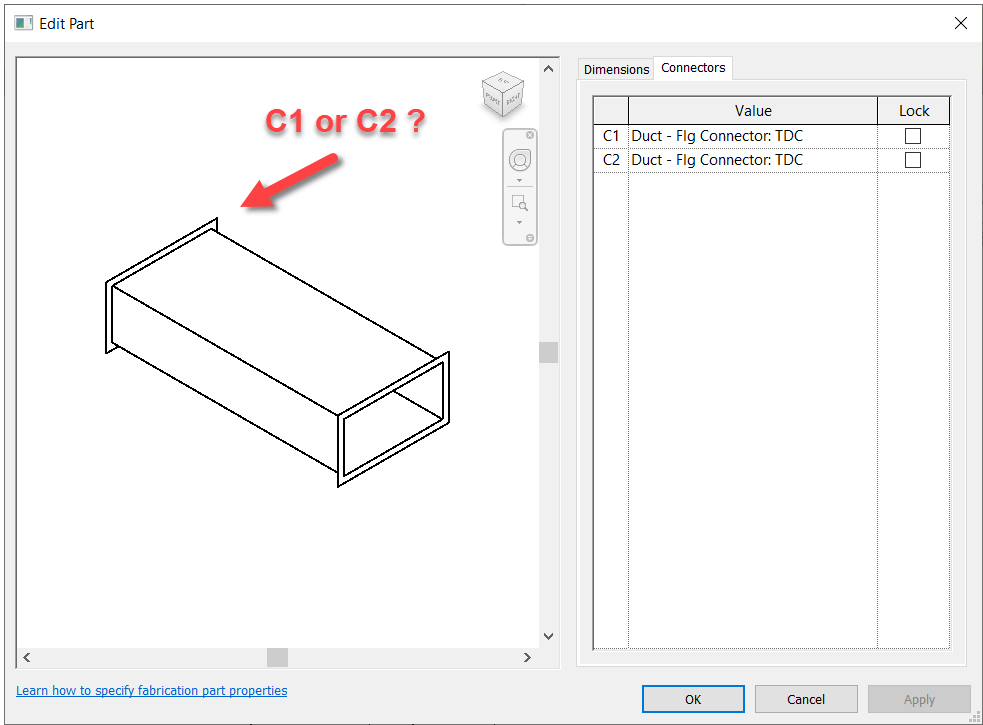
So if you need to change a connector, you’re essentially guessing which one to change. Trial and error is at best 50% unless you’re lucky.
So how can you improve this “guessing” based workflow?
Thankfully I have a great network of people smarter than myself. I often get the credit for sharing the information but really, the credit belongs to those who show me. In this case, two of my industry friends showed me ways to improve the odds.
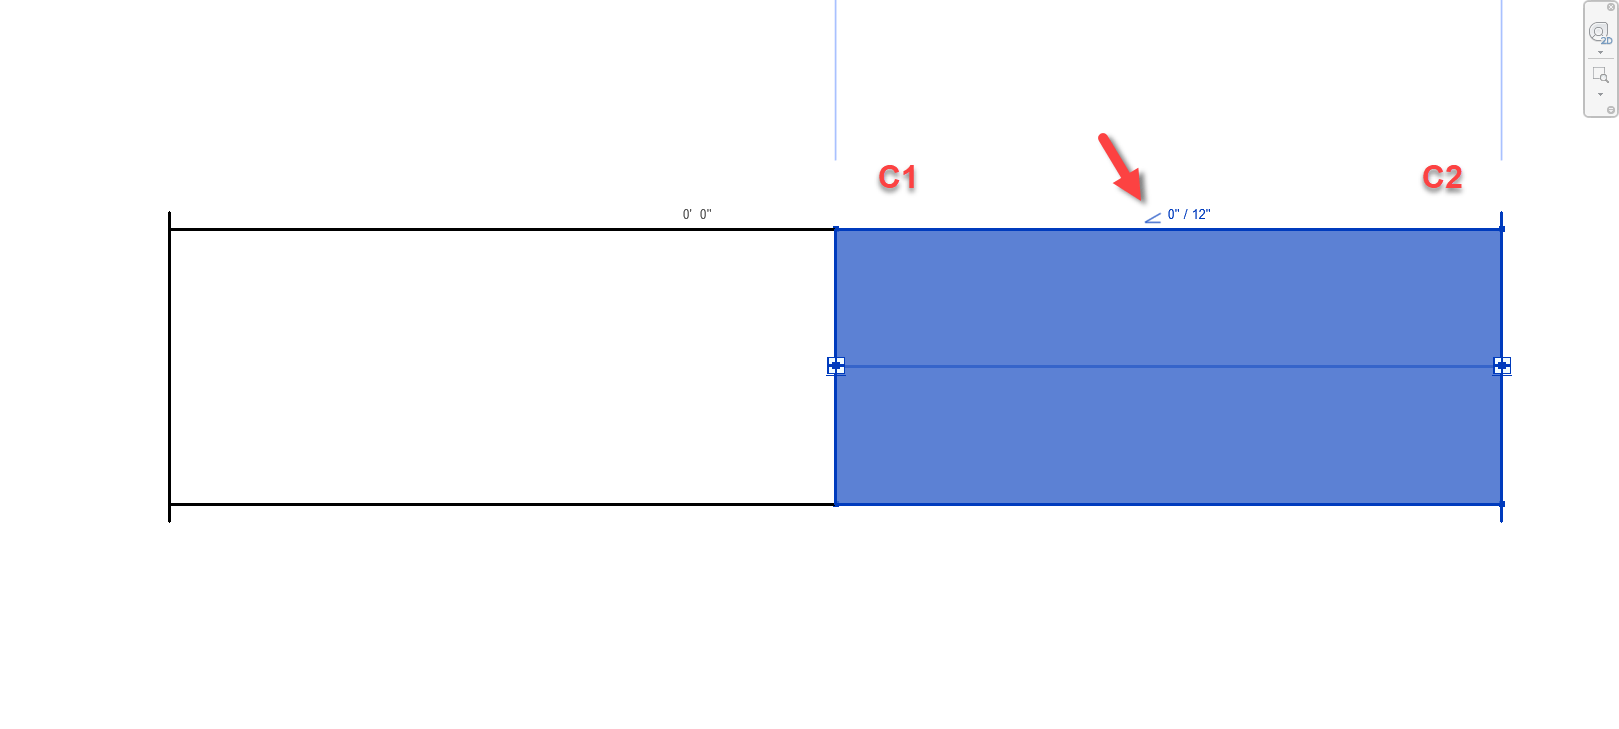
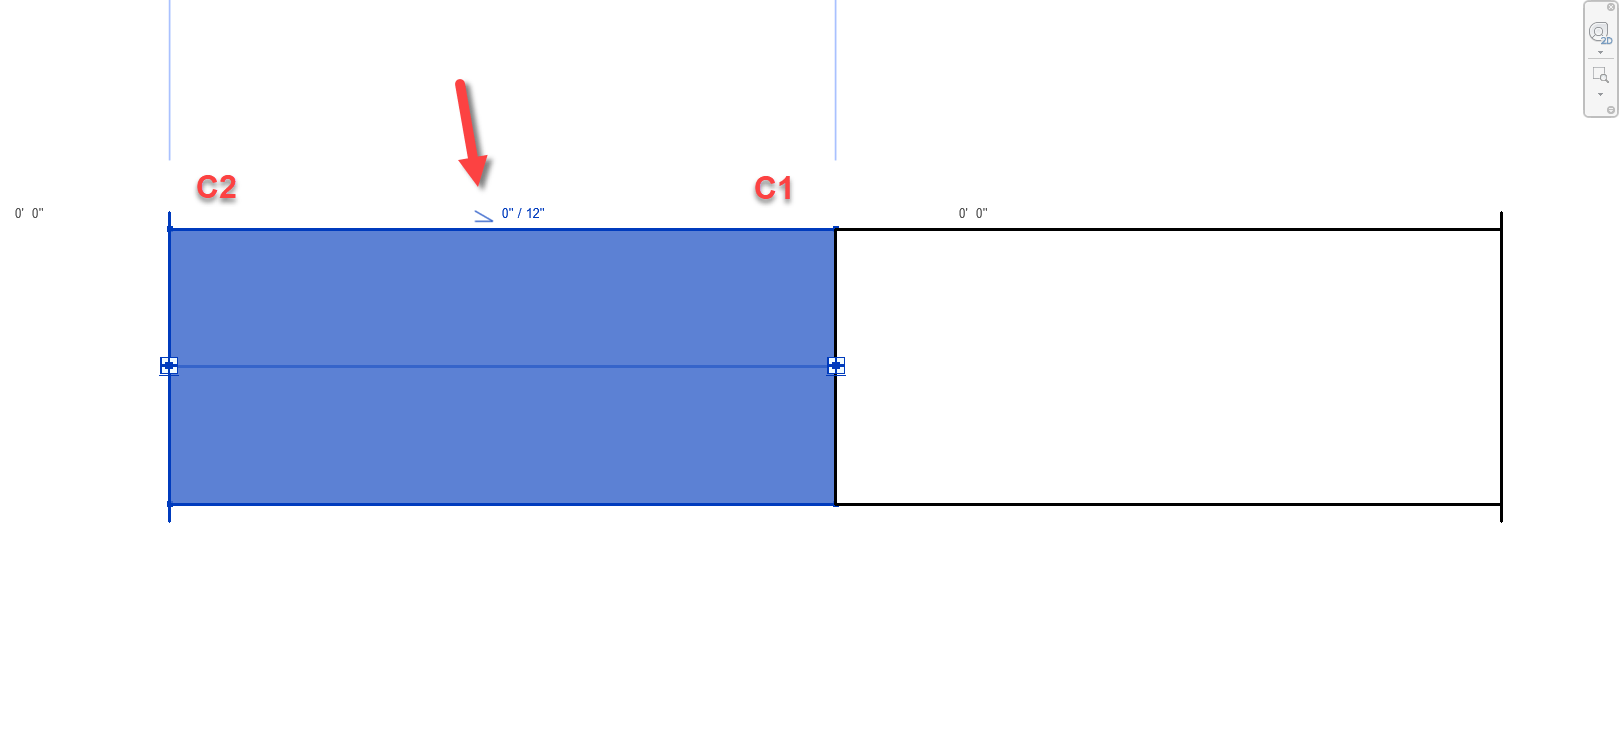
Method 1 – Slope
For this first method, credit goes to Liz Fong from MacDonald Miller. When you place a piece of straight pipe or duct, when you select it you’ll see a Slope indicator (< or >). This by default points to the C1 connector.
There’s a couple downsides to this approach that may apply in some scenarios….
- This doesn’t work for fittings. Only Straight Pipe/Duct.
- If you click the Slope Symbol, it changes direction and is no longer accurate.
- This should really only affect Plumbing or sloped Grease Duct systems. Otherwise there’s not a lot of reason to change direction on a non-sloped system.
- Symbol could still be accidentally clicked and reversed anyway and then be wrong.
- Once changed, Slope symbol direction is remembered and there’s no good way to “reset” it.
Still, despite the downsides of this approach, I’m going to go out on a limb and suggest that even on a plumbing system, less that 50% of the slope symbols will be changed from their default. This alone makes this method better than a 50/50 guess like before.
Method 2 – View Cube/Viewing Direction
This next method takes slightly more work, but is almost 100% accurate. Credit for this method goes to Alina Y. from JH Kelly.
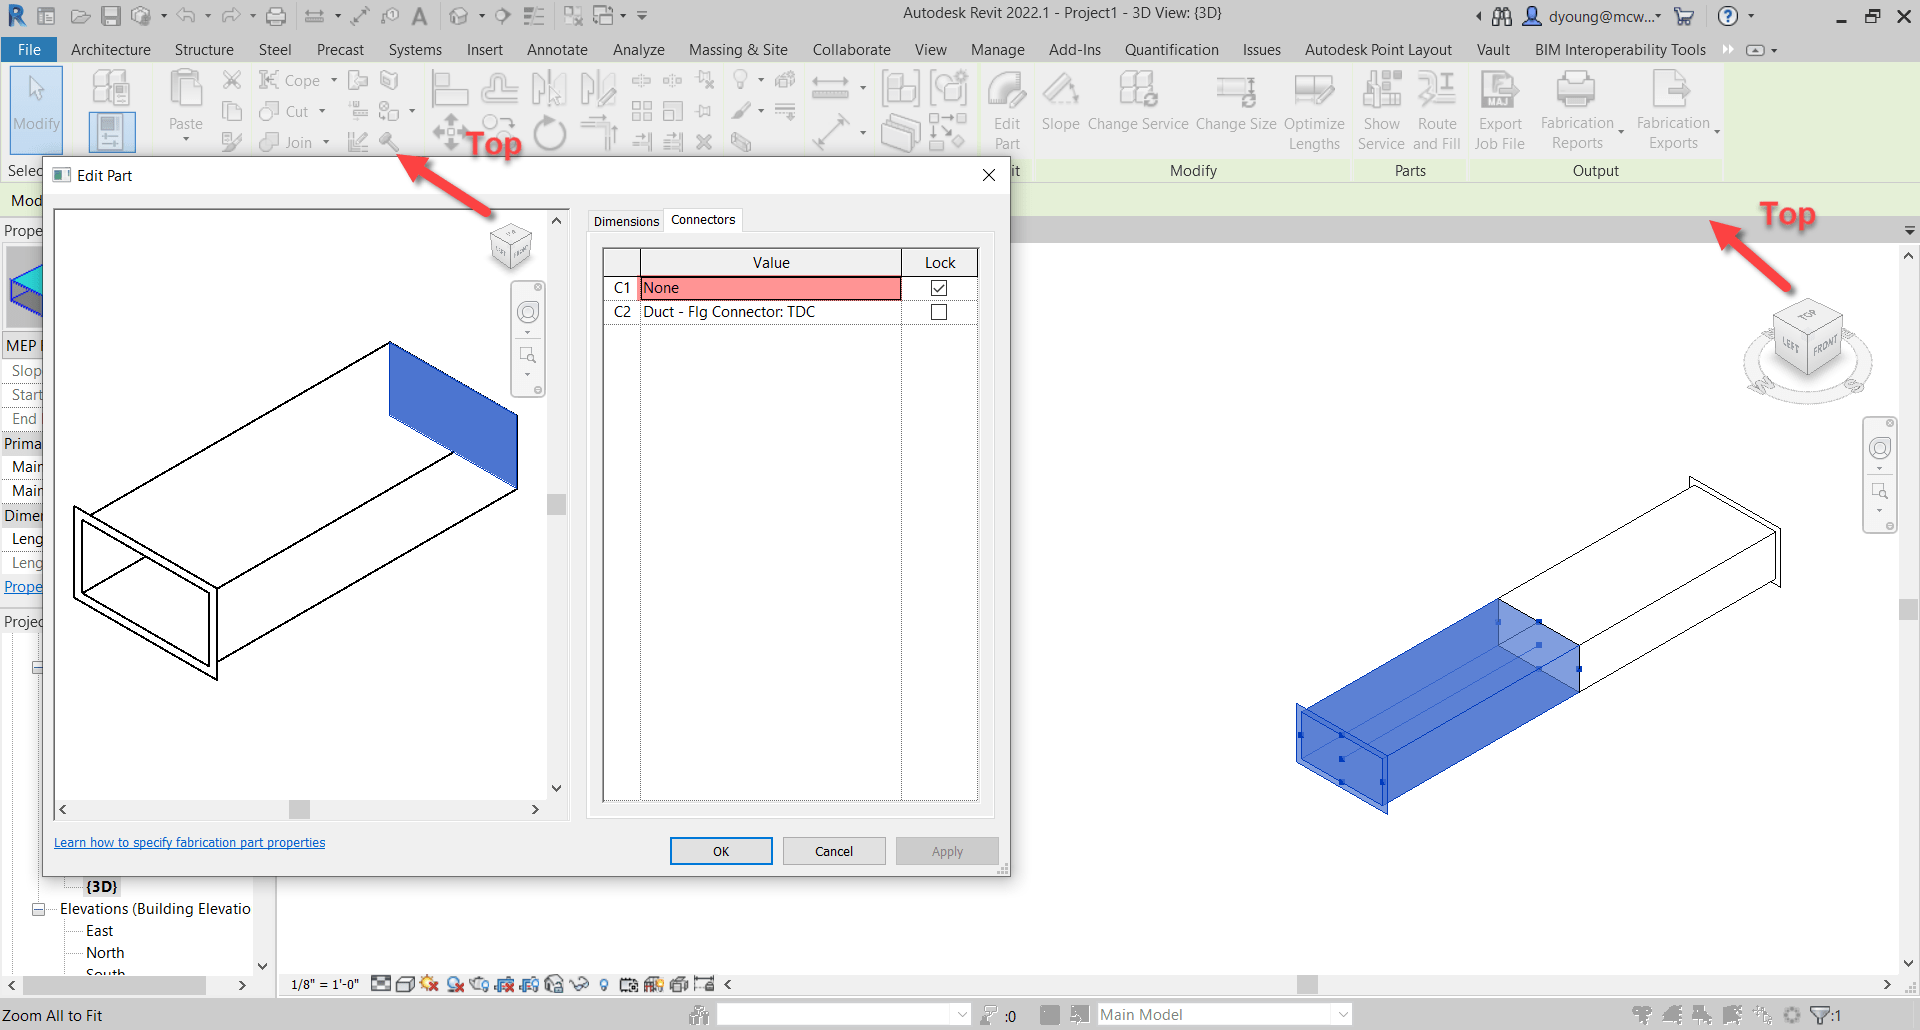
In short, from a 3d view, if you make sure the View Cube in the Part Editor window is aligned to the Revit View you’re in, the fittings is oriented in the same direction in the editor as in Revit. You can then select the connector in the Part Editor window and it highlights the connector end associated with it.
This method is almost fool proof and has a few benefits over the sloped method we showed earlier.
- Works on Fittings in addition to Straight Duct/Pipe.
- Slope direction doesn’t matter.
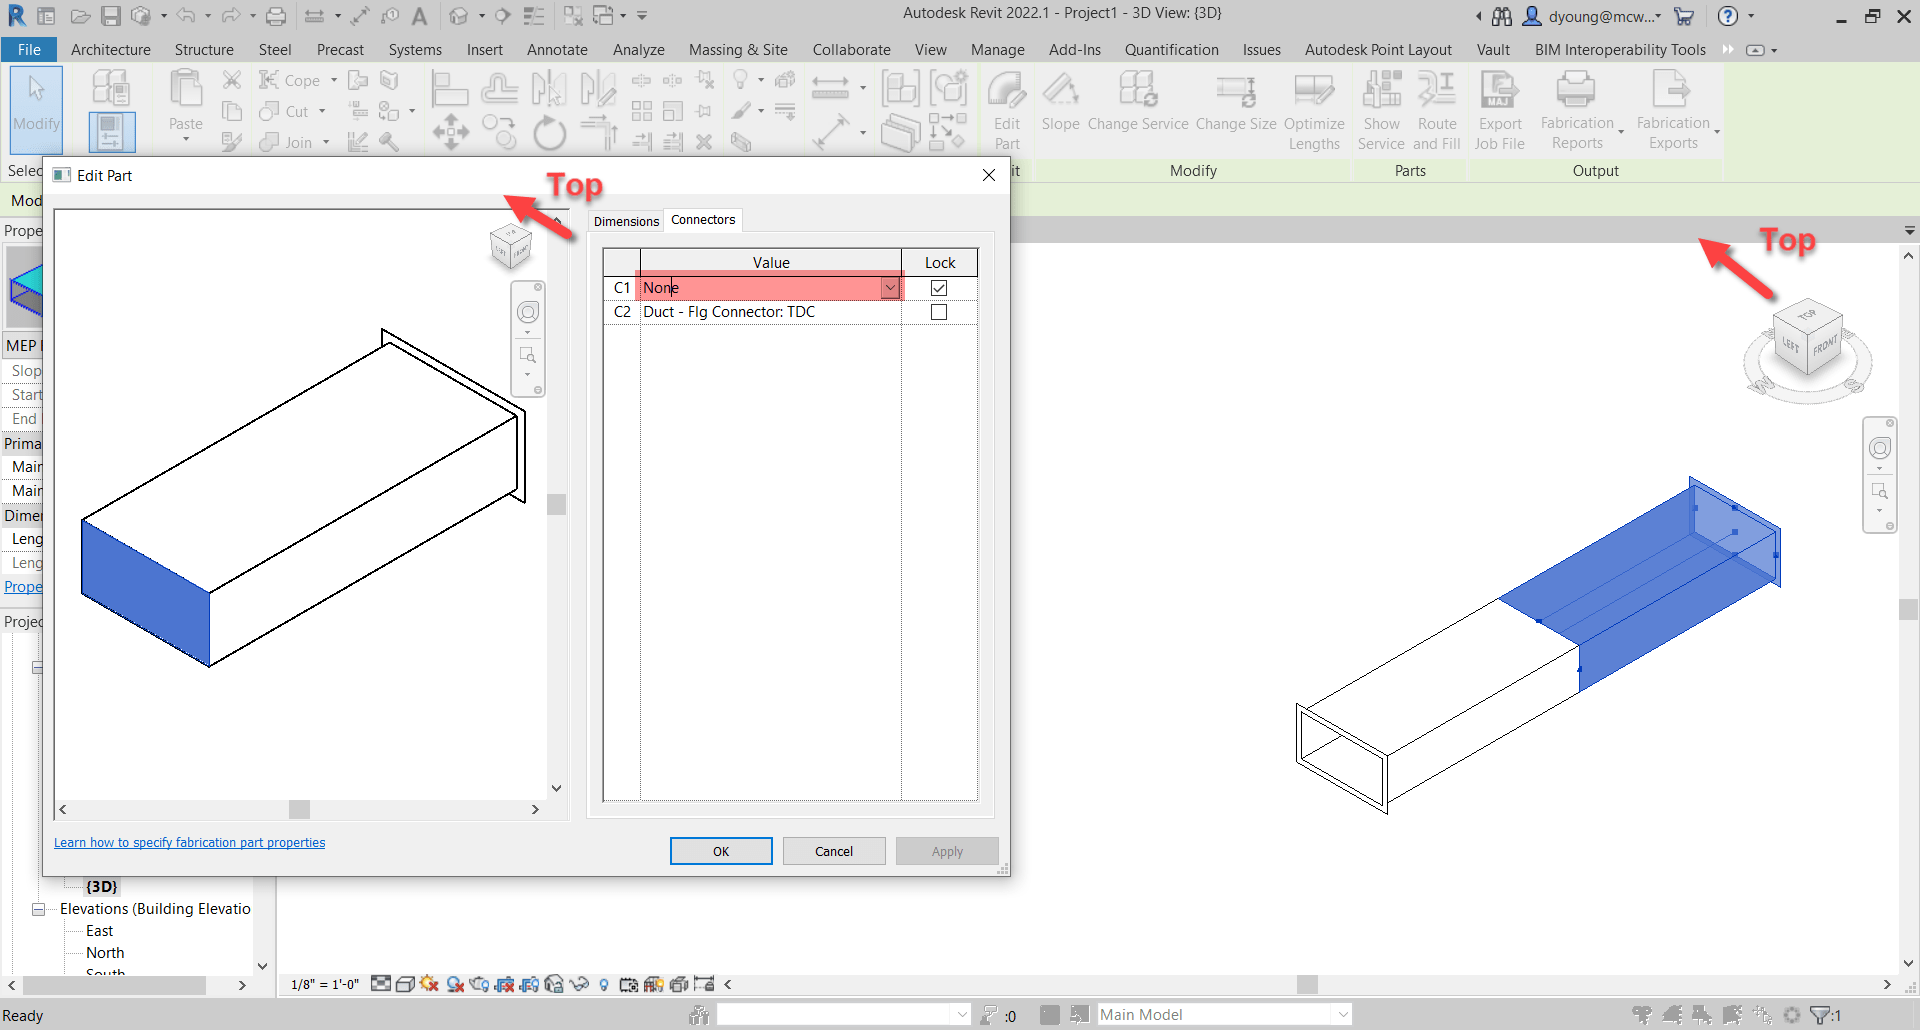
But we did say Almost. Where this method fails, is if the View in Revit is redefined.
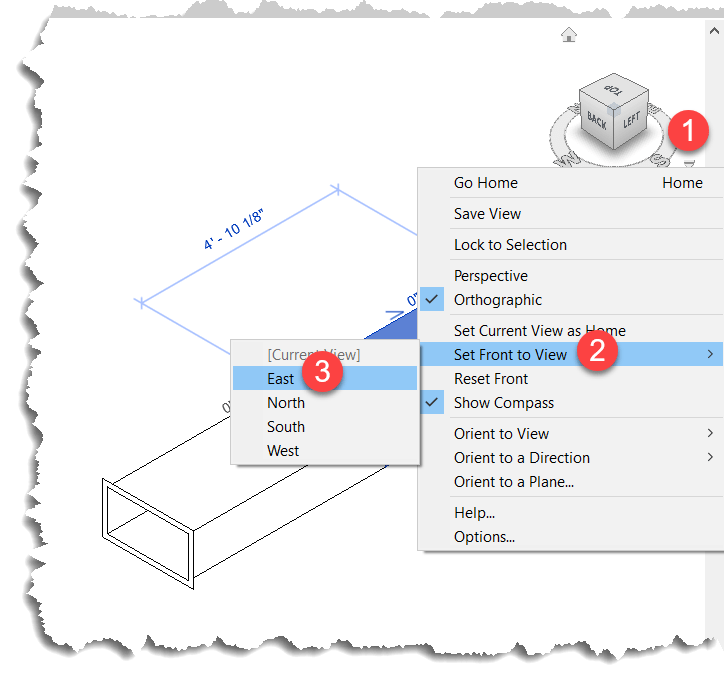
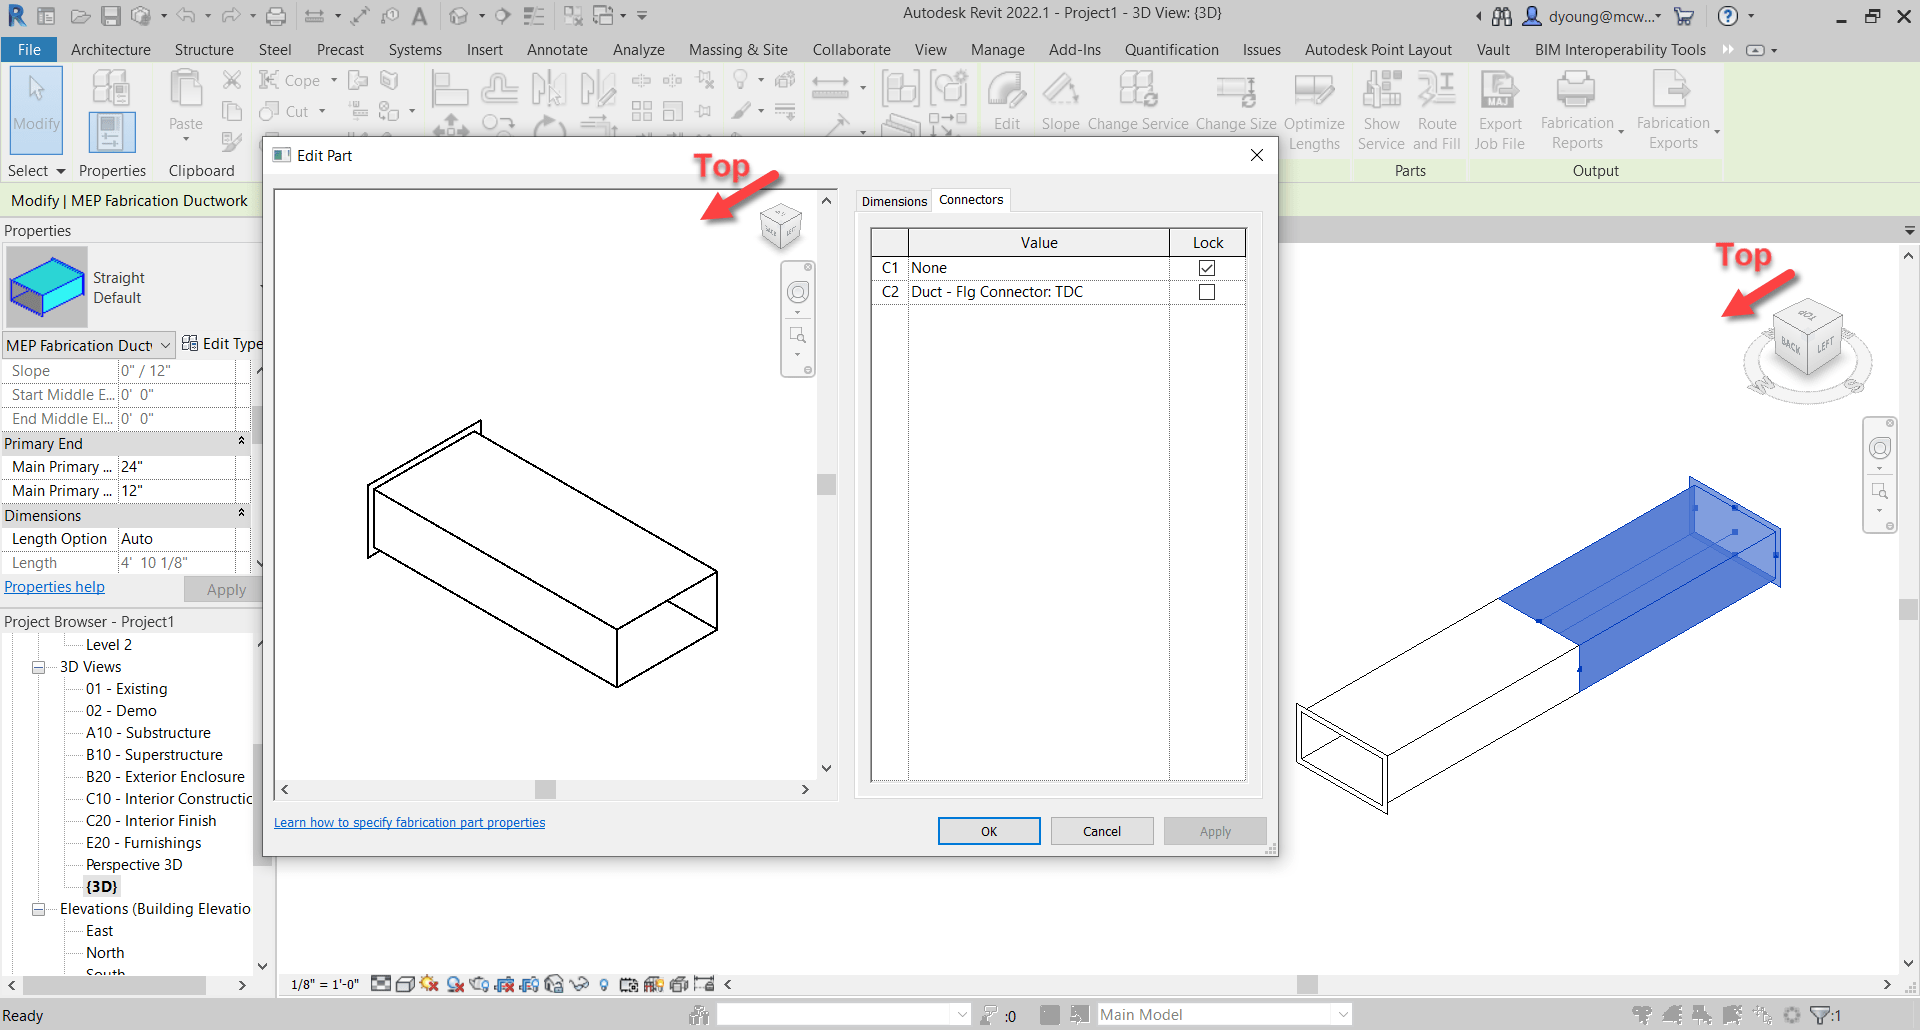
When you set a new Front View, the view in Revit no longer matches the orientation in the Part Editor window as seen in the following image…
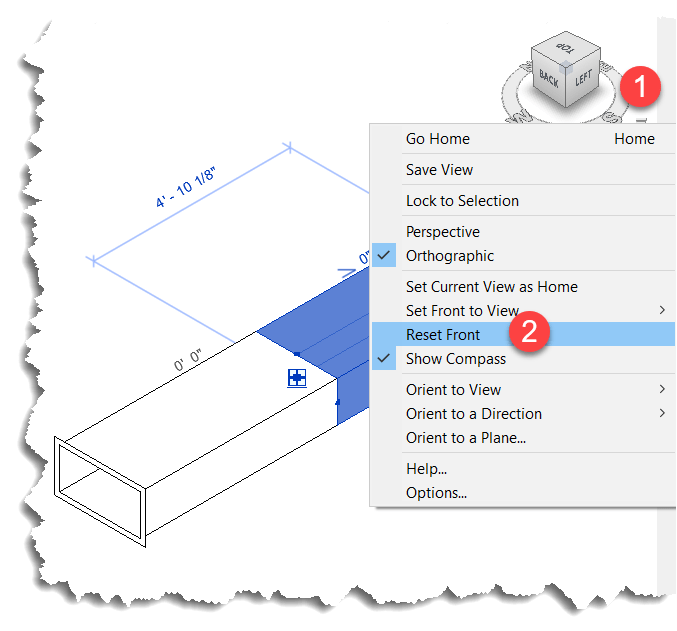
Luckily, this is easily remedied by simply resetting the Front View in Revit.
This method also works in Plan and Elevation Views with a slight twist. There’s no View Cube in the Revit window so it’s up to you to understand which viewing angle Revit is in. Next, you can make the View in the Item Editor match but when you look at a connector straight at the edge, you don’t see it highlight. You can then hold the SHIFT key and use the Middle-Mouse Button to slightly rotate the view so that you can see the connector that’s highlighted.
Here you can see what that looks like…

Summary
While not as quick and efficient as hovering over a connector in CADmep, either of these methods or even used in combination can increase your odds of changing the Correct connector on the first try.
While method #2 is more fool proof than method #1, there’s a reason I explain both and here’s how I’d use them both.
For non-sloped systems, the chances the slope symbol is reversed is very low. Because you’re likely selecting the part anyway to edit a connector, a quick glance is all you need to know which connector to change. Quick and easy for straight part on non-sloped fittings. No fuss. No muss. In this scenario, Method #1 is super quick.
For fittings and sloped systems, I would then shift to Method #2. Take a little more time, but it’s certainly quicker than being wrong 1/2 the time and then undoing the connector you just changed and then changing the other. That “trial and error” method results in 3 connector changes when you guess wrong. This is where Method #2 really shines…you get it right every time. If you’re Front View happens to be redefined, it’s easily rest.
Thanks again to Liz Fong (MacDonald-Miller) and Alina Y (JH Kelly) for their great input in coming up with these methods. They’re two of my favorite “Go To” people when I get stumped or need a little help orienting my thoughts.